Pearl nails are one of those trends that never feel tired. They look soft, polished, and a little luxe, whether you go with a sheer shimmer or a bold cluster of 3D pearls.
The look works on short nails, long nails, natural nails, and acrylics. It also pairs with almost any base color. That is why so many people keep coming back to it.
In this guide, you will find 30 nails ideas sorted by style. Some are quiet and everyday-friendly. Others are full statement sets. You will also learn how to get the look at home, which tools help most, and how to make pearl nail art last longer than a week.
Save your favorites as you scroll. You will want them handy at your next appointment.
What Are Pearl Nails?
These nails are manicures that use a pearlescent finish, real or faux pearl charms, or both. The finish can be a milky polish with a soft glow, a chrome powder that mimics the sheen of a pearl, or small round beads set into the nail with gel.
There are two main types:
- Flat pearl finishes, made with polish or powder
- 3D pearl nail art, made with charms or beads
Both look great. The first is easier to wear every day. The second makes a stronger statement.
Subtle Pearl Nails for Everyday Wear
These designs keep the pearl detail light. They suit office days, errands, and anyone who does not like heavy nail art.
1. Milky Pearl Nails
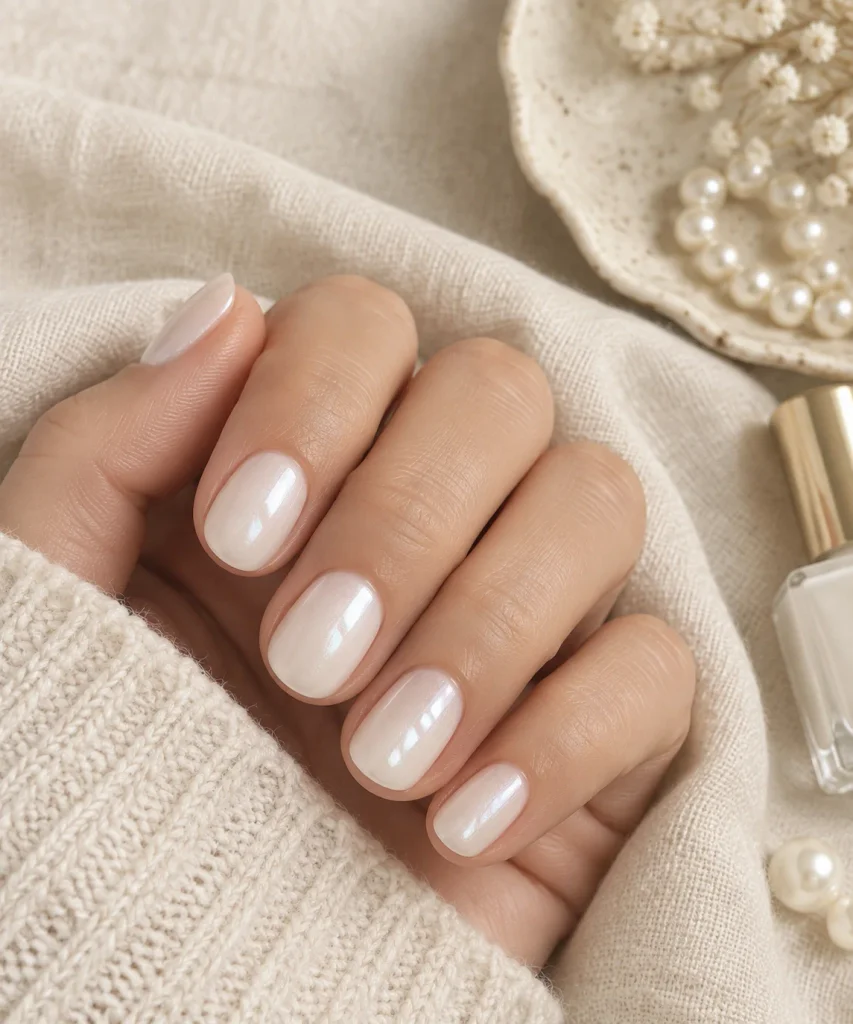
A sheer white base with a soft pearl shimmer. It looks like your natural nails on their best day. This is the easiest pearl nails look to start with, and it grows out cleanly.
2. Single Pearl Accent Nail
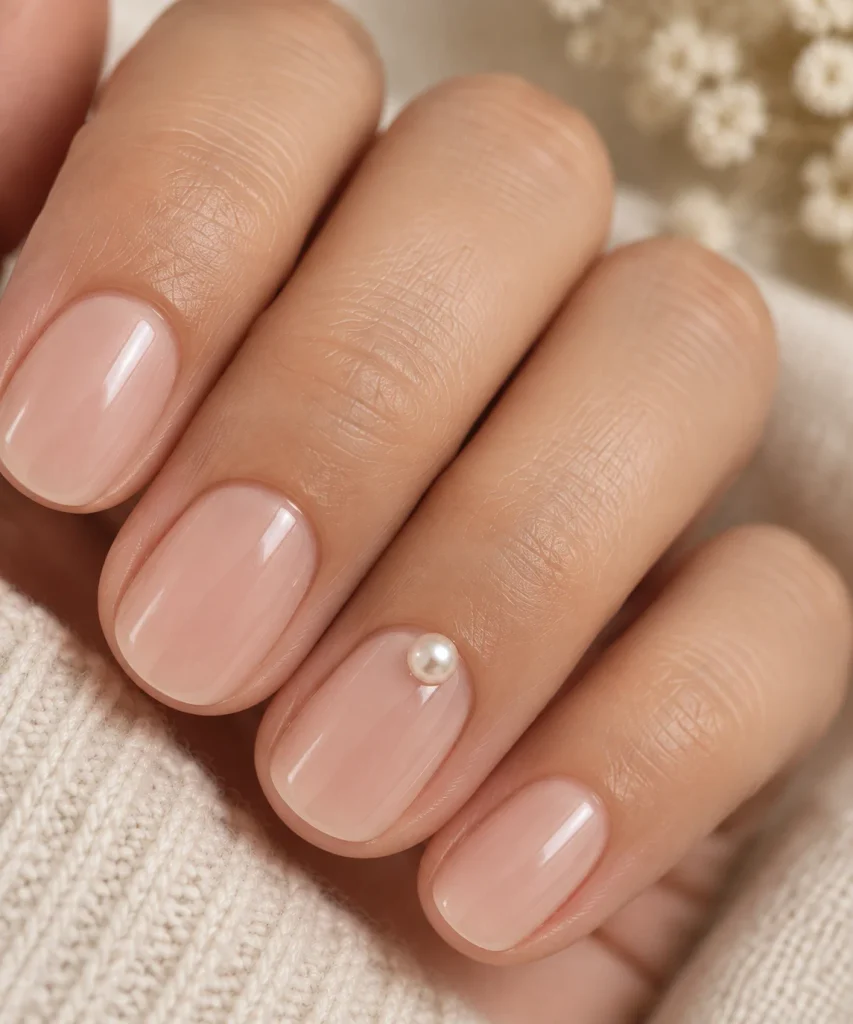
Keep every nail neutral and place one pearl near the cuticle on the ring finger. It is small, simple, and easy to repair if a pearl pops off.
3. Pearl Cuticle Line
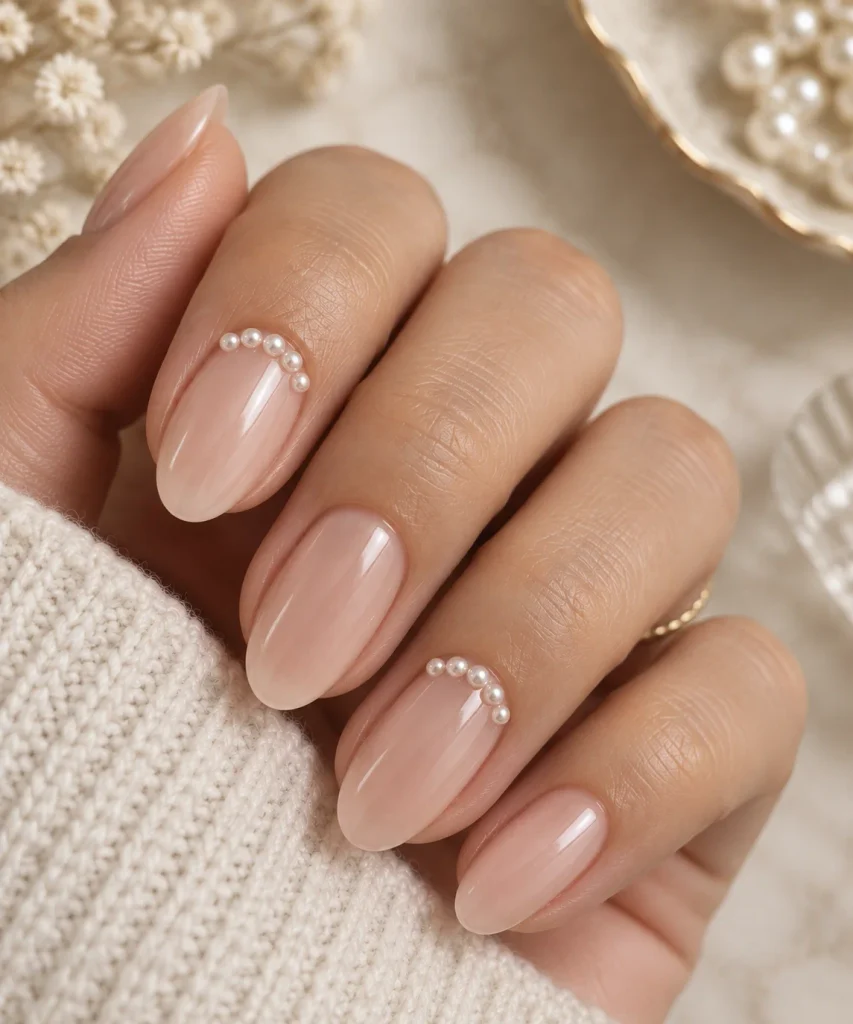
Place tiny pearls along the base of one or two nails. The result frames the nail bed and adds shape without adding bulk. Use micro pearls, about 1.5 mm, for a clean finish.
4. Sheer Pink Pearl Gloss
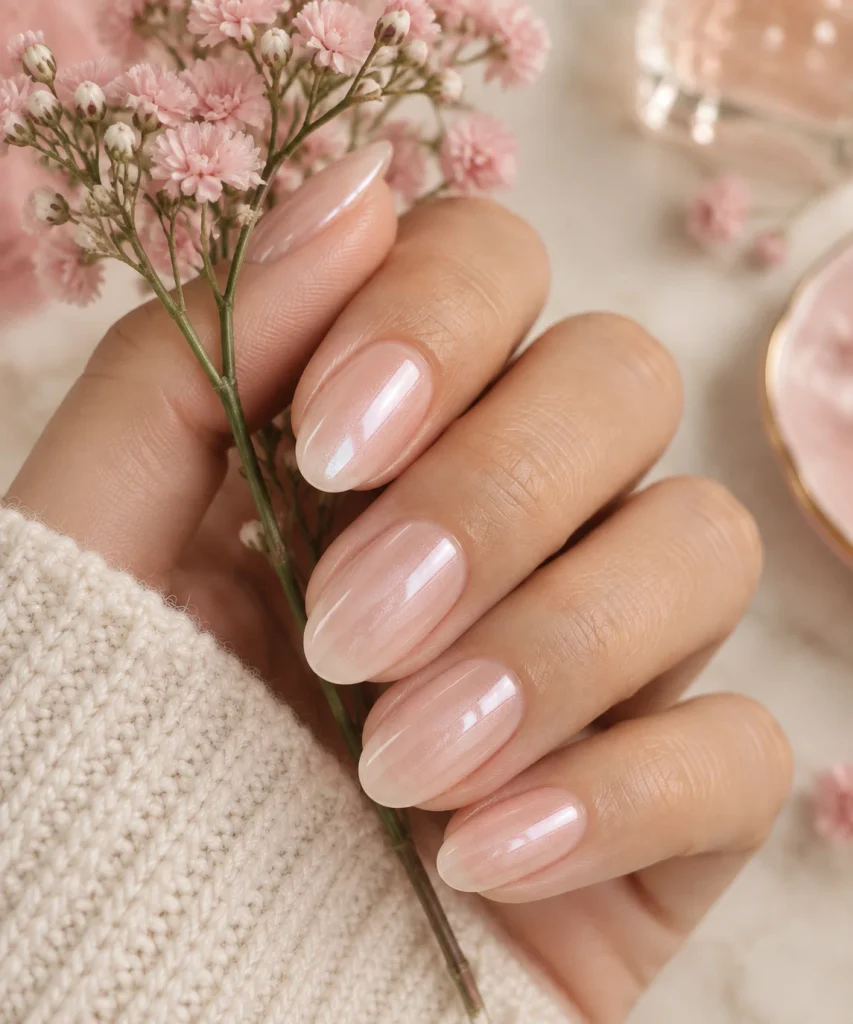
Pale pink polish with a fine pearl shimmer on top. It flatters warm and cool undertones, and it hides small chips well.
5. Pearl Dust Over Nude
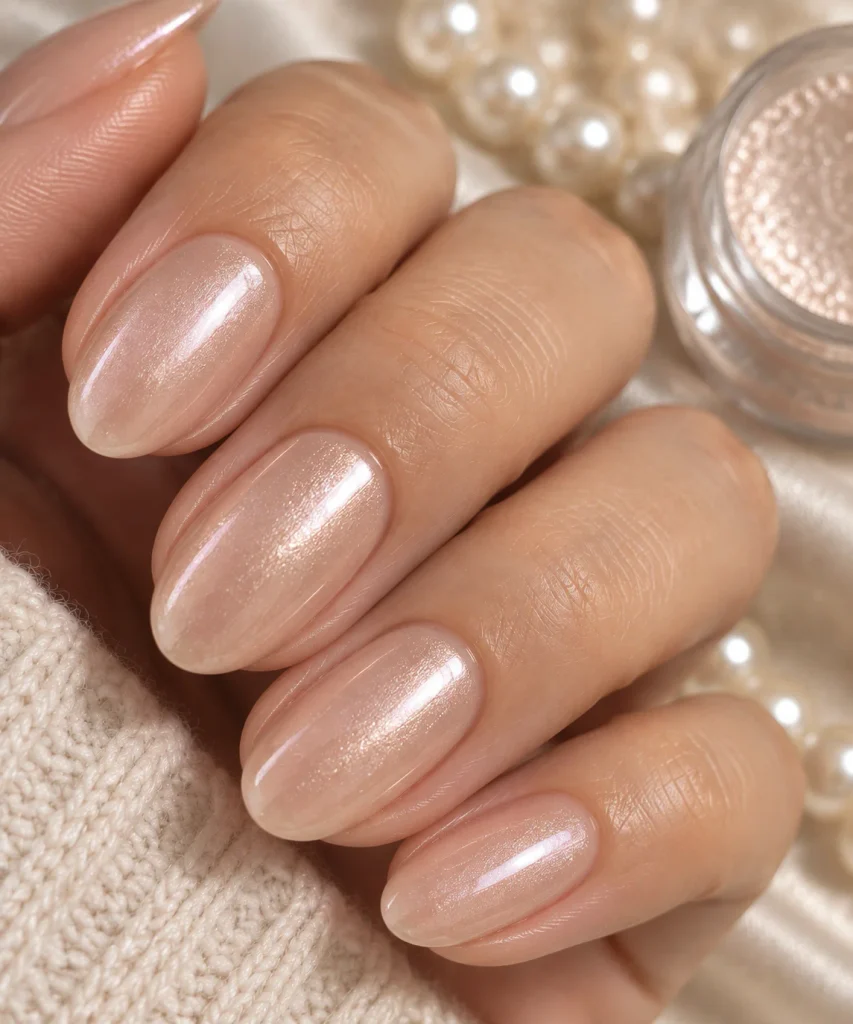
Brush a light pearl pigment over a nude base. Apply it thinly for a soft glow. Add a second layer if you want more shine.
6. Barely-There Pearl Half Moons
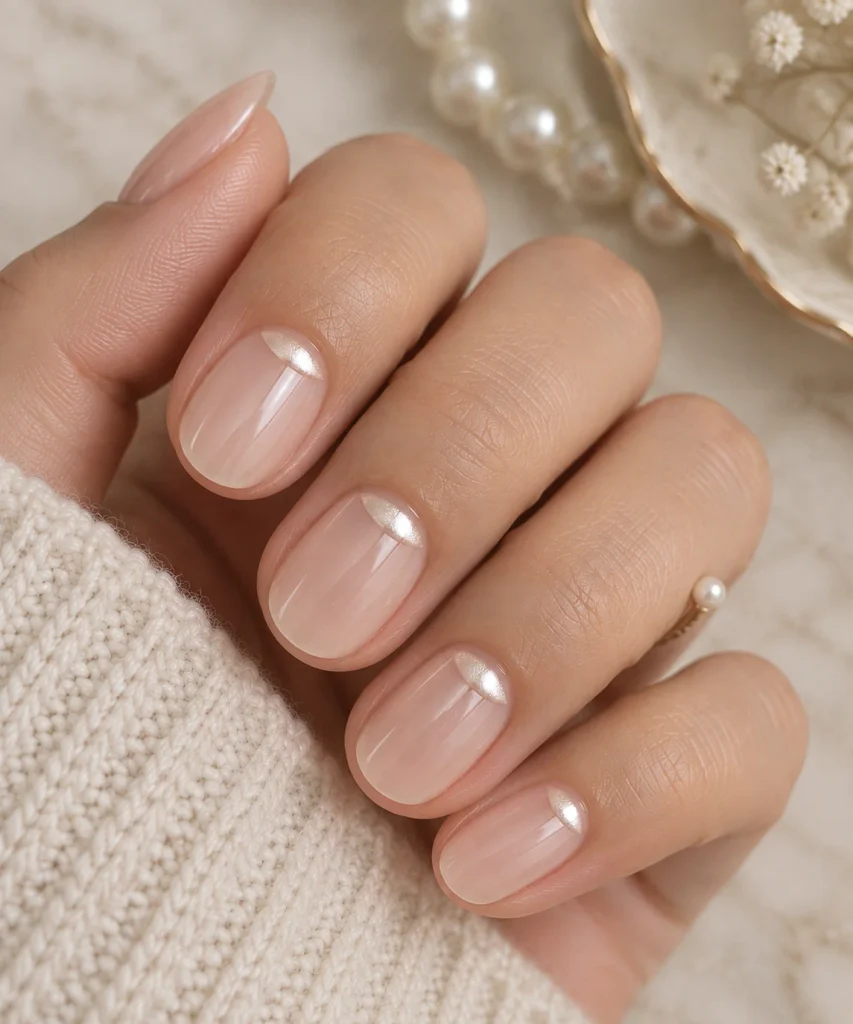
Paint a thin pearl crescent at the base of each nail and leave the rest bare or sheer. It is a modern twist on the classic half moon manicure.
Pearl French Tips and Classic Styles
French manicures and pearl finishes are a natural match. These ideas update the classic shape without losing its clean look.
7. Pearl French Tips
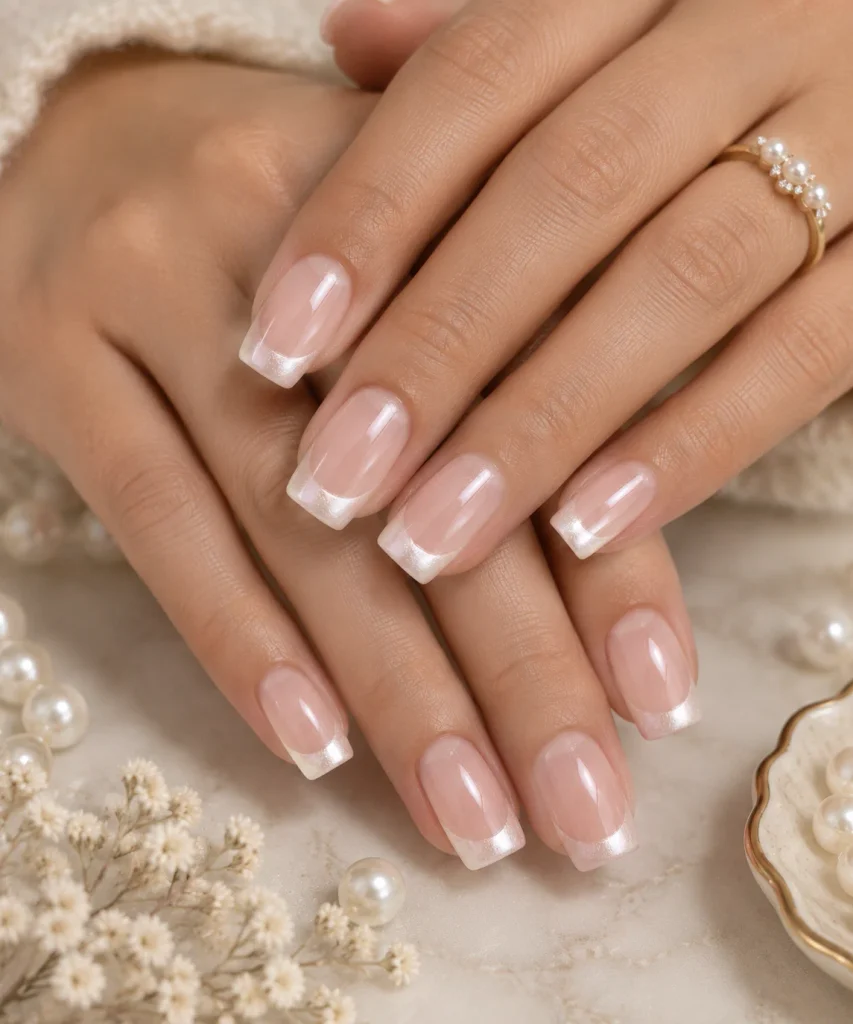
Swap the white tip for a pearl shimmer tip. The line catches light as your hands move. It works best on a sheer pink or beige base.
8. Pearl Micro French
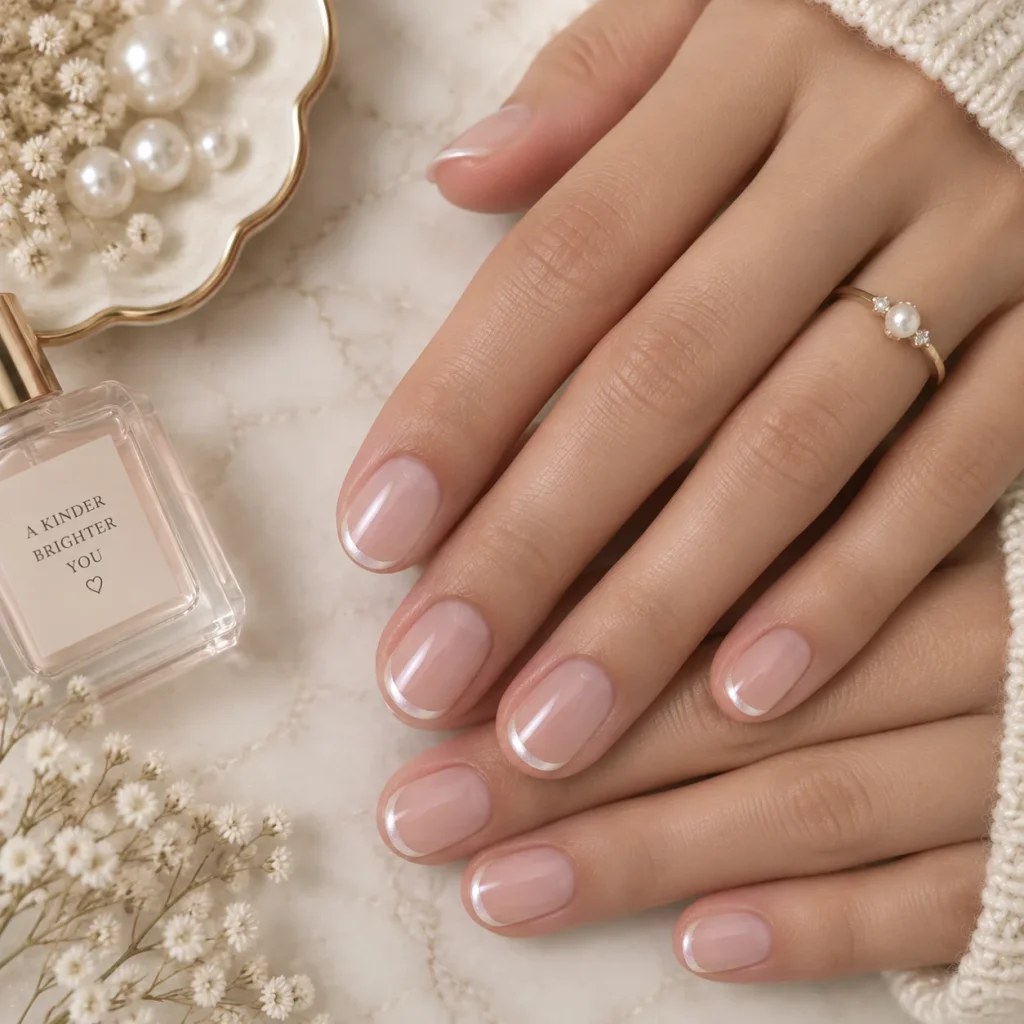
Draw a very thin tip line in pearl polish. Micro French tips lengthen short nails and look neat on every nail shape.
9. Double Pearl French
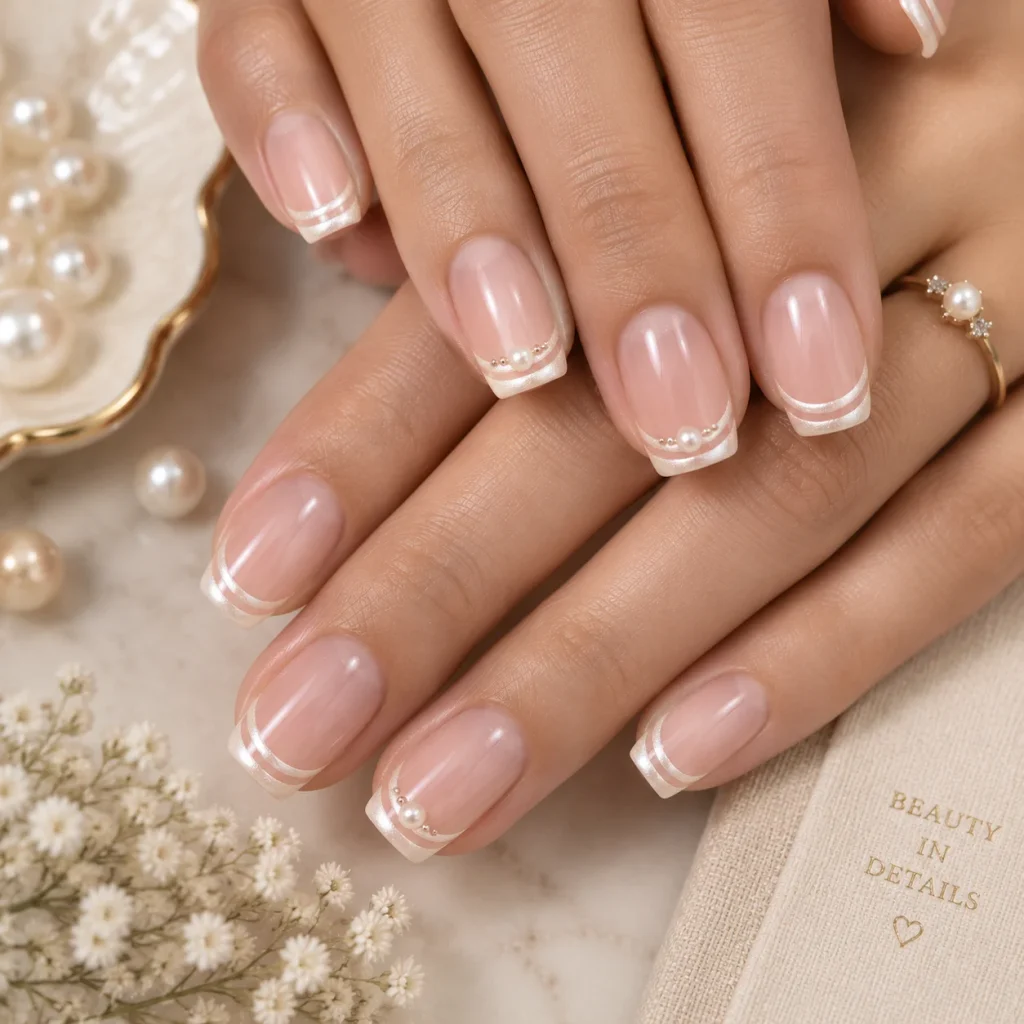
Add a second thin line just below the first. Place one tiny pearl where the two lines meet on each nail, or on accent nails only.
10. Reverse Pearl French
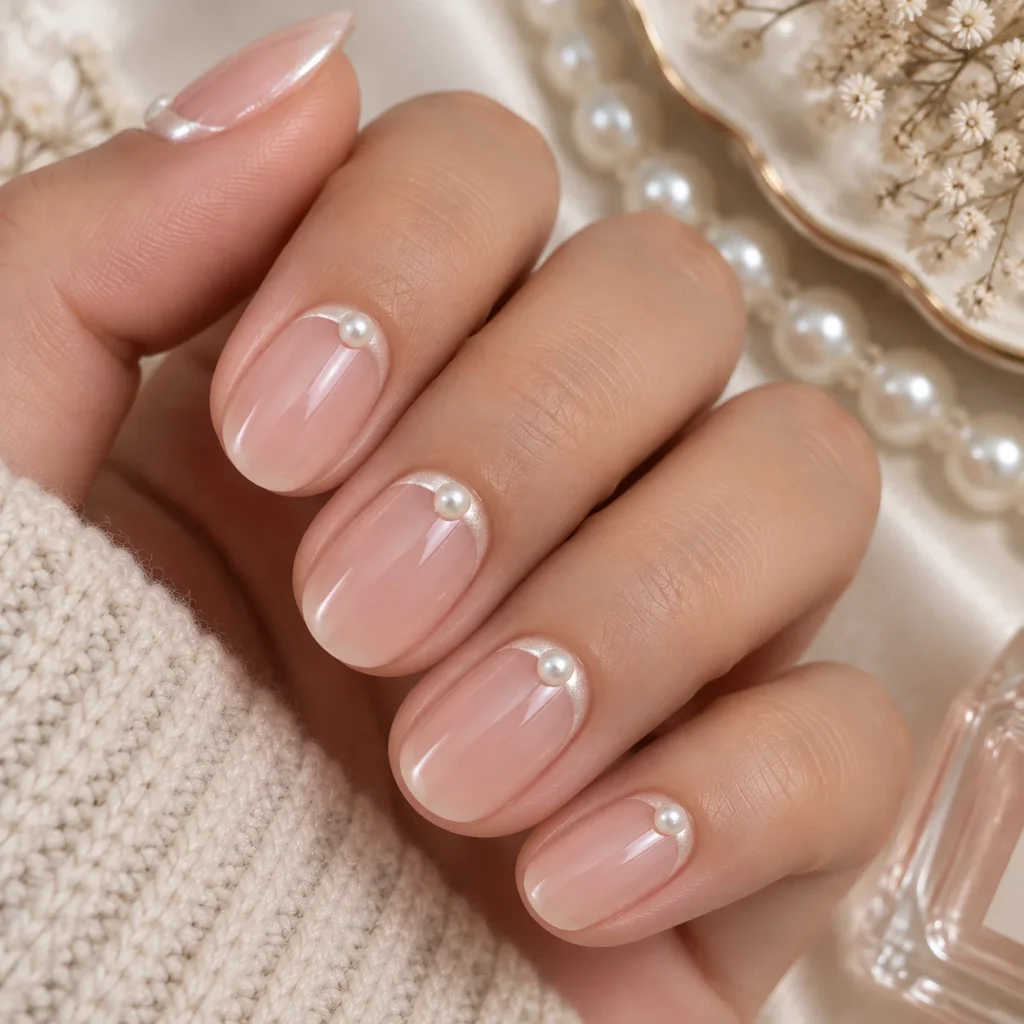
Paint the pearl curve at the cuticle instead of the tip. Finish with a small pearl in the center. This is a strong pick for anyone bored of standard French tips.
11. Pearl Ombre Nails
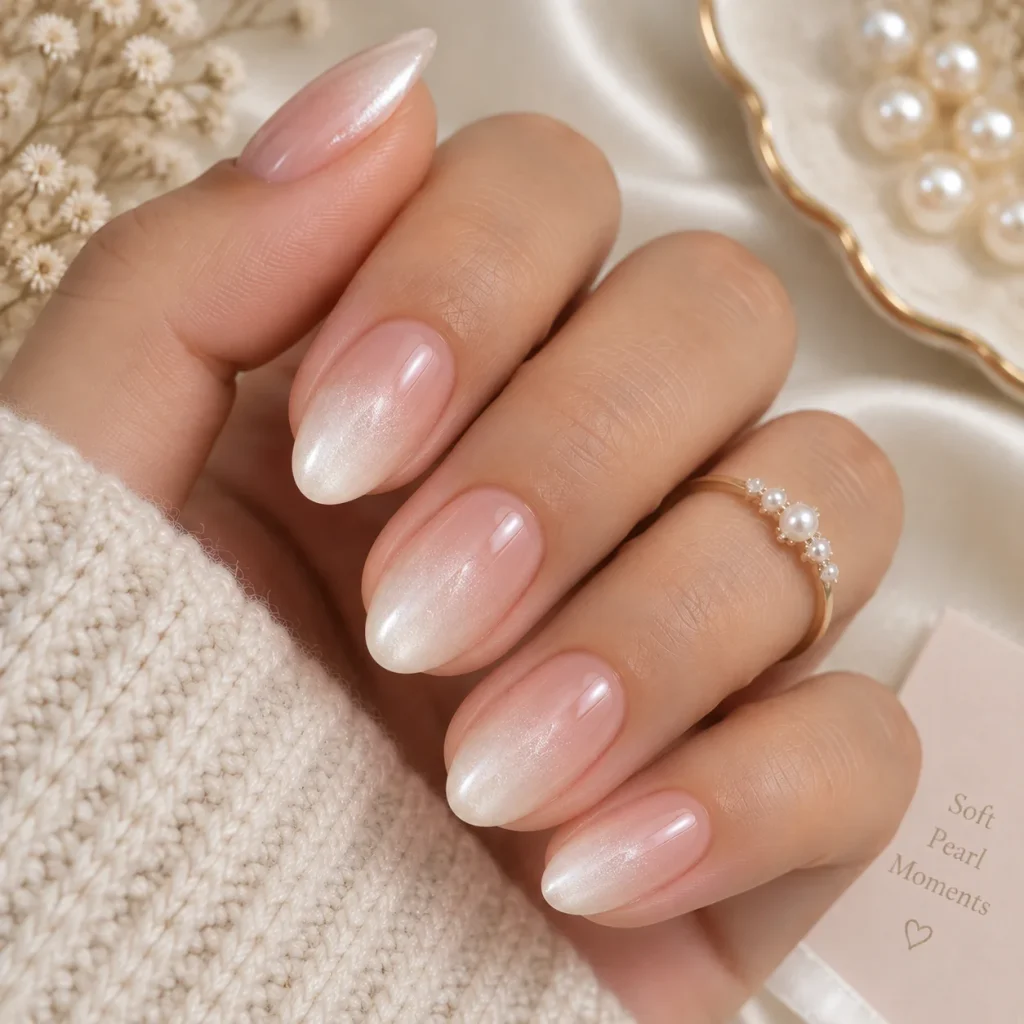
Fade a milky base into a pearl-tinted tip. Use a makeup sponge to blend the two shades for a soft, cloud-like effect.
12. Glossy Pearl Almond Nails
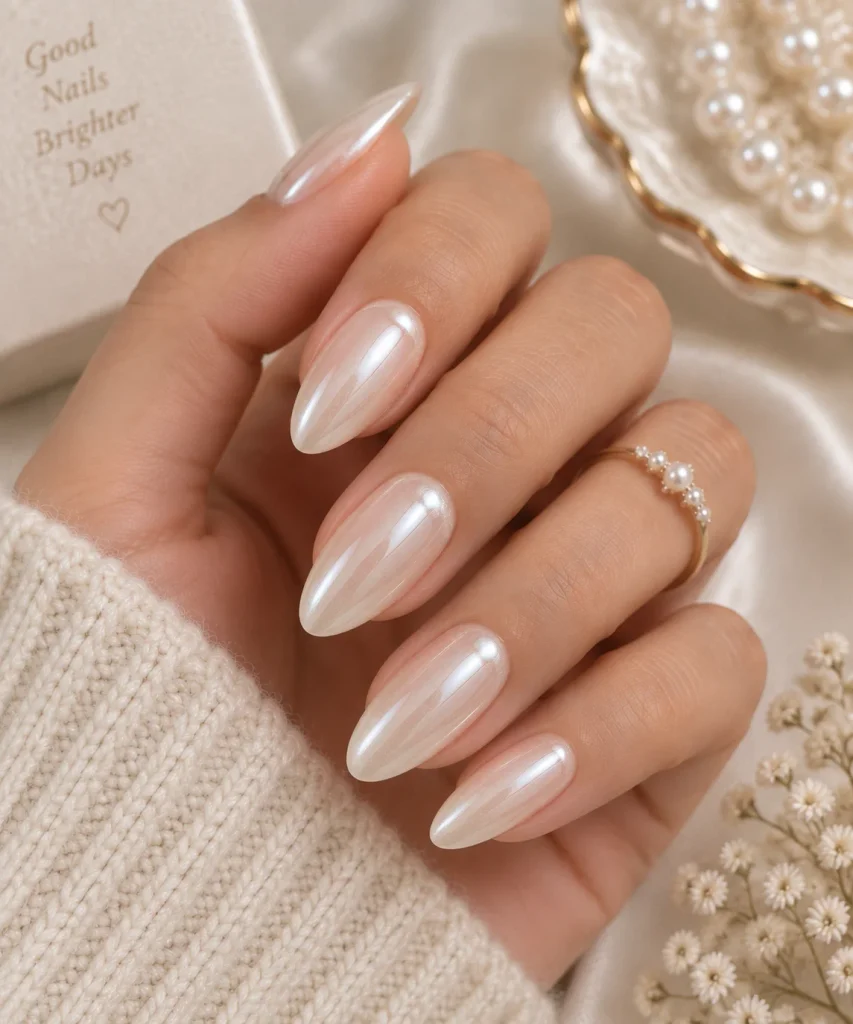
A pearl polish on an almond shape gives a long, elegant line. Finish with a high-shine top coat and nothing else. Sometimes the shape does the work.
3D Pearl Nail Art
These designs use real dimension. They take more time to apply, but they photograph beautifully and get saved often.
13. Scattered Pearl Nails
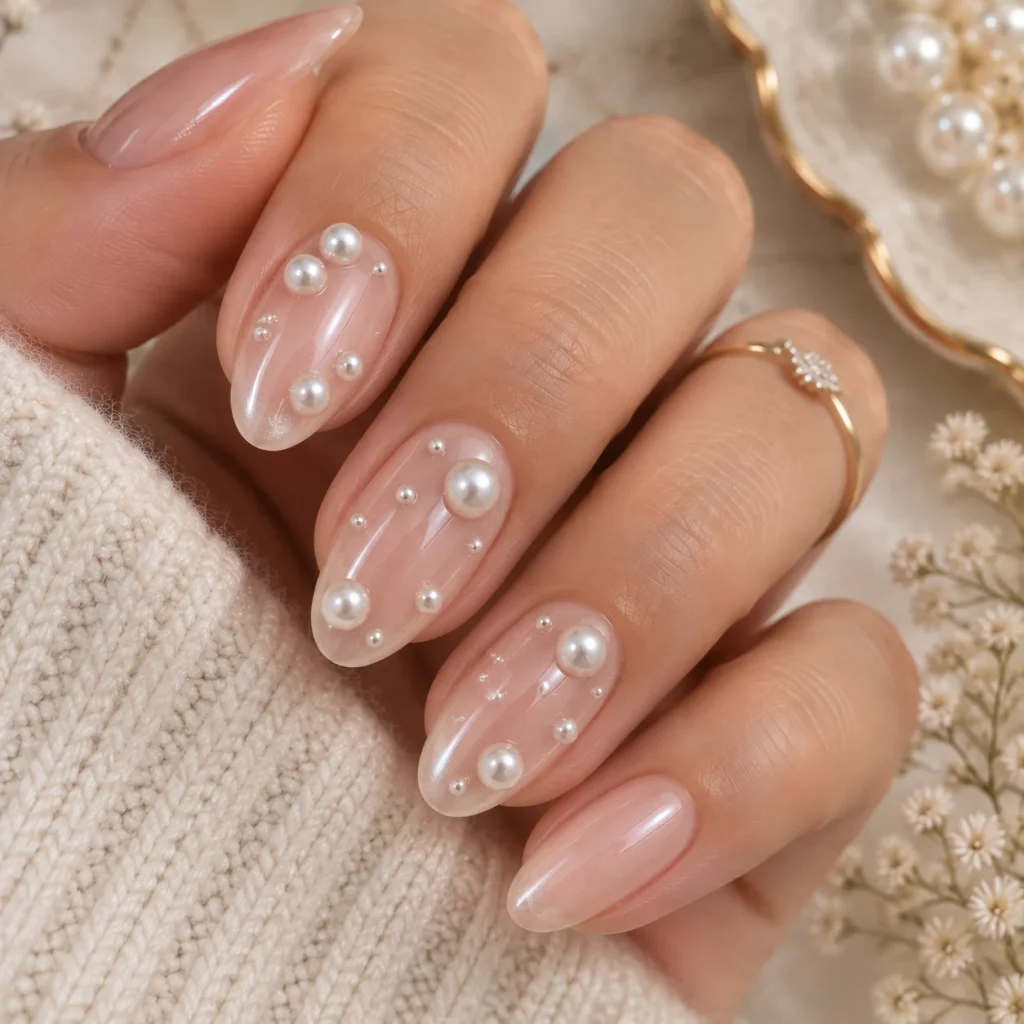
Place pearls of different sizes at random across two or three nails. Keep the base sheer so the pearls stand out. The uneven spacing looks natural, not cluttered.
14. Pearl Cluster Accent
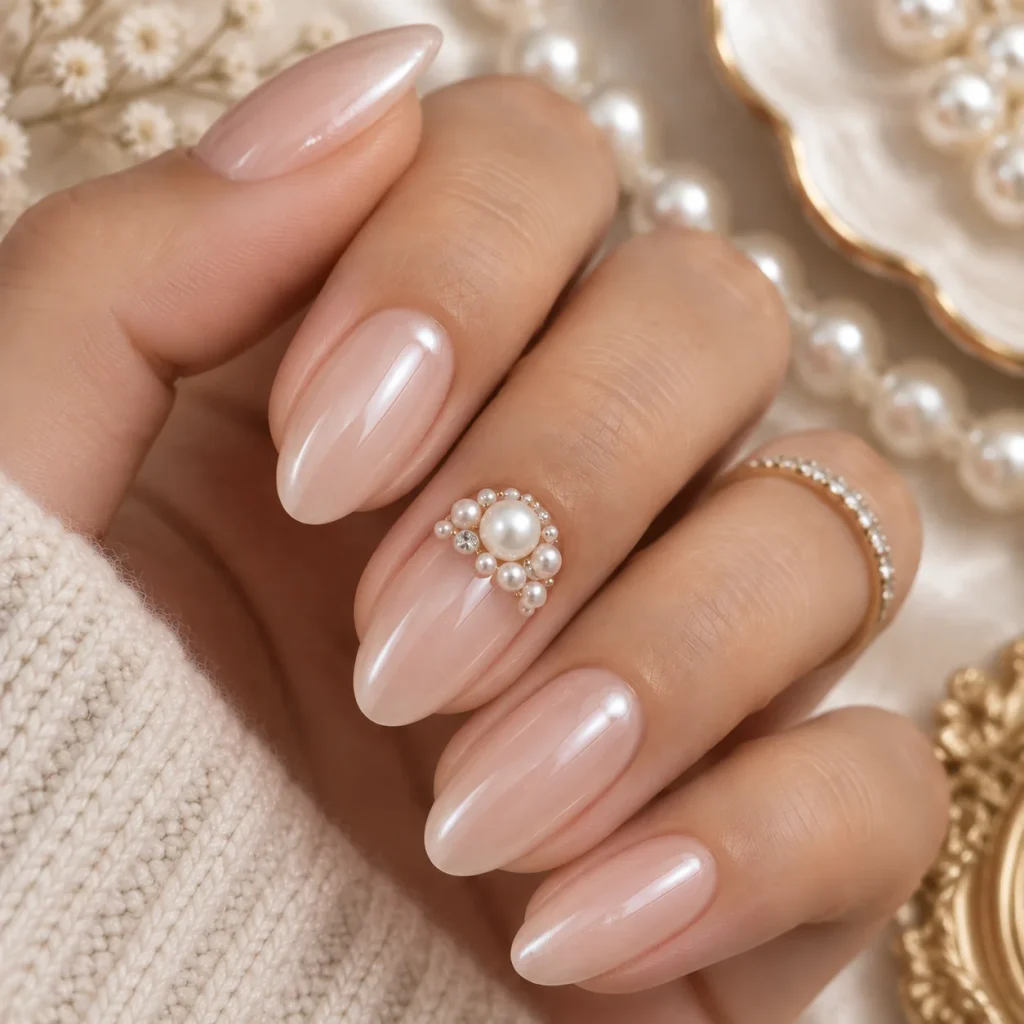
Group five to seven pearls near the cuticle or at the center of the nail. Use one large pearl and fill in with smaller ones. It looks like jewelry for your hands.
15. Pearl Drip Nails
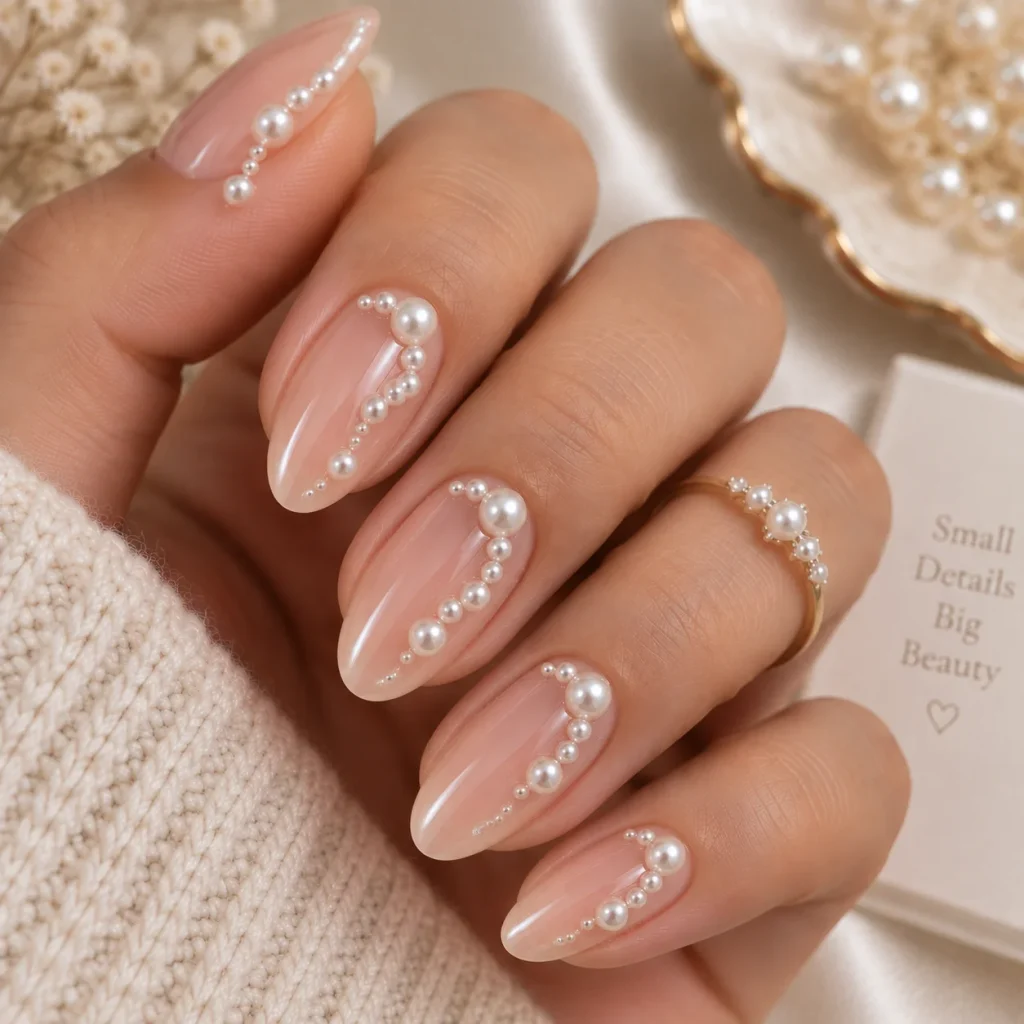
Line up pearls in a curved path that looks like a drip running down the nail. Pair it with a glossy clear base for a wet-look effect.
16. Full Pearl Nail
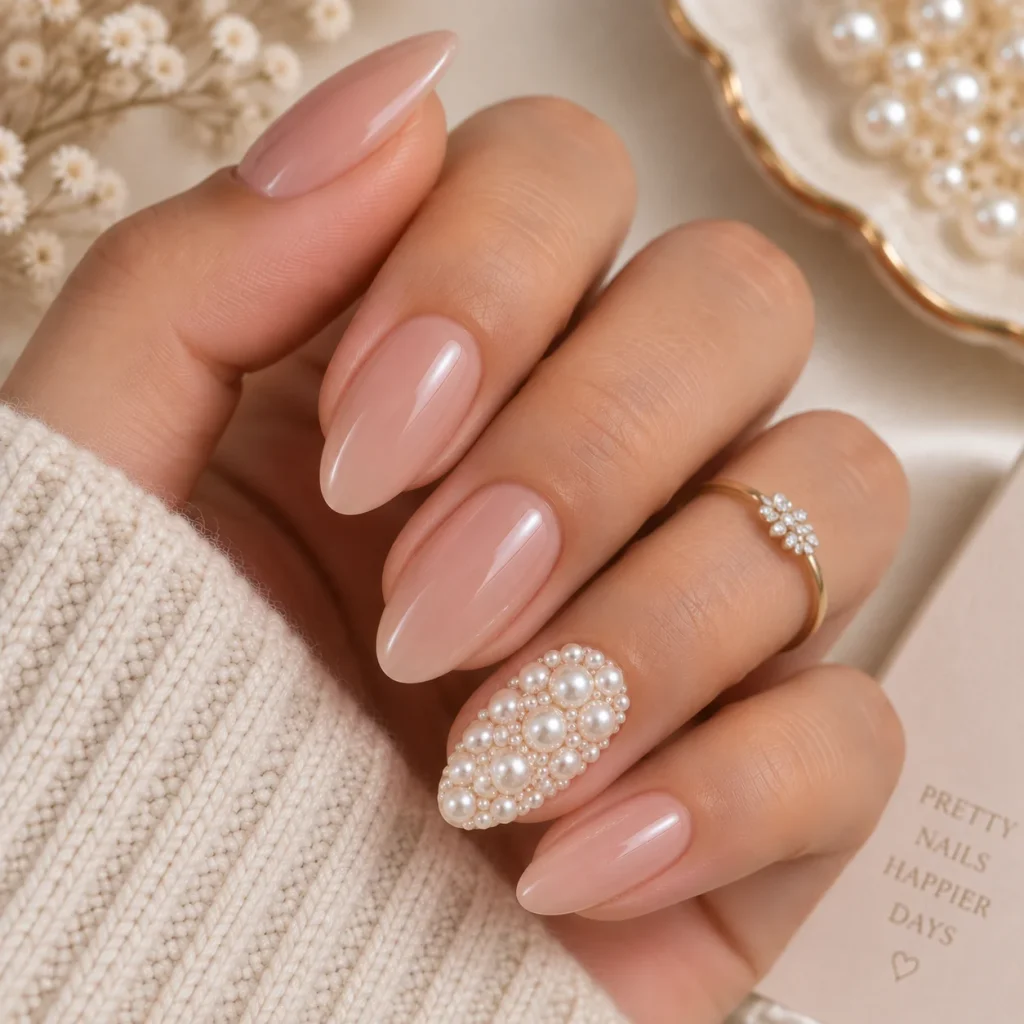
Cover one entire nail in tiny pearls. It is a bold accent, and it works best when the other nails stay plain. Use a thick layer of gel to hold the beads in place.
17. Pearl and Gold Detail
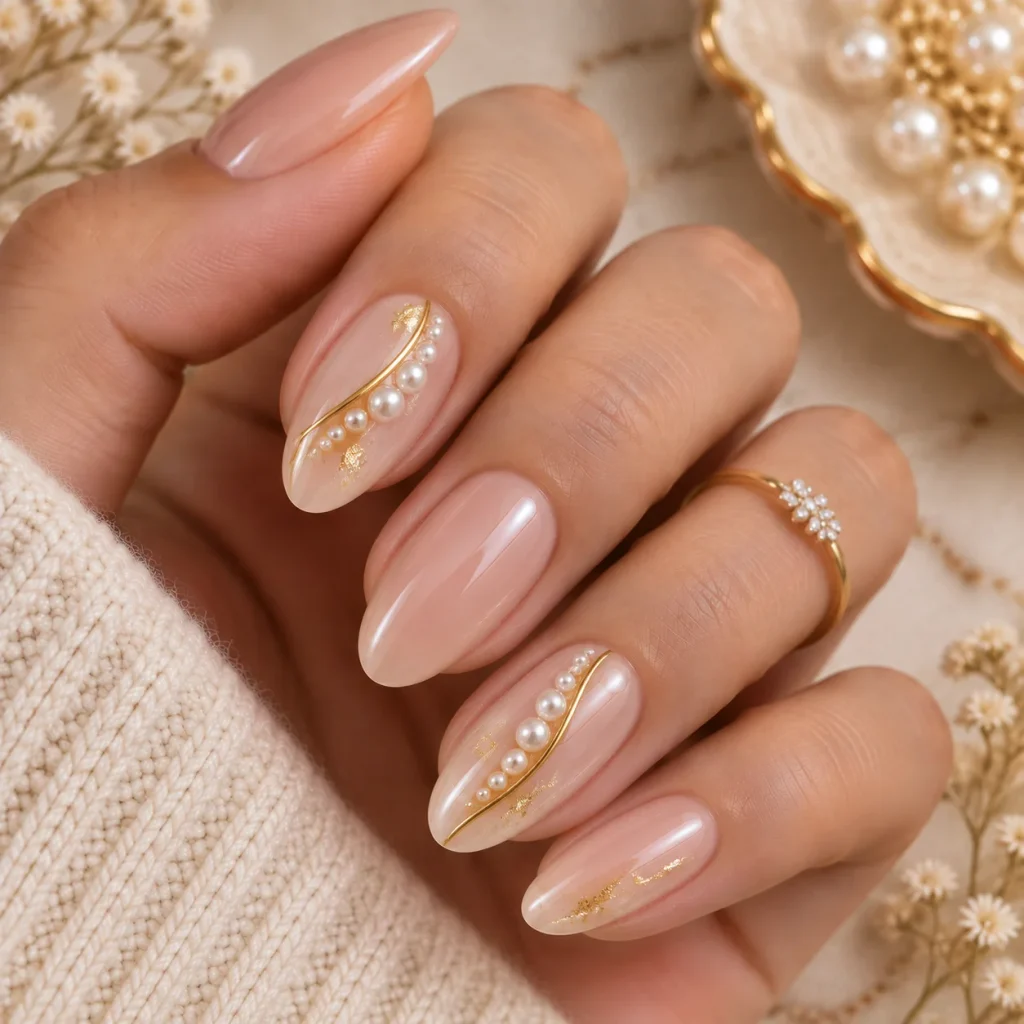
Add fine gold foil or a thin gold line next to a row of pearls. The warm metal makes the pearls look richer, and the mix suits a neutral wardrobe.
18. Pearl Heart Placement
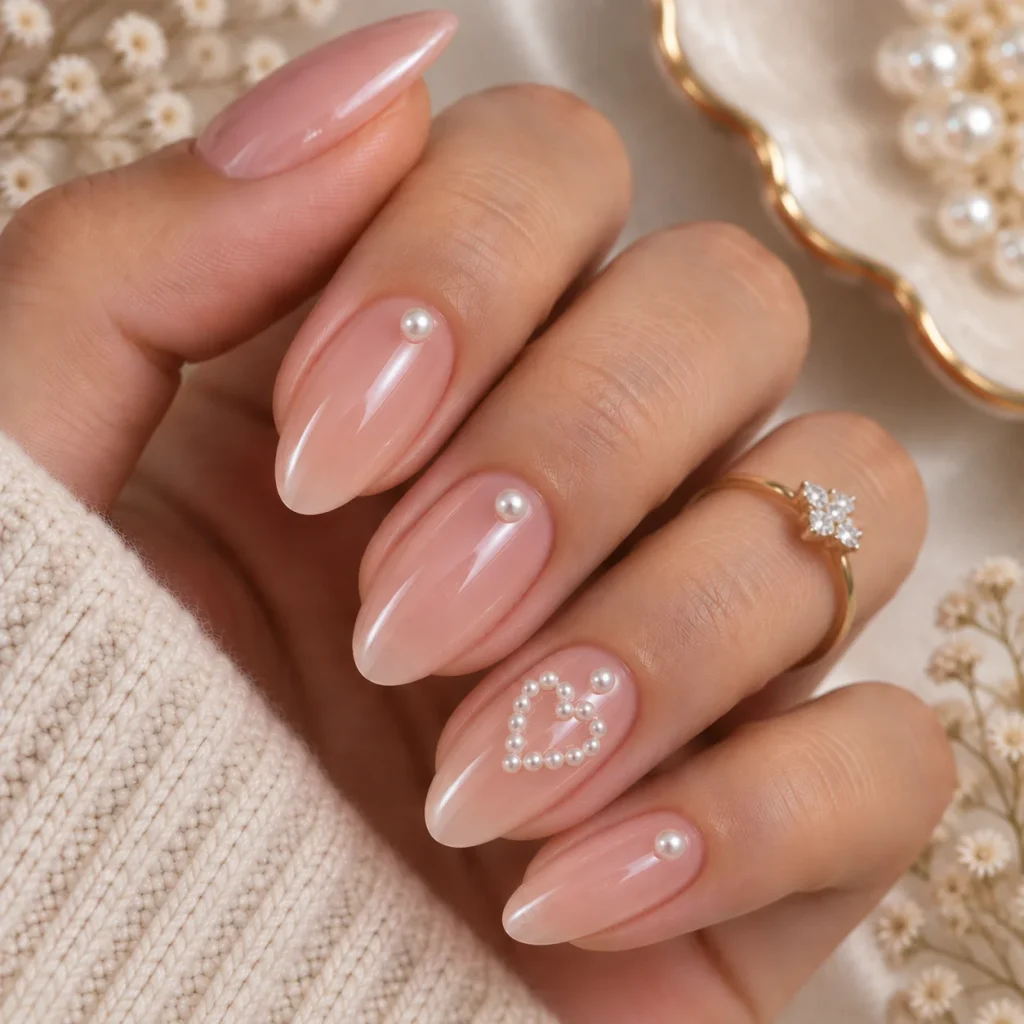
Arrange small pearls in a heart shape on the ring finger. Keep the base sheer pink or nude. It is sweet without being too much.
While pearl nails focus on a soft, luminous finish, Lace Nails add a touch of artistry with fine patterns and intricate details, making them a perfect choice for anyone who loves elegant manicure designs.
19. Pearl Necklace Nails
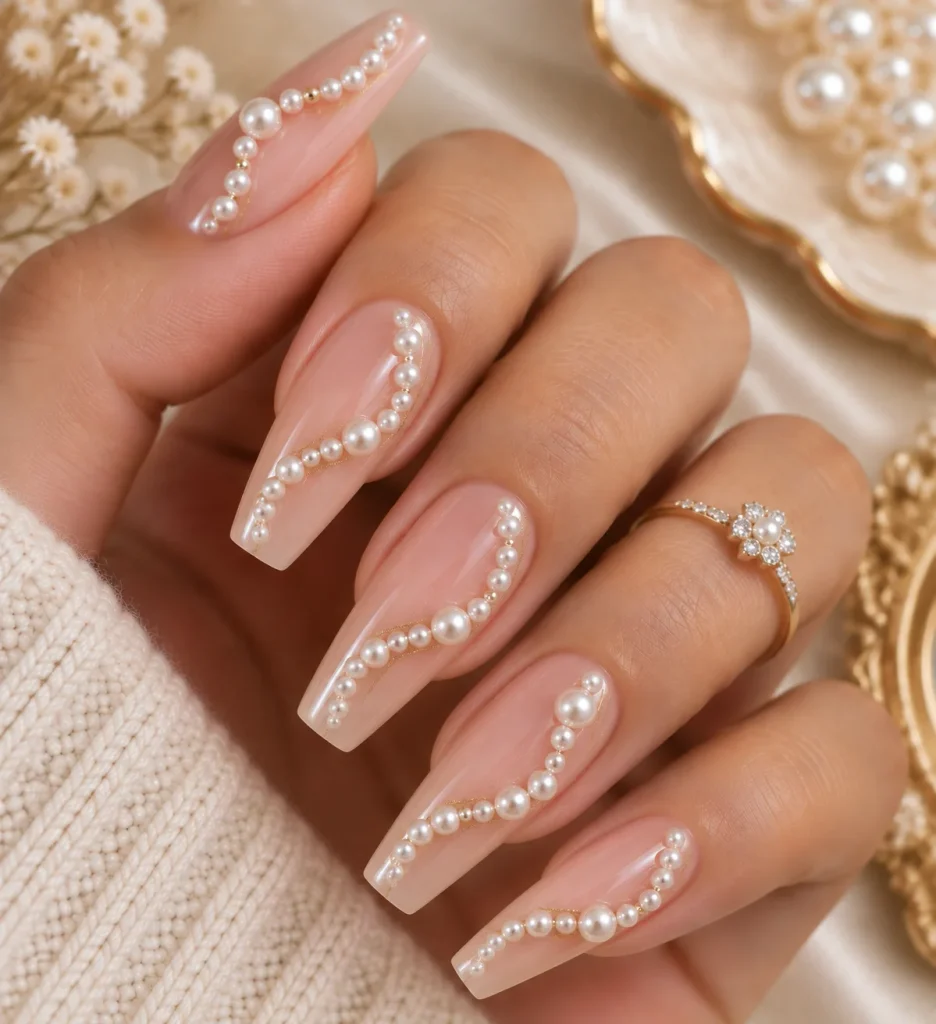
Draw a curved line of pearls along the nail like a strand of beads. Use a wax pencil to place them one by one. This is a real showpiece for long nails.
Chrome and Aurora Pearl Finishes
If you like the glow of pearls without the bumps, these flat finishes are for you. They are also much easier to wear while typing or doing chores.
20. Pearl Chrome Nails
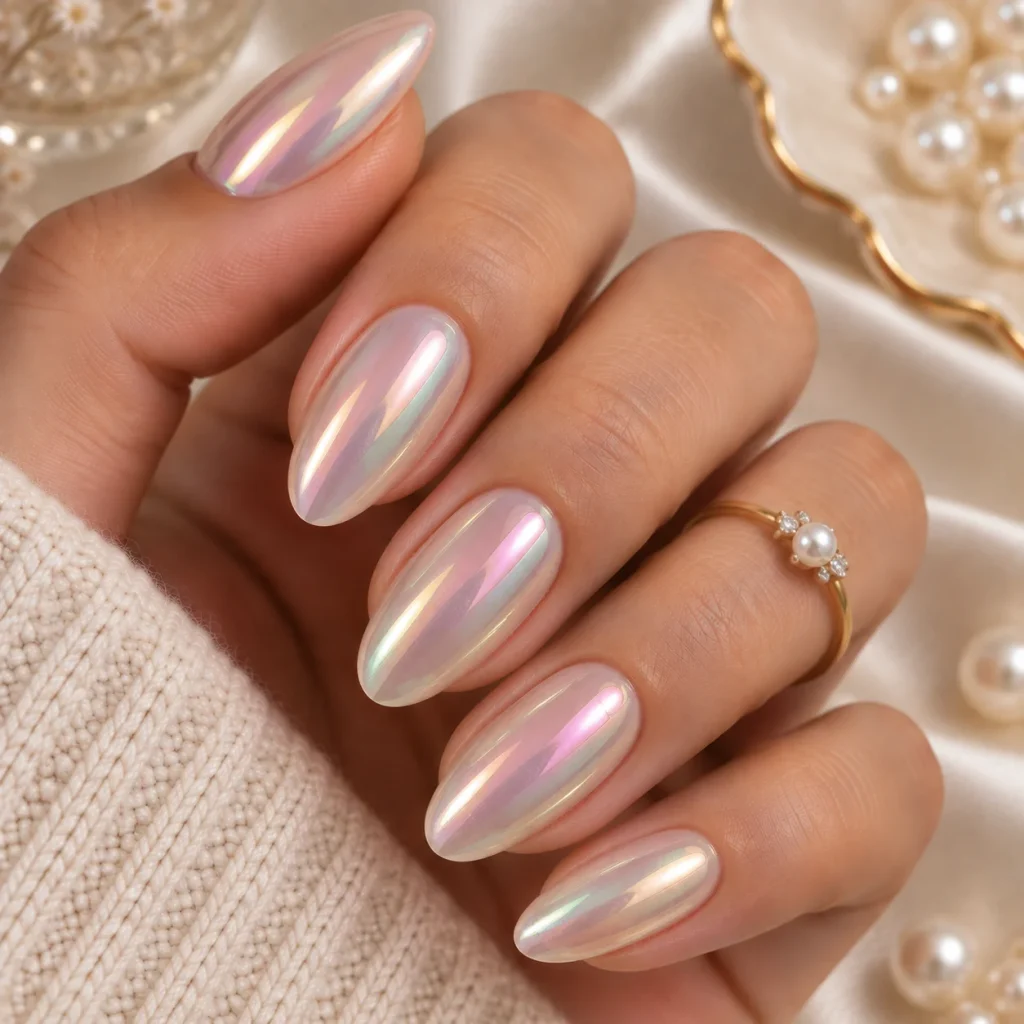
Rub pearl chrome powder over a gel top coat for a mirror-like shine with a soft rainbow glint. This is one of the most popular pearl nails finishes right now, and it lasts well.
21. White Pearl Chrome
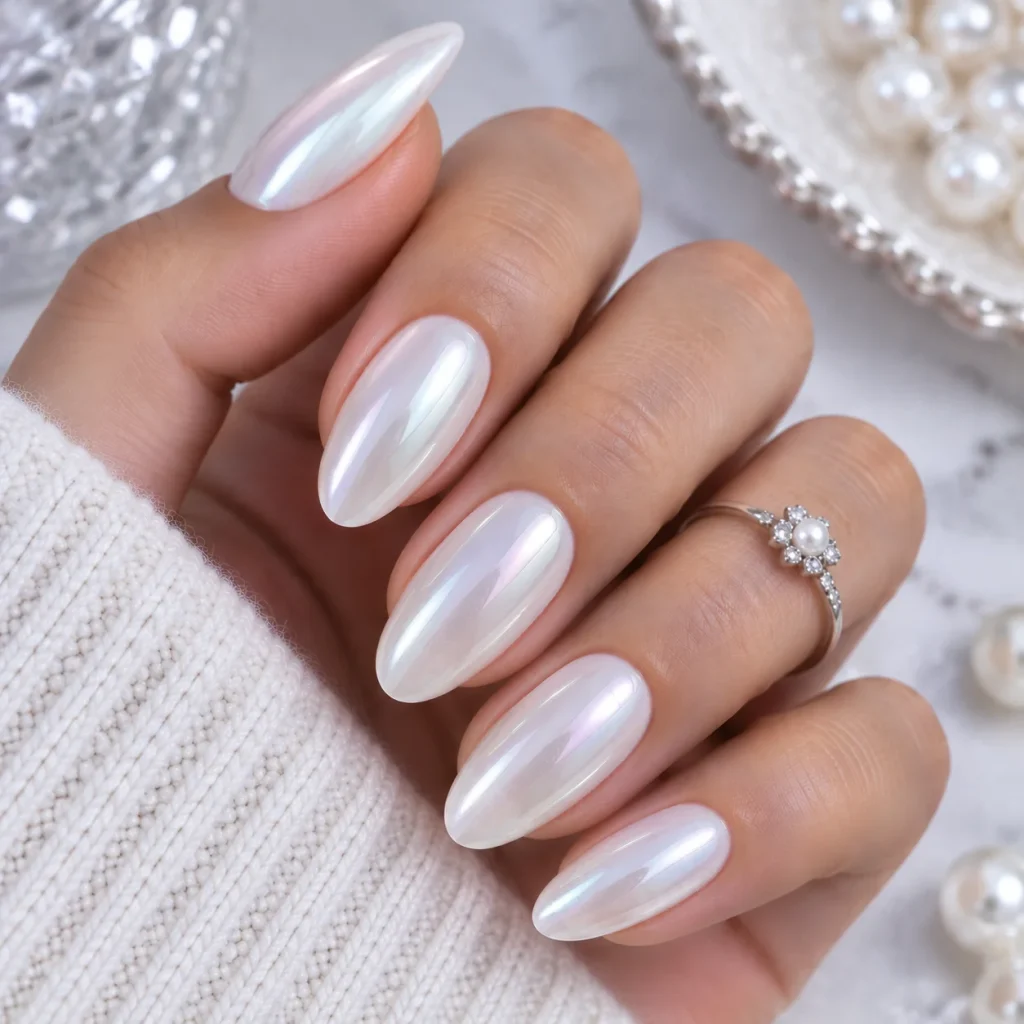
Use a white or silver base under the chrome powder. The look is clean, bright, and slightly icy.
22. Pink Pearl Chrome
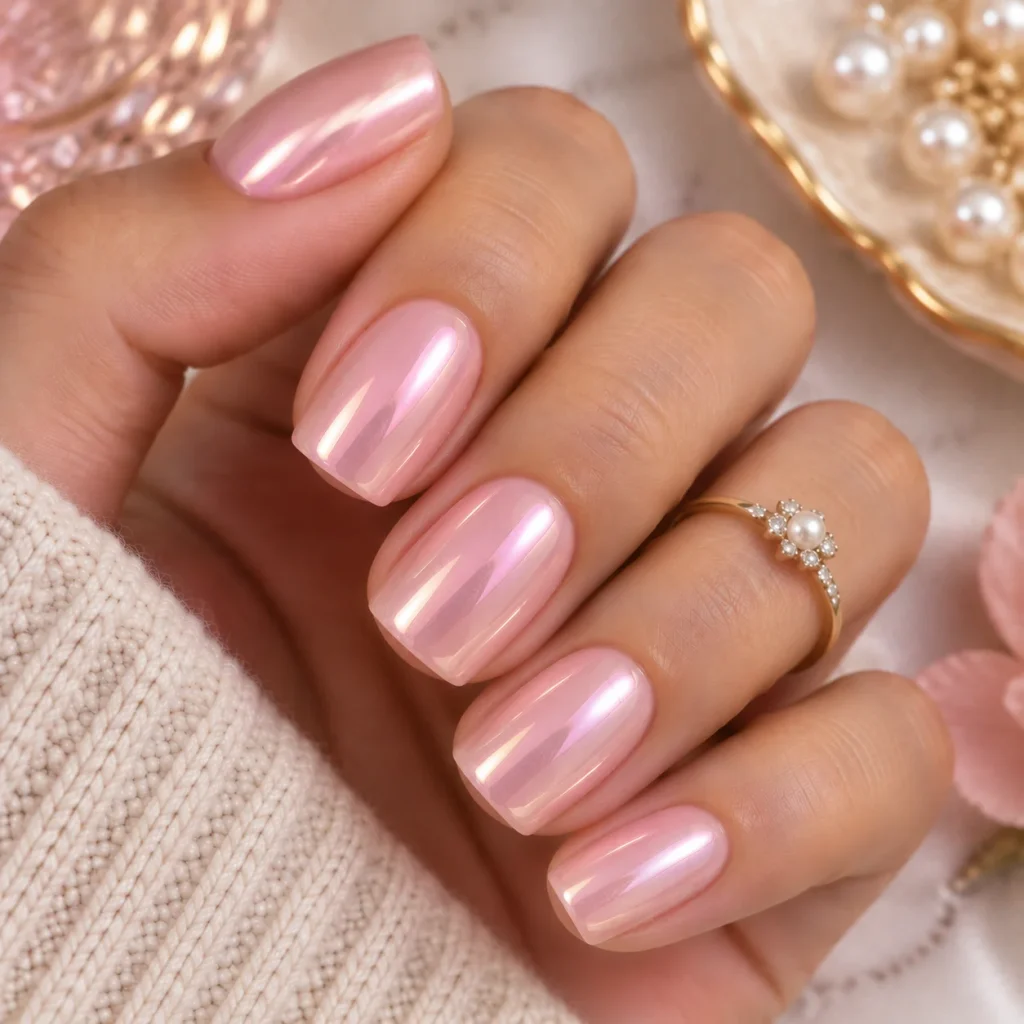
A pale pink base under pearl chrome creates a warm, rosy glow. It looks lovely on short square nails.
23. Aurora Pearl Nails
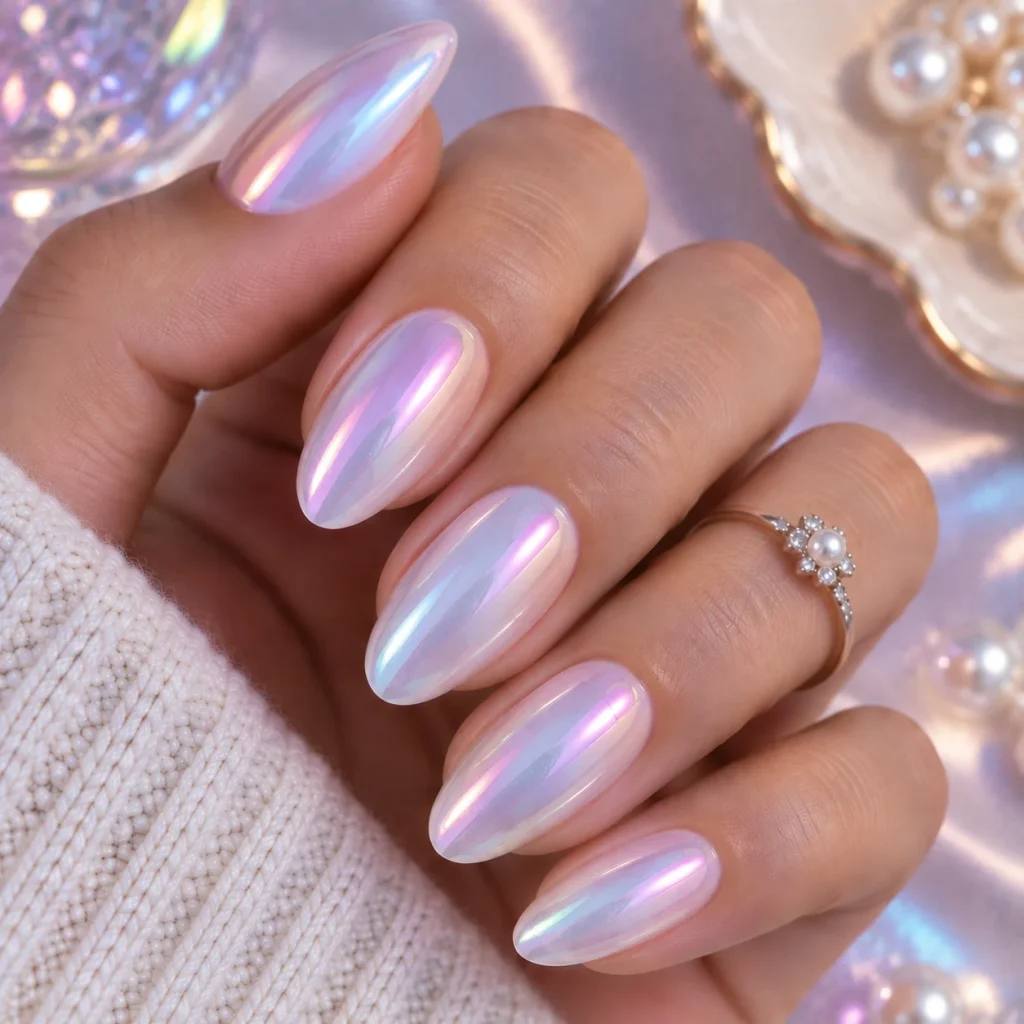
Aurora powder gives a shifting pearl effect with hints of lilac, blue, and pink. Apply it to a dark or light base depending on how strong you want the color shift to be.
24. Velvet Pearl Nails
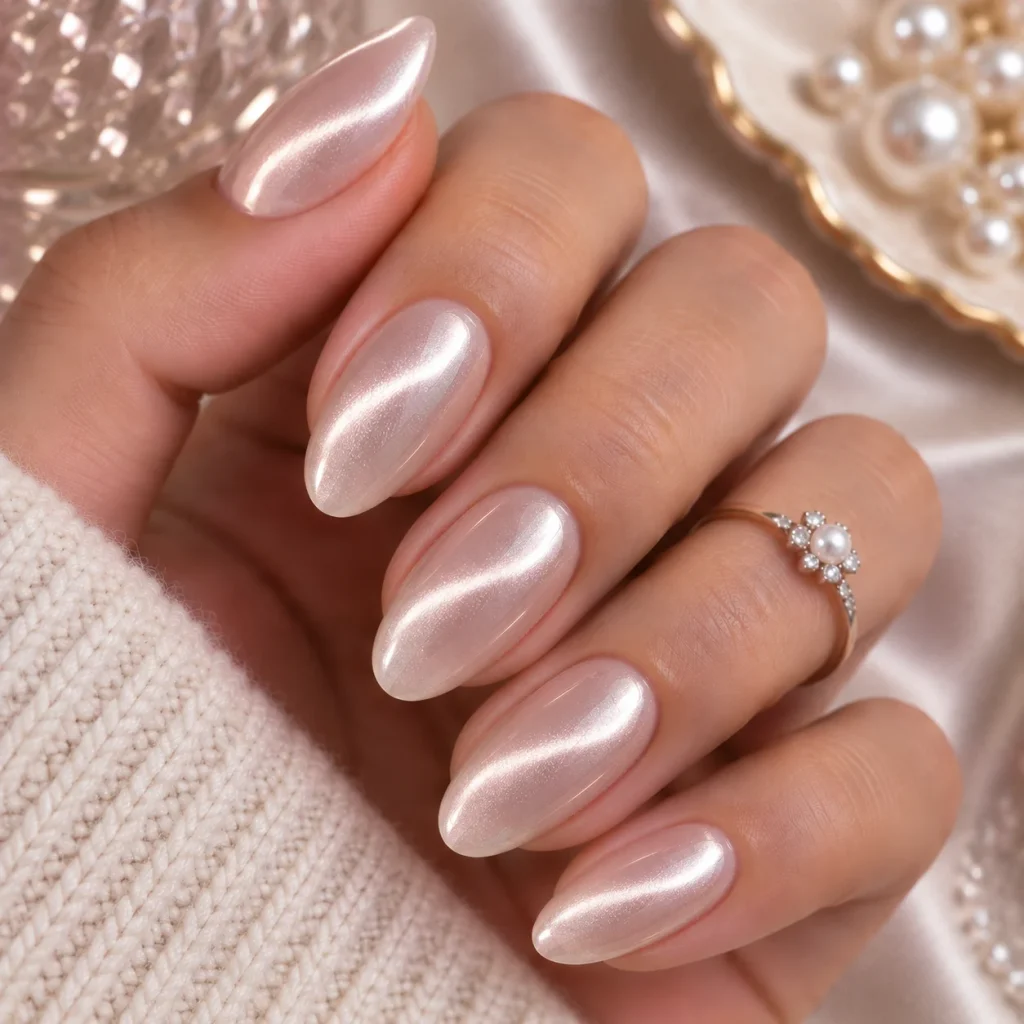
Pair a magnetic gel with a pearl tone for a soft, silky glow. Move the magnet across the nail to create a single band of light.
Pearl Nails Mixed With Other Styles
Pearl details look good next to many trends. These ideas show how to mix them without making the manicure feel busy.
25. Pearl and Glazed Donut Nails
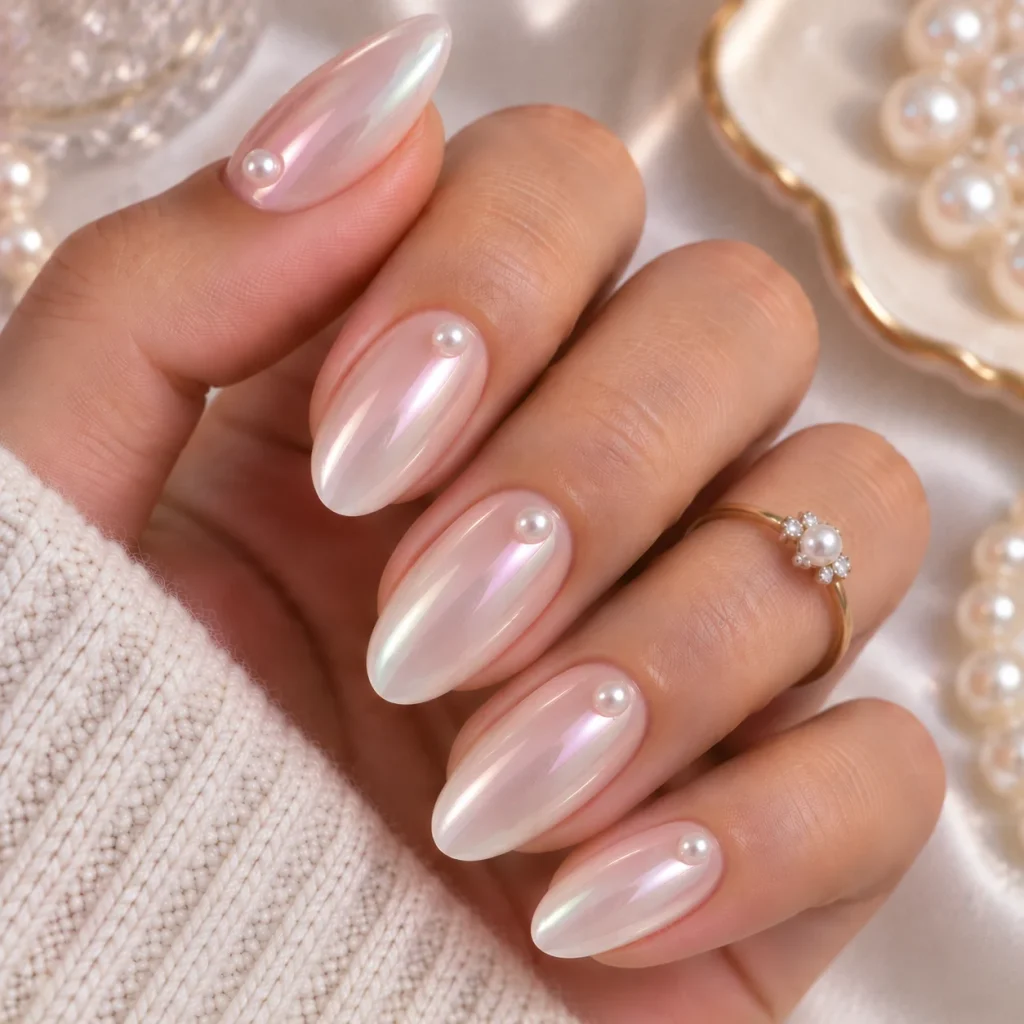
Layer a glazed pearl finish over a pale base, then add a tiny pearl at the cuticle. The glossy, soft look is easy to keep up.
26. Pearl and Blush Swirl Nails
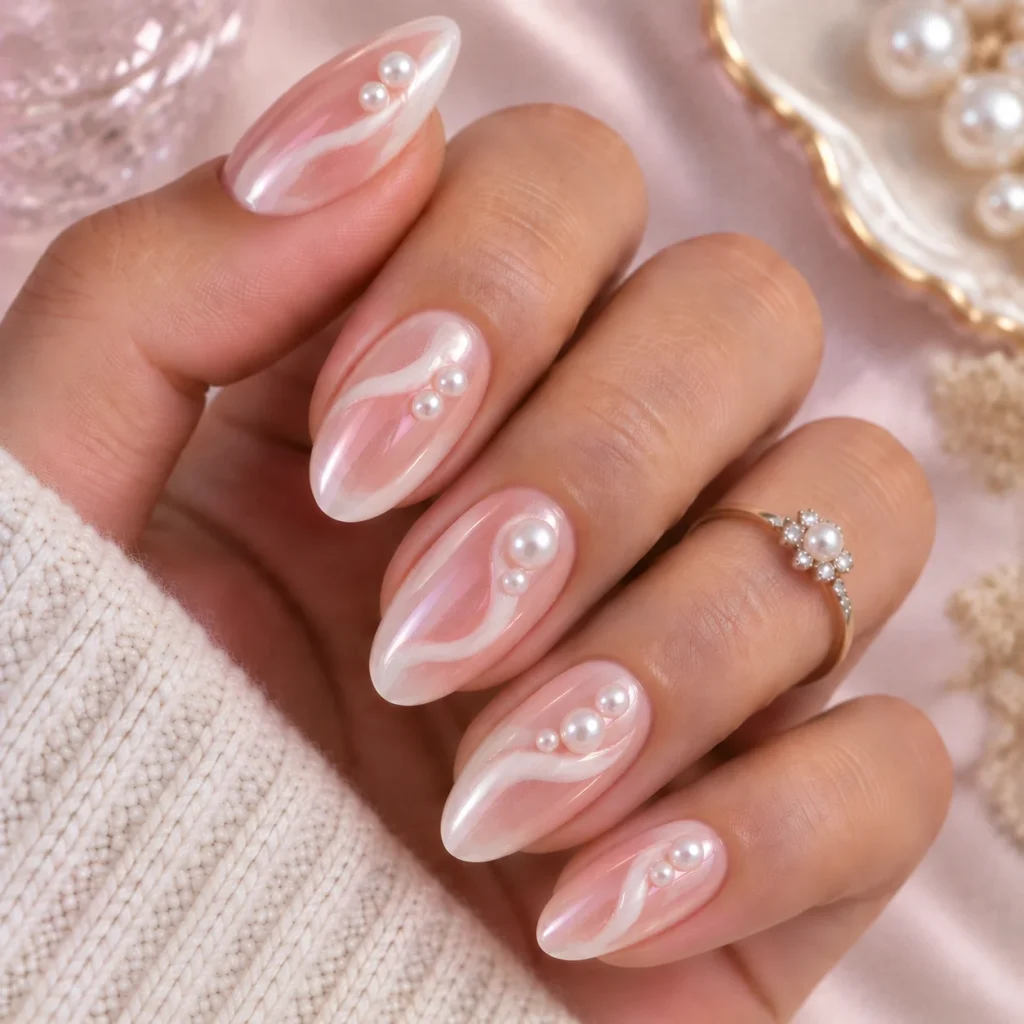
Paint a loose, abstract swirl in blush and white. Place two or three pearls along the curve. The mix of flat and 3D detail gives the set some movement.
27. Pearl and Lace Nails
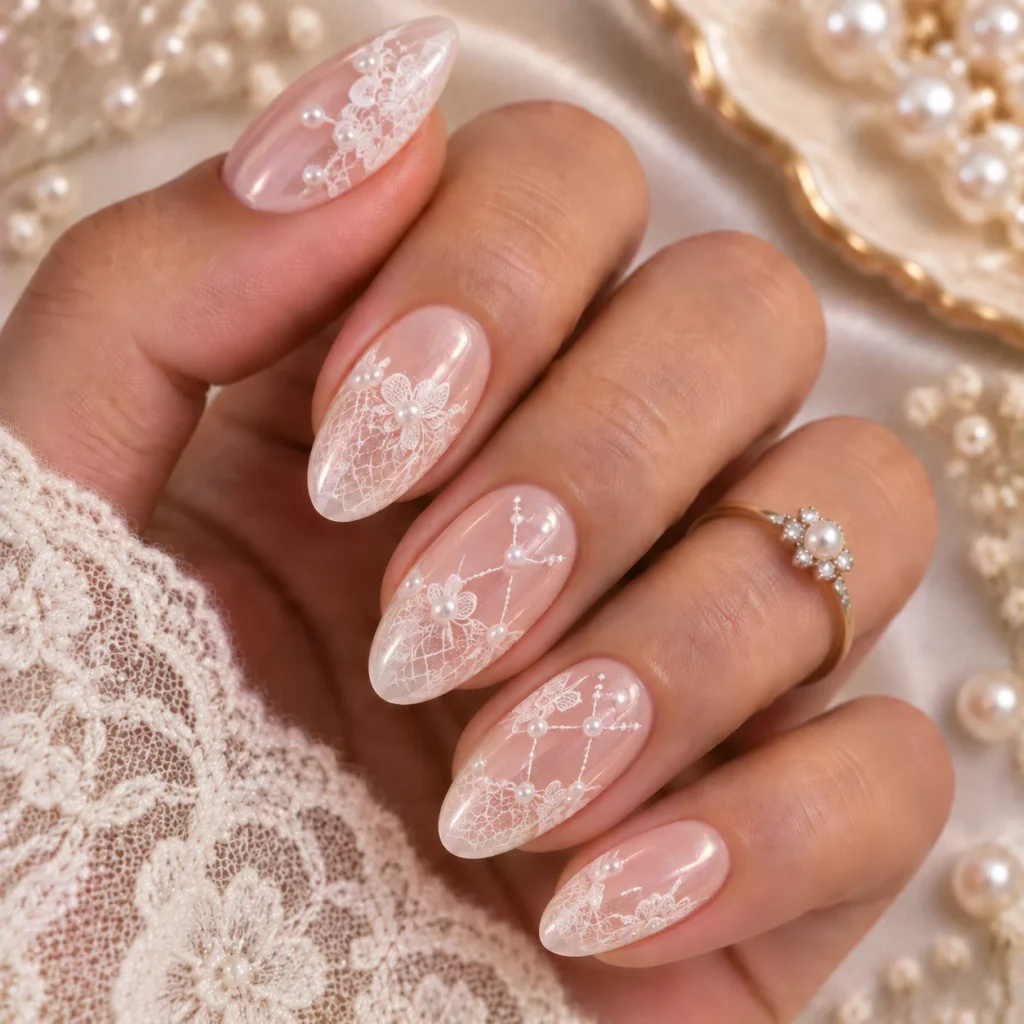
Use a fine brush to draw a lace pattern in white on a sheer base. Add pearls at the points where the lines meet. It looks delicate and handmade.
28. Pearl and Marble Nails
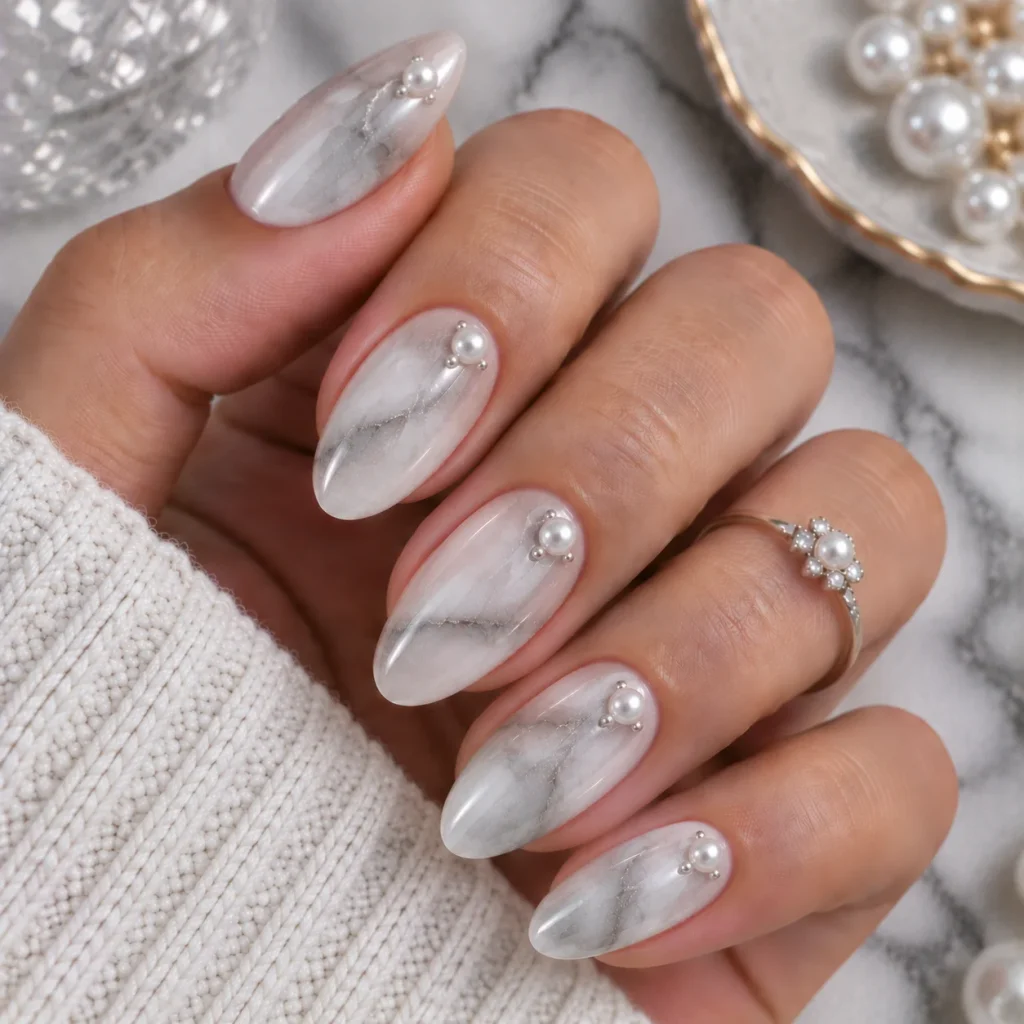
Create a light gray and white marble pattern, then add a pearl in one corner. Marble gives a cool, stone-like base that makes pearls feel more refined.
29. Pearl and Black Contrast
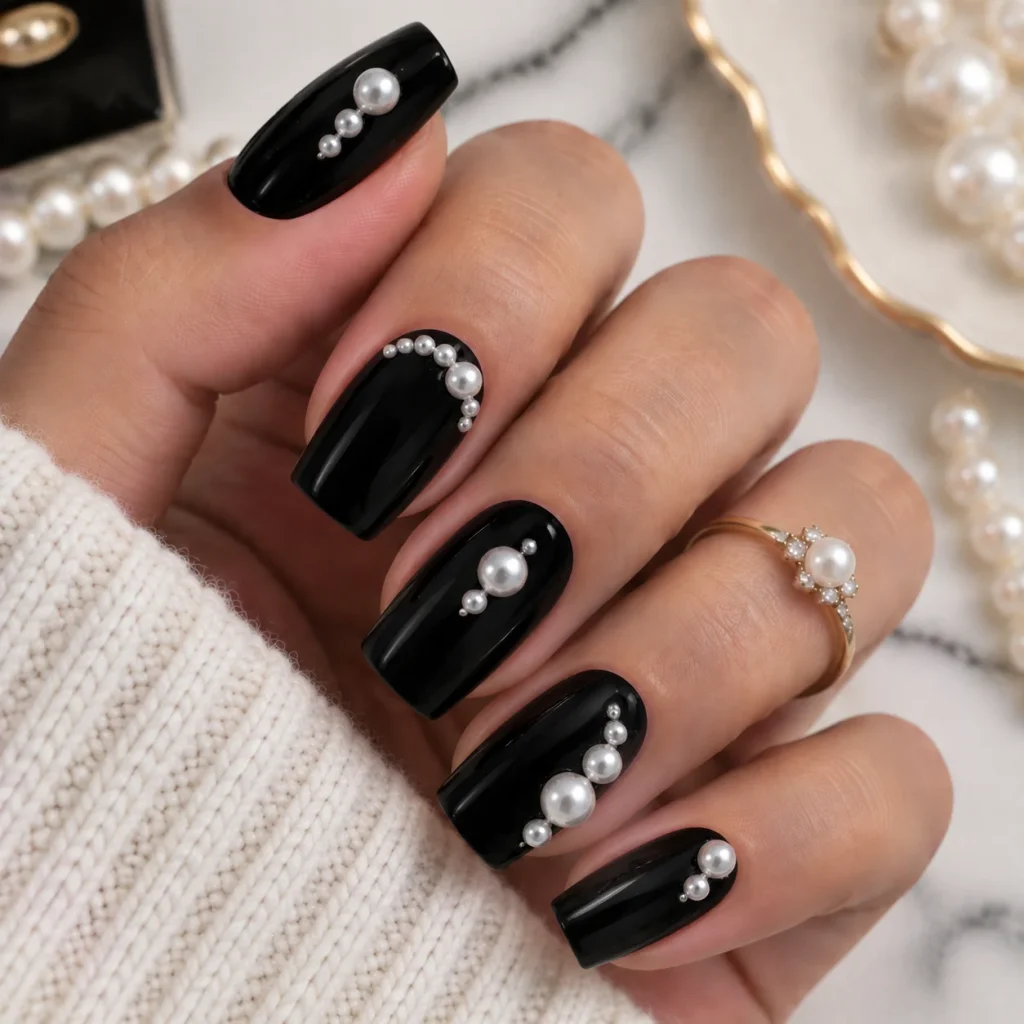
Place pearls on a jet-black nail for a sharp contrast. It feels edgy and elegant at once, and it works well on square or coffin shapes.
30. Pearl and Rhinestone Mix
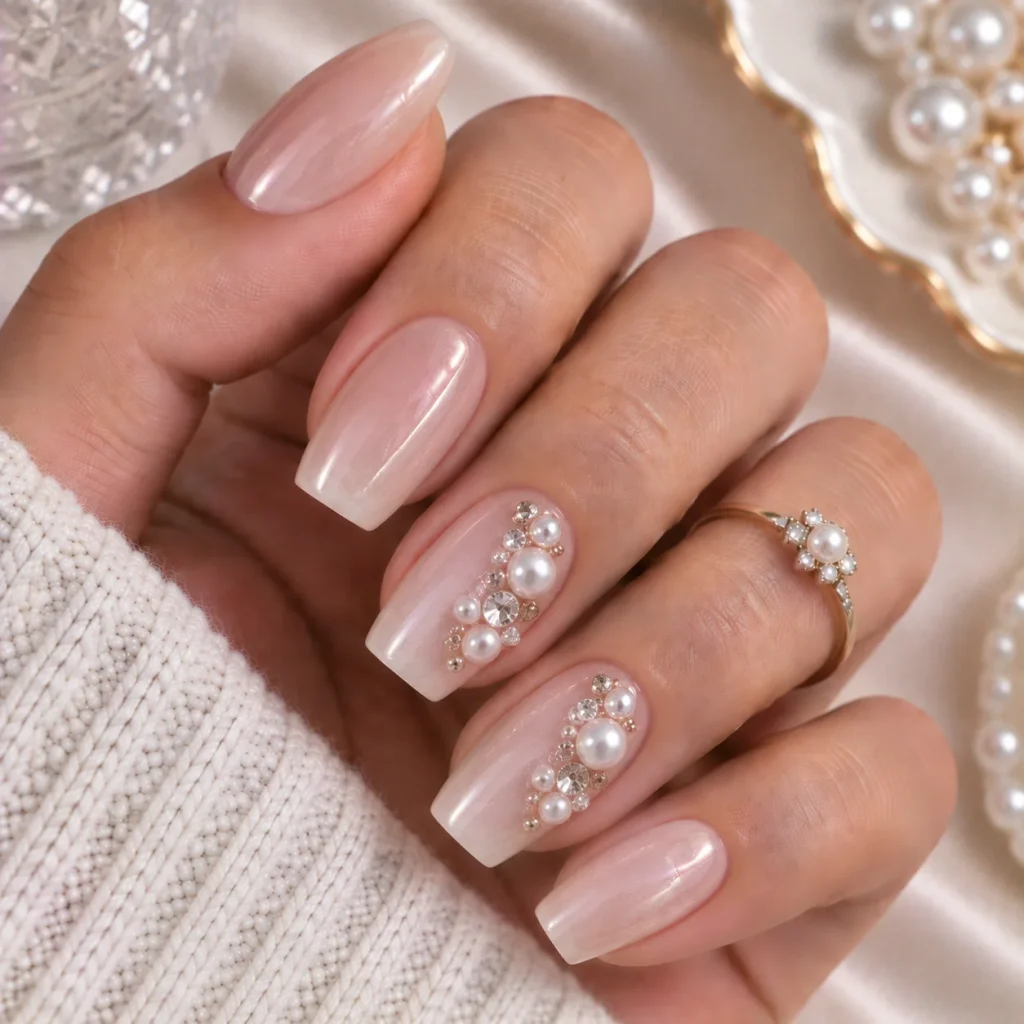
Combine pearls with a few clear crystals in a small cluster. The two textures play off each other. Keep the placement on one or two nails so the set stays wearable.
How to Do Pearl Nails at Home
Here is a simple method for 3D pearl nails. It works with gel polish and press-ons alike.
- Prep your nails. Push back cuticles, buff the surface lightly, and wipe with alcohol.
- Apply a thin base coat and cure it.
- Add two coats of your base color and cure each one.
- Apply a thin layer of top coat, but do not cure it yet.
- Place your pearls with a wax pencil or tweezers while the layer is still tacky.
- Cure the nail for the time on your lamp’s label.
- Add a dab of gel glue under each pearl for extra hold, then cure again.
- Seal around the edges of each pearl with a thin line of top coat and cure once more.
- Finish with cuticle oil.
Take your time with steps 5 and 7. Most pearl loss comes from skipping these.
Tools That Make Pearl Nails Easier
You do not need a full salon kit. A few good tools make the biggest difference.
Flat-back pearl nail charms in assorted sizes are the foundation. Look for a set that includes 2 mm, 3 mm, and 4 mm sizes. Flat backs sit closer to the nail and snag less than round ones.
A gel nail glue for charms holds heavier pearls in place. Regular top coat is fine for tiny beads, but larger ones need something stronger.
For pick-up and placement, a nail art wax pencil saves time and stops pearls from rolling away. It is the tool most beginners wish they had sooner.
If you prefer a smooth finish, pearl chrome powder delivers the look with no bumps. Pair it with a no-wipe gel top coat for the best shine.
A no-wipe gel top coat also seals around 3D details without leaving a sticky layer. It helps the surface look glassy and clean.
A nail dotting tool set helps with tiny placements and with creating pearl patterns using polish alone. It also works well for drawing small curves.
Finally, cuticle oil keeps the skin around your nails soft and helps prevent lifting. Use it daily, especially after you file or remove polish.
How to Make Pearl Nails Last Longer
Pearl nail art can last two to three weeks with the right care. These habits help:
- Choose flat-back pearls over round ones
- Seal the edges with a thin layer of top coat
- Wear gloves when washing dishes or cleaning
- Do not use your nails to open cans or peel labels
- Apply cuticle oil once a day
- Keep pearls to accent nails if you type a lot
If a pearl pops off, do not glue it back on top of the old adhesive. Wipe the spot clean, add a fresh drop of gel glue, place the pearl, and cure.
Which Nail Shapes Work Best for Pearl Nails?
Every shape can carry pearls. Here is how each one changes the look.
Short square nails give a clean, modern base for pearl chrome or micro pearl lines. Round nails suit milky pearl polish. Almond nails elongate the hand and pair well with pearl French tips. Coffin and stiletto shapes have more surface area, so they can carry bigger clusters and full pearl accents.
If you are new to 3D pearl designs, start with short or medium nails. It is easier to keep pearls secure when the nail has less leverage.
Pearl Nails FAQ
What are pearl nails?
Pearl nails are manicures that use a pearlescent polish, chrome powder, or pearl-shaped charms to create a soft, glowing finish. They can be subtle or bold.
How long do pearl nails last?
With gel polish and good aftercare, pearl nails last two to three weeks. Chrome finishes usually last as long as the gel manicure underneath them.
Can I do pearl manicure on short nails?
Yes. Short nails are a great fit for milky pearl polish, micro French tips, and single pearl accents. Choose smaller pearls, about 2 to 3 mm.
Are pearl nails hard to remove?
Not if you soak them in acetone the right way. File off the top coat, wrap each nail in acetone-soaked cotton, and wait 10 to 15 minutes. Then gently slide off the gel and pearls.
What colors go best with pearl nails?
White, blush, nude, and soft pink are the most popular. Black, gold, and silver also work if you want more contrast.
Do these nails work for beginners?
Yes. Start with a pearl polish or chrome powder. Once you feel confident, move on to 3D pearls.
Final Thoughts
Pearl nails work because they feel personal. You can keep them soft with a milky finish or go all in with a full cluster of 3D pearls. Either way, the look stays clean and timeless.
Pick two or three designs from this list and test them on your accent nails first. Then build from there. Save this post so you can find your favorites at your next manicure.