Halloween nails do not have to mean cartoon pumpkins and neon slime. The best sets are subtle, moody, and well made. Think deep oxblood, glossy black, soft smoke, and tiny gold details that catch the light.
That is what classy halloween nails are all about. They nod to the spooky mood without shouting it. You can wear them to the office, to dinner, or to a party and still look put together.
This guide gives you 25 ideas, from quiet minimal sets to bold but refined statement nails. Each one comes with a short description, who it suits, and a clear tip for getting the look. You will also find guides to shape, color, and finish, a simple at-home routine, a few tools worth owning, and quick answers to common questions.
Save your favorites as you scroll. When you book your next appointment or sit down with your polish, you will have a ready plan for the classy halloween nails you want.
25 Classy Halloween Nails to Try
1. Glossy Black Almond Nails
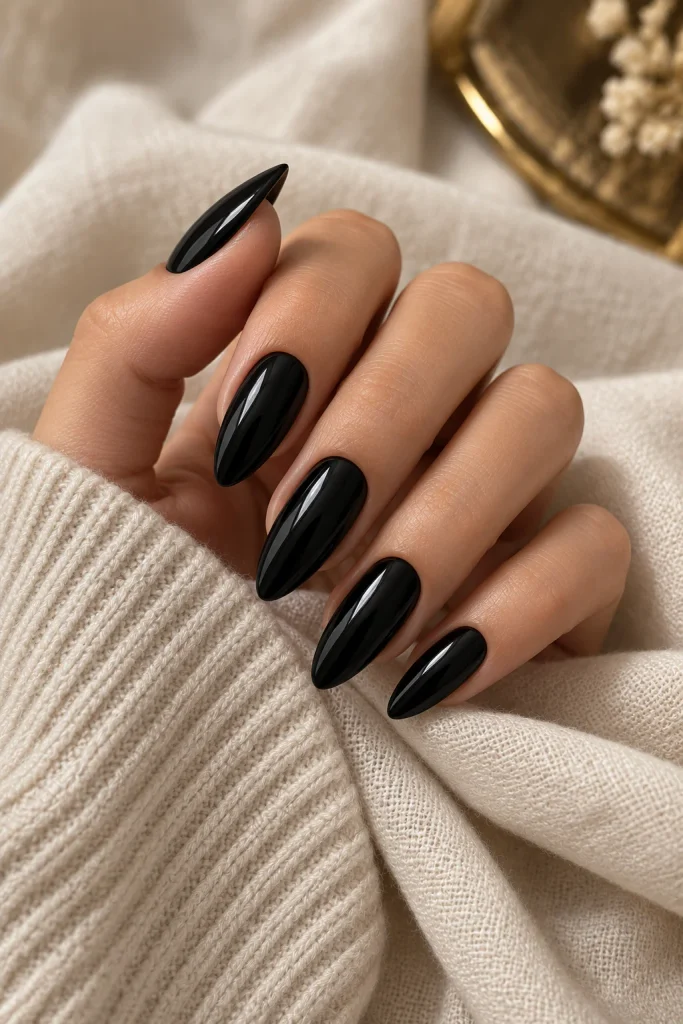
This is the foundation of all classy halloween nails. A deep, shiny black on almond-shaped nails looks sleek, sharp, and sure of itself.
The almond shape lengthens the fingers and softens the dark color. Keep every nail the same, with no art at all. The simplicity is the statement.
Best for: Anyone who wants a no-fuss, high-impact set.
How to get it: Apply two thin coats and finish with a thick top coat. A true jet black gives a clean, opaque finish that does not turn gray as it dries.
2. Oxblood Red Short Squares
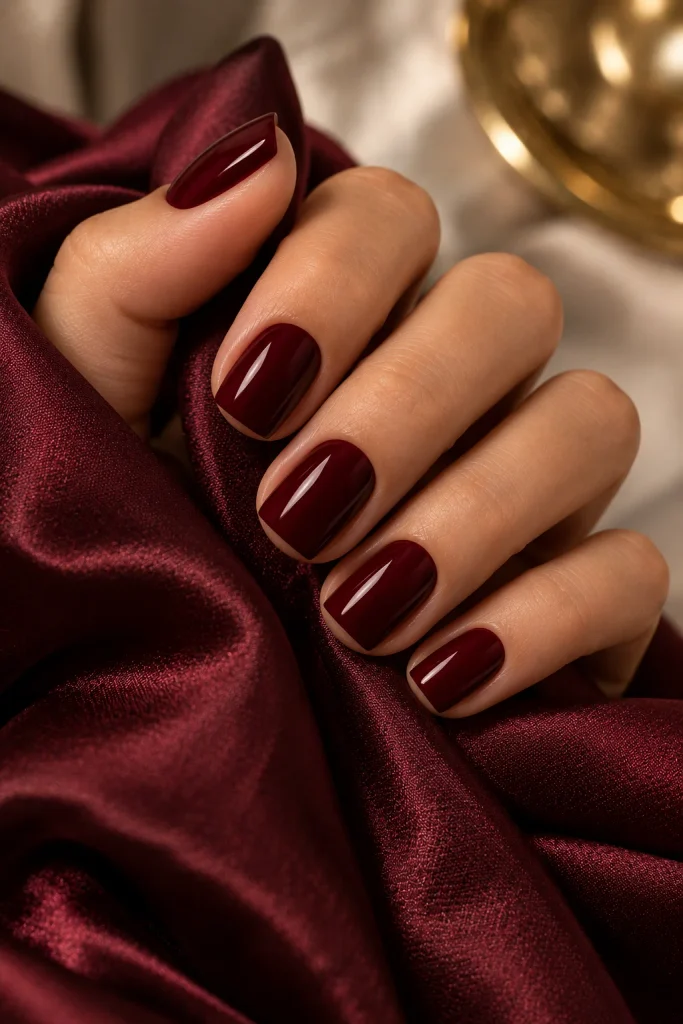
Oxblood is black cherry’s moodier cousin. It looks like dark red in daylight and almost black indoors, which gives it a quiet drama.
On short square nails, the color feels grown-up and polished. It is one of the easiest classy halloween nails to wear every day, because most people will simply see a rich fall shade.
Best for: Office settings and subtle seasonal style.
How to get it: Two coats of a cream formula are enough. Add a glossy top coat for depth. Skip glitter so the color stays deep and even.
3. Black French Tips on Nude Nails
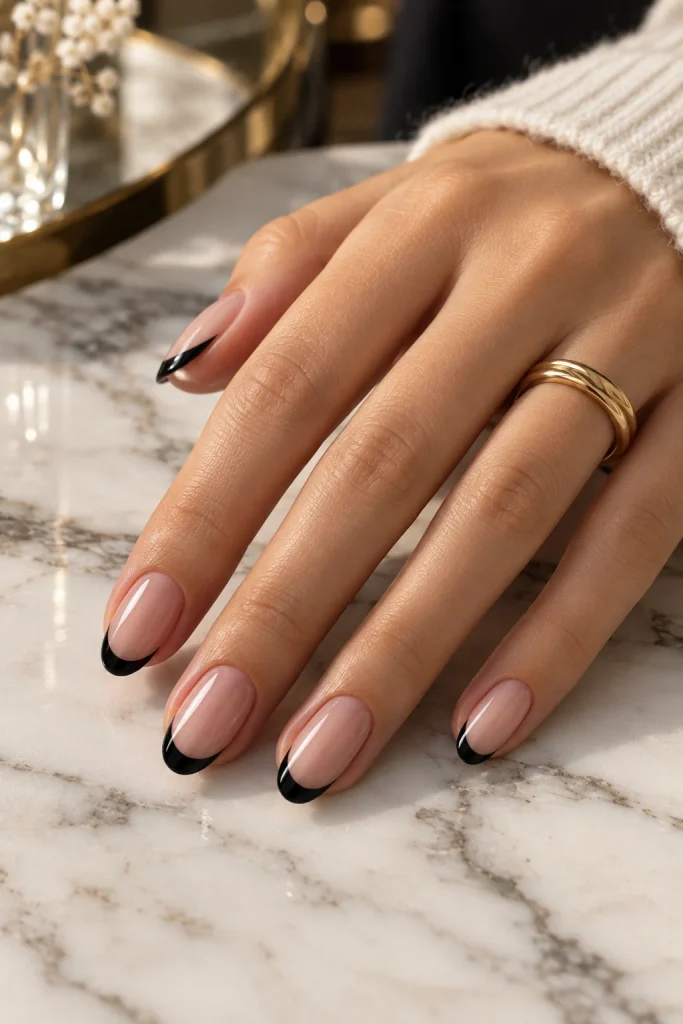
This is a classic French manicure with black tips instead of white. The soft nude base keeps the look light, while the black line adds edge.
It is among the most flexible classy halloween nails because it works in any month. Nobody will guess it started as a Halloween idea, and you can wear it long after October ends.
Best for: People who like a clean, minimal manicure.
How to get it: Use a thin tip guide or a fine brush. Draw the line first, then fill in. Keep the smile line shallow for a modern look.
4. Burgundy Velvet Magnetic Nails
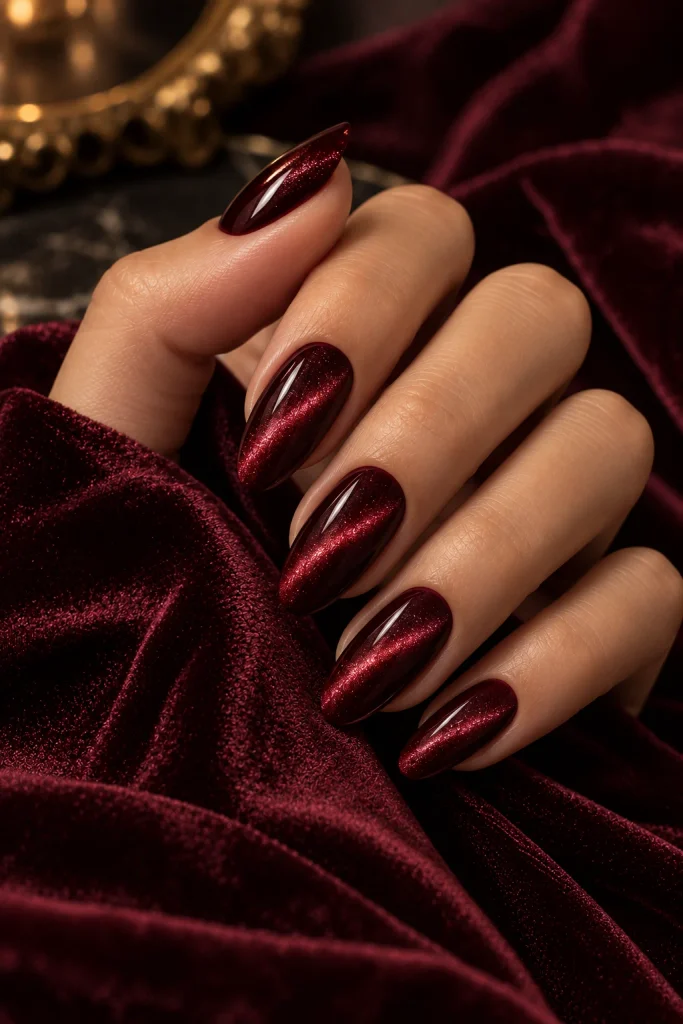
Magnetic polish creates a soft, shimmering band that looks like crushed velvet. In burgundy or deep plum, the effect is rich and luxe.
The light seems to move across the nail as your hand moves. Of all the classy halloween nails here, this one has the most depth for the least work, because the polish does the art for you.
Best for: Anyone who wants texture without a pattern.
How to get it: Paint one coat of magnetic gel, hold the magnet near the surface for a few seconds, then cure under a lamp. A starter set includes a lamp and the basics you need to try this at home.
5. Smoky Gray Ombre
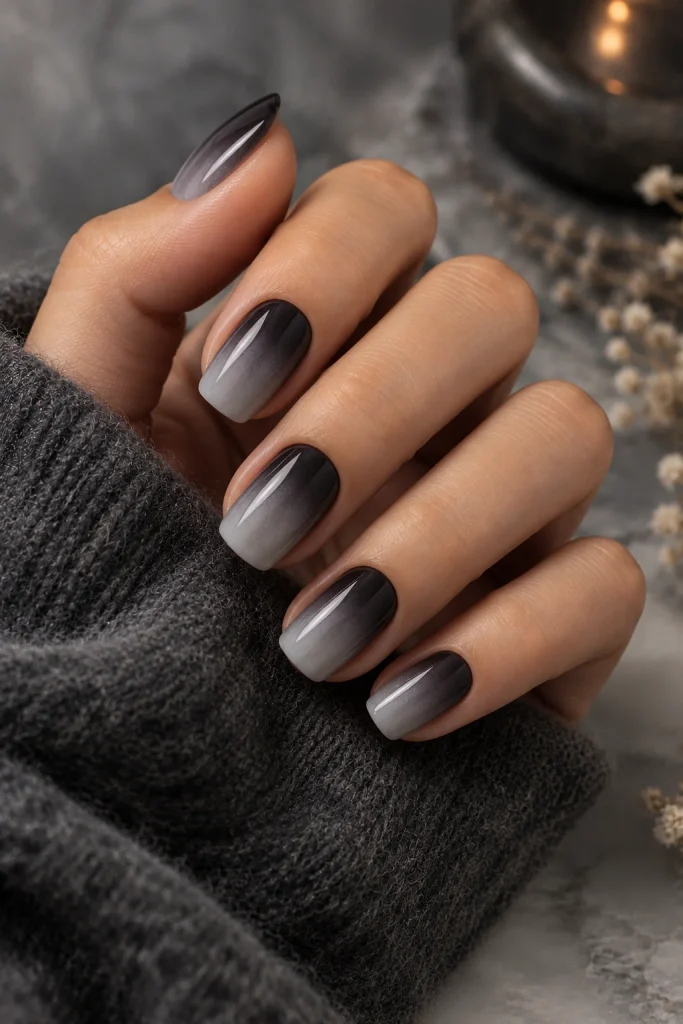
Fade charcoal into pale gray, like fog rolling over a graveyard at dawn. The look is quiet, soft, and atmospheric.
This design suits classy halloween nails fans who want mood over symbols. The gentle blend looks beautiful on short and medium nails alike, and it flatters almost every skin tone.
Best for: A calm, cool-toned look.
How to get it: Dab two shades onto a makeup sponge side by side. Press the sponge onto the nail and repeat until the blend looks smooth. Seal with a top coat to hide the sponge texture.
6. Single Gold Web Accent Nail
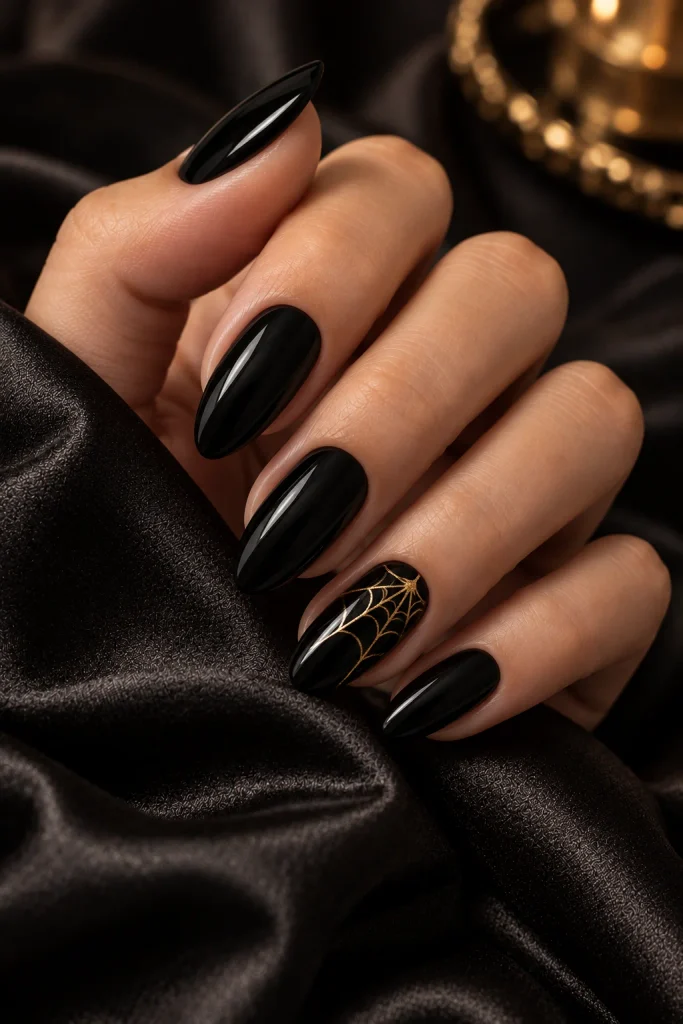
Here, one nail carries the whole theme. Paint every nail black, then add a fine gold spiderweb on the ring finger.
The metallic line feels like jewelry. It is a perfect example of how classy halloween nails use restraint to look more expensive. A tiny detail goes a long way.
Best for: Minimalists who still want a clear Halloween nod.
How to get it: Use a thin liner brush and gold polish. Draw three lines out from one corner, then connect them with small curved strokes. A nail art brush set with a long, fine liner makes this much easier.
7. Milky White with Tiny Black Moons
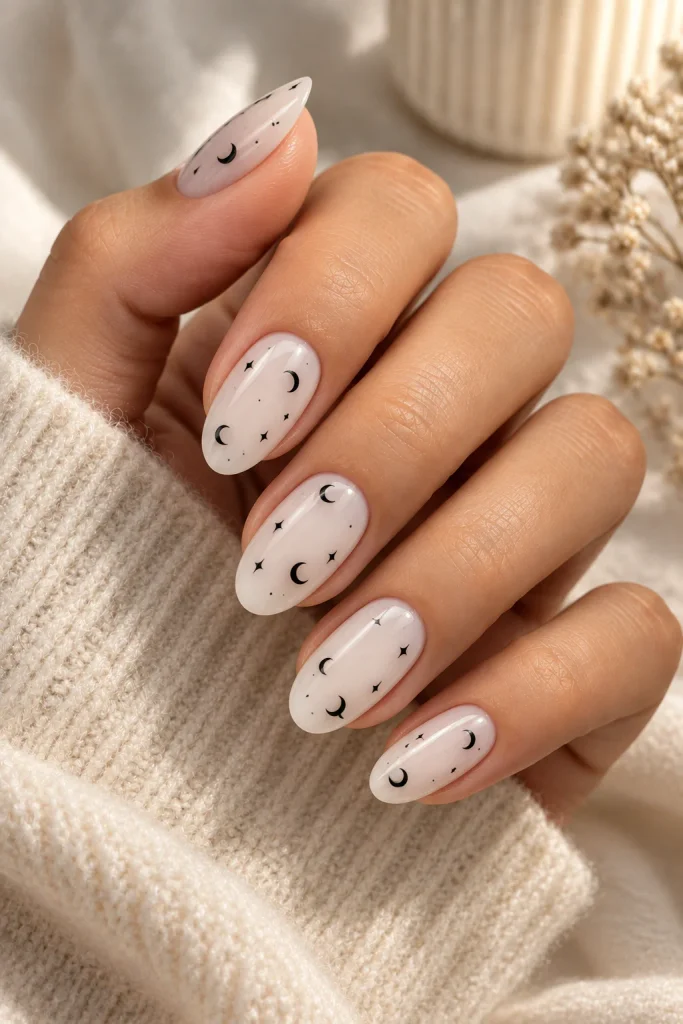
Sheer white nails are scattered with small black crescent moons. It looks like a night sky in reverse.
The soft base keeps the design light and airy. These are some of the most delicate classy halloween nails on the list, which makes them ideal if black polish feels too heavy for you.
Best for: Lovers of soft, airy nail art.
How to get it: Use a dotting tool to make a black circle, then drag a second circle of white slightly over it to carve the crescent. You can also paint the curve freehand with a fine brush.
If you love this soft, light base, you may also enjoy these white hoco nails, which use the same clean look with sparkle and pearl details.
8. Deep Forest Green Cream Nails
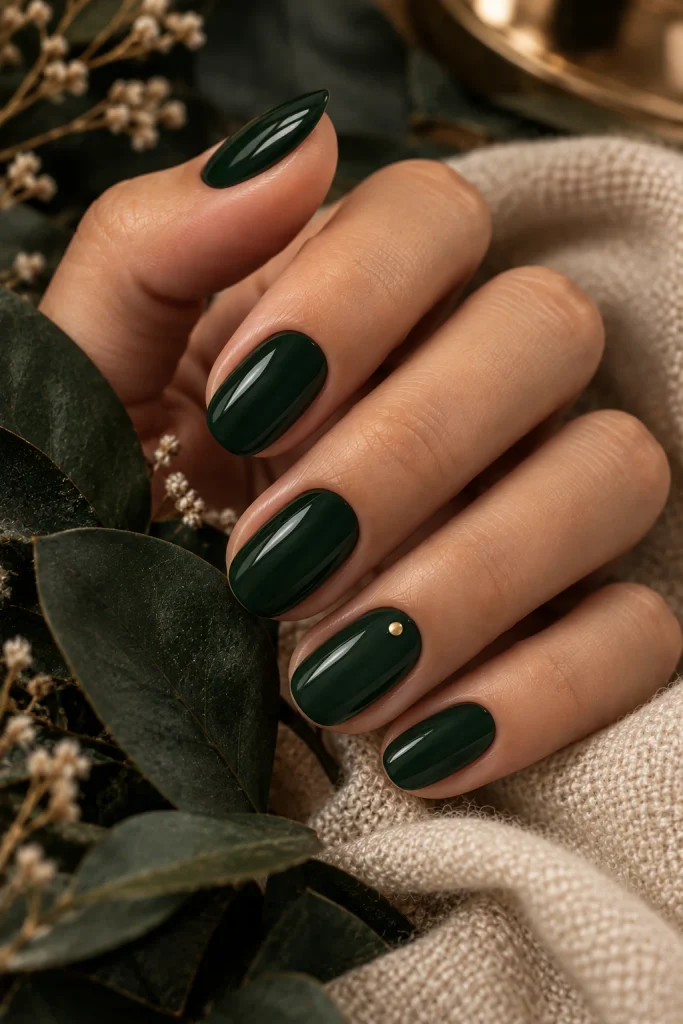
Dark green is an underrated spooky color. It feels like a haunted wood at dusk, and it flatters both warm and cool skin tones.
Pair it with a high-shine finish and keep the shape short and rounded. Deep green is a quiet way to wear classy halloween nails without any black at all.
Best for: People who want something different from the usual dark palette.
How to get it: Apply two coats of a cream formula, then a top coat. Add a tiny gold dot near the cuticle on one nail if you want a hint of detail.
9. Black Chrome Mirror Nails
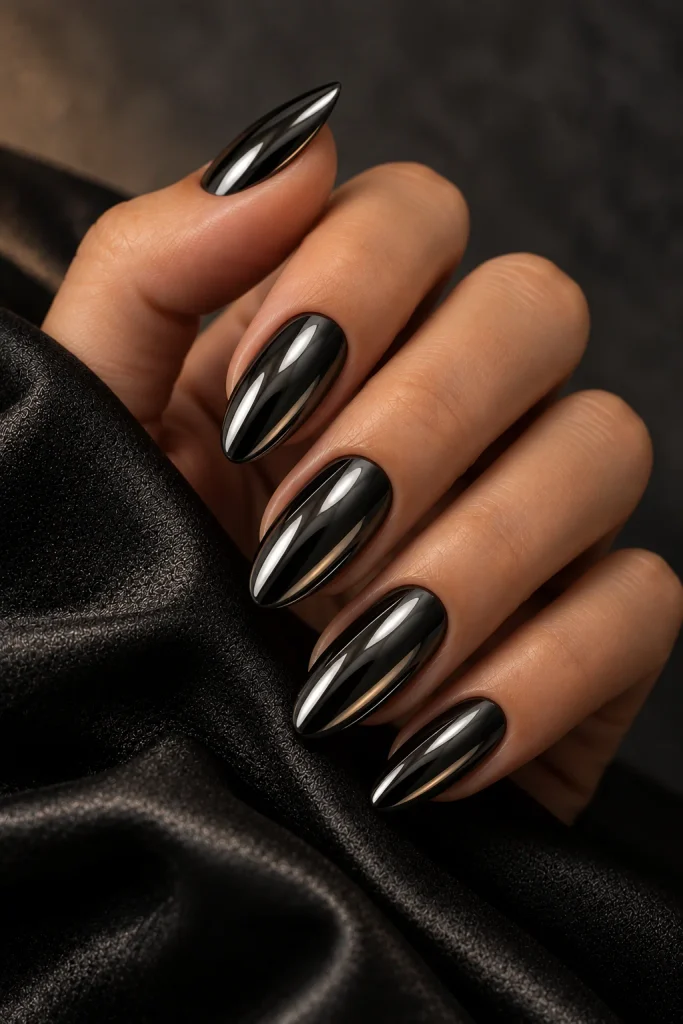
Chrome powder over black polish creates a smoky, liquid-metal sheen. It looks like polished obsidian.
The look is bold, but the single-color design keeps it refined. Black chrome sits at the glamorous end of classy halloween nails and photographs beautifully under any light.
Best for: Anyone who loves a futuristic, high-shine finish.
How to get it: Cure a black gel base with a no-wipe top coat, rub chrome powder over it with a small applicator, then seal with another thin layer of top coat.
10. Plum and Mauve Two-Tone Set
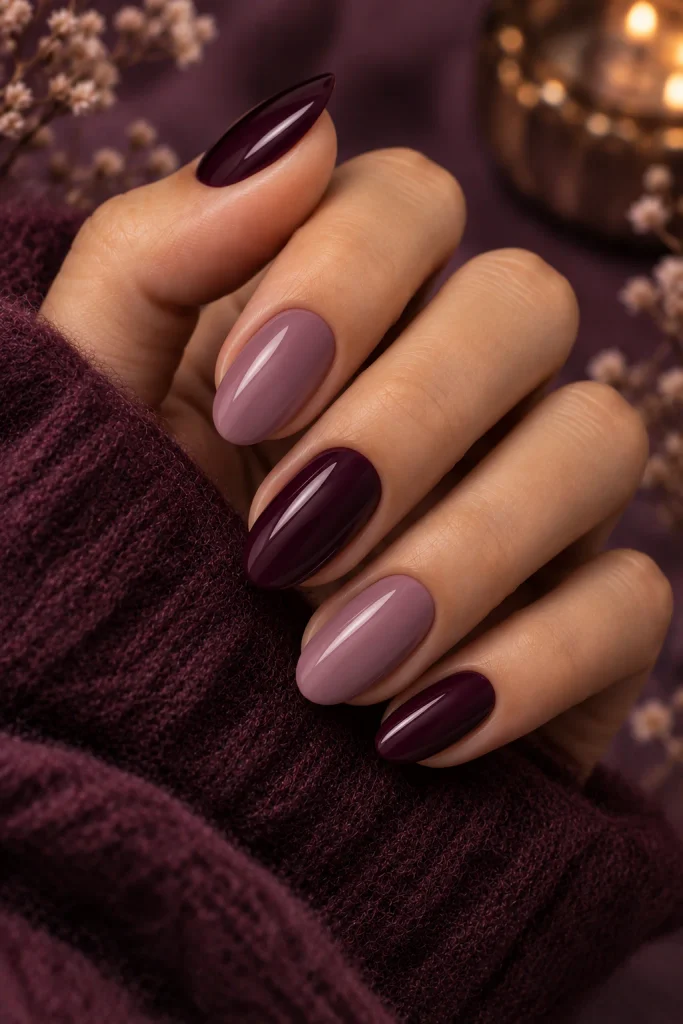
Alternate deep plum and dusty mauve across your fingers. The two shades are close enough to look intentional and calm.
This palette feels soft yet spooky, like the last light of evening. It is a gentle way into classy halloween nails if you usually avoid dark colors.
Best for: Wearers who prefer muted, romantic tones.
How to get it: Paint the thumb, middle, and pinky in plum, and the index and ring fingers in mauve. Finish all nails with a glossy top coat so the two shades feel connected.
11. Black Cat Eye Nails with Silver Shimmer
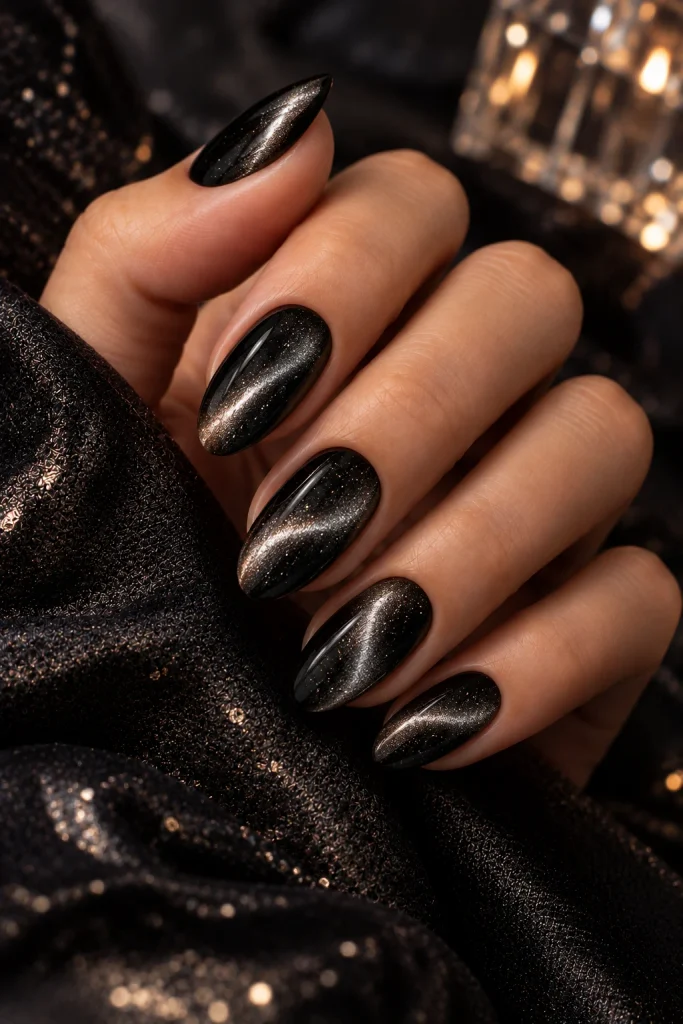
Cat eye gel polish forms a bright line of light across a dark base. In black with silver shimmer, it looks like a starry sky.
The effect is hypnotic and works well on almond or oval shapes. Many people consider this one of the most striking classy halloween nails for evening wear.
Best for: Nights out and dressy outfits.
How to get it: Hold the magnet at an angle near the nail while the polish is still wet, then cure right away. Move the magnet to change the direction of the line.
12. Bone White Skeleton Hand Accent
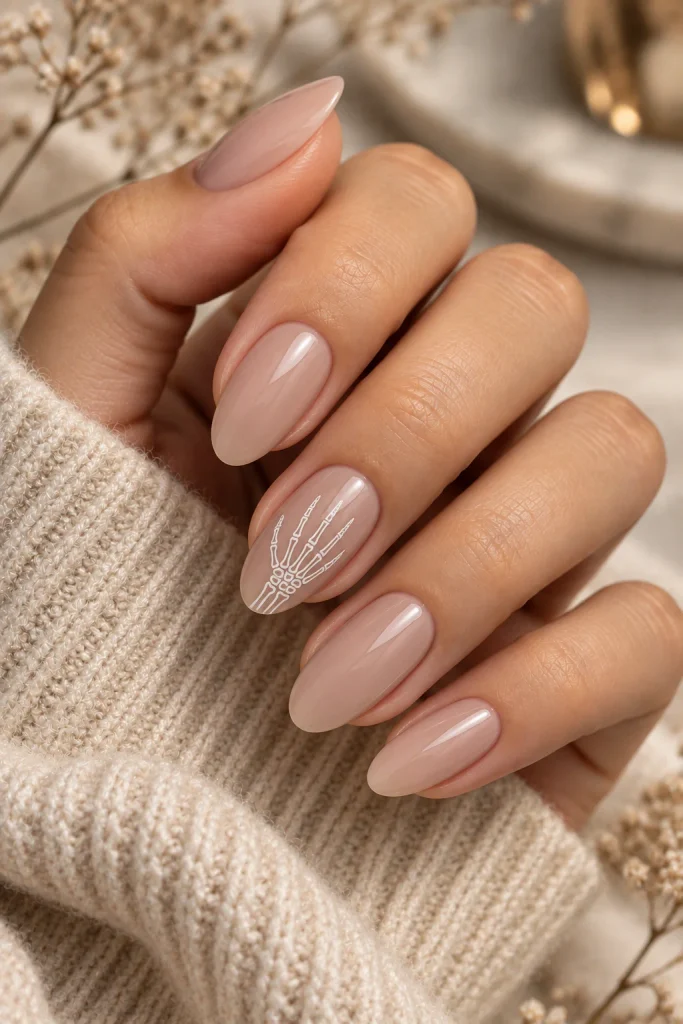
Paint soft nude nails, then add a delicate white skeleton hand outline on one accent nail.
The key is to keep the lines thin and spaced apart. Done well, this becomes one of the cleverest classy halloween nails, because it feels graphic and modern instead of cartoonish.
Best for: Fans of subtle illustration.
How to get it: Use a white gel pen or a fine liner brush. Draw the palm first, then add long, narrow fingers. Keep it simple, since a few lines are plenty.
13. Dark Cherry Glazed Donut Nails
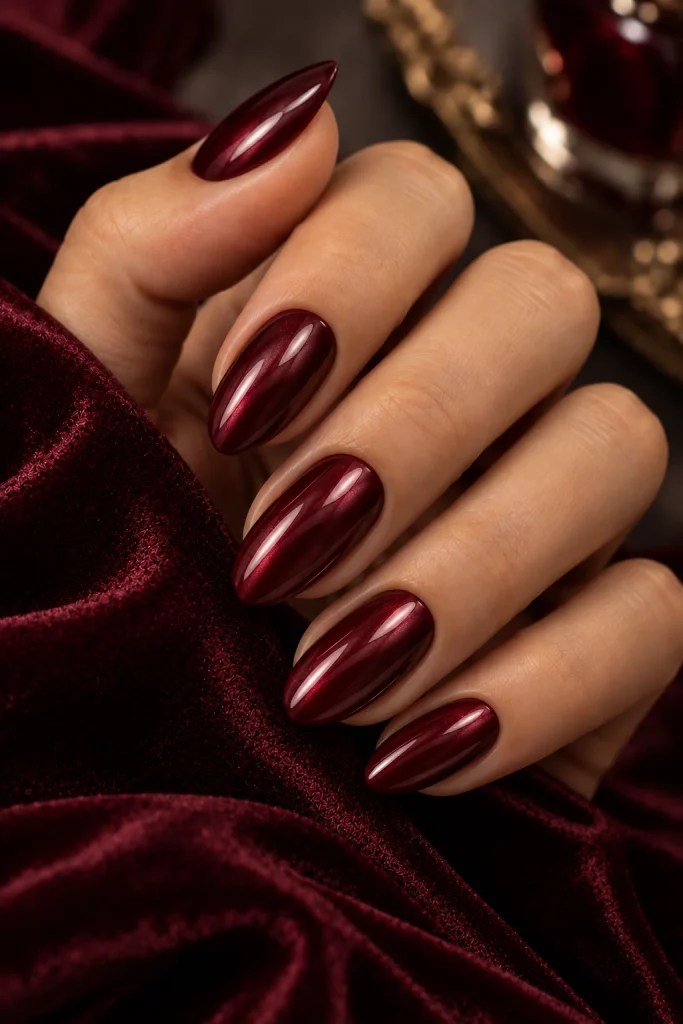
Glazed nails have a pearly, sheer shimmer that looks like a soft sheen on glass. Over dark cherry, the effect is glossy and gentle, like polished stone.
The finish adds light to a deep color. It is a modern spin on classy halloween nails that feels fresh instead of heavy.
Best for: Anyone who likes a shiny, dimensional finish.
How to get it: Apply a cherry cream polish and cure it. Rub a pearl chrome powder over the top, then seal with a top coat.
14. Matte Black Coffin Nails
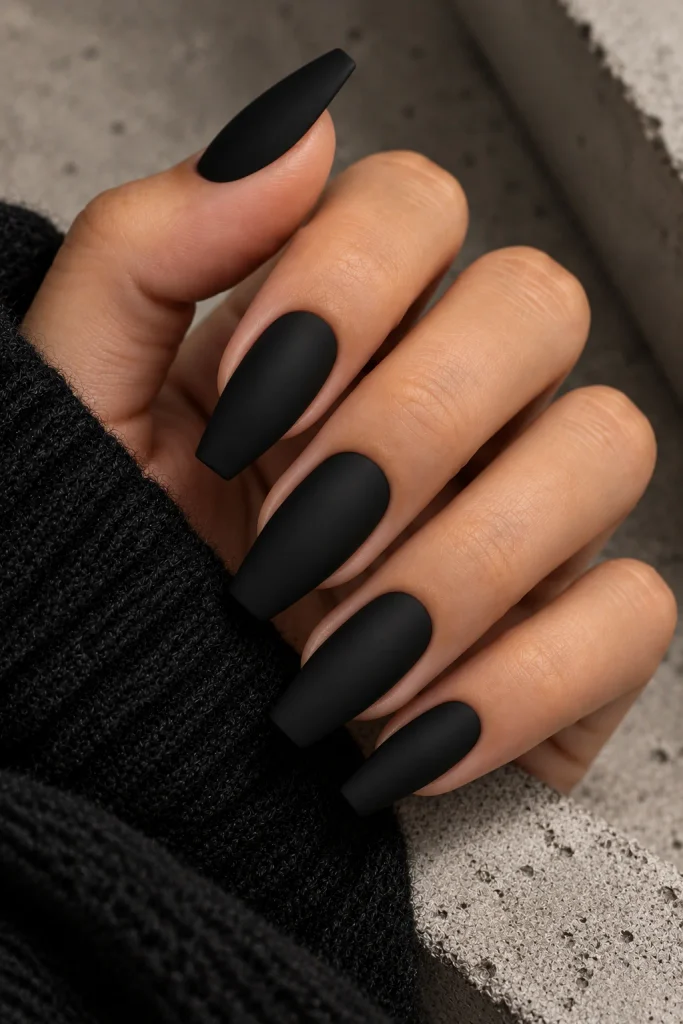
Matte black on a coffin shape is dramatic, but the lack of shine keeps it understated. The finish feels velvety and modern.
It is bold yet clean, which is why it earns a spot among the best classy halloween nails. Keep the length medium so the set stays wearable for daily life.
Best for: A chic, edgy look.
How to get it: Paint with black polish, then use a matte top coat instead of a glossy one. Avoid touching the surface right after, since skin oils show up on matte nails.
15. Black and Gold Marble Nails
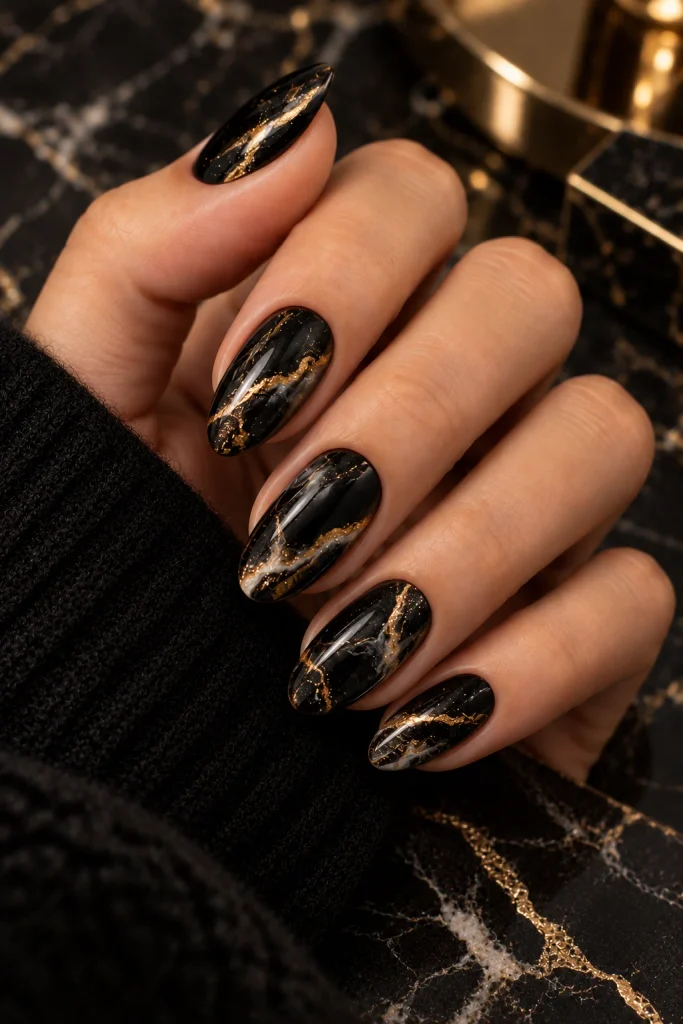
Swirls of gold veining through black polish look like polished stone. The pattern feels elegant and a little mysterious.
Marble works because it needs no clear icons. It is a luxurious choice among classy halloween nails and a good option for anyone who wants art without a theme.
Best for: People who like glam details.
How to get it: Dab a few drops of white and gold onto wet black polish and drag them gently with a thin brush. Seal with a top coat to smooth the ridges.
16. Sheer Blood-Red Jelly Nails
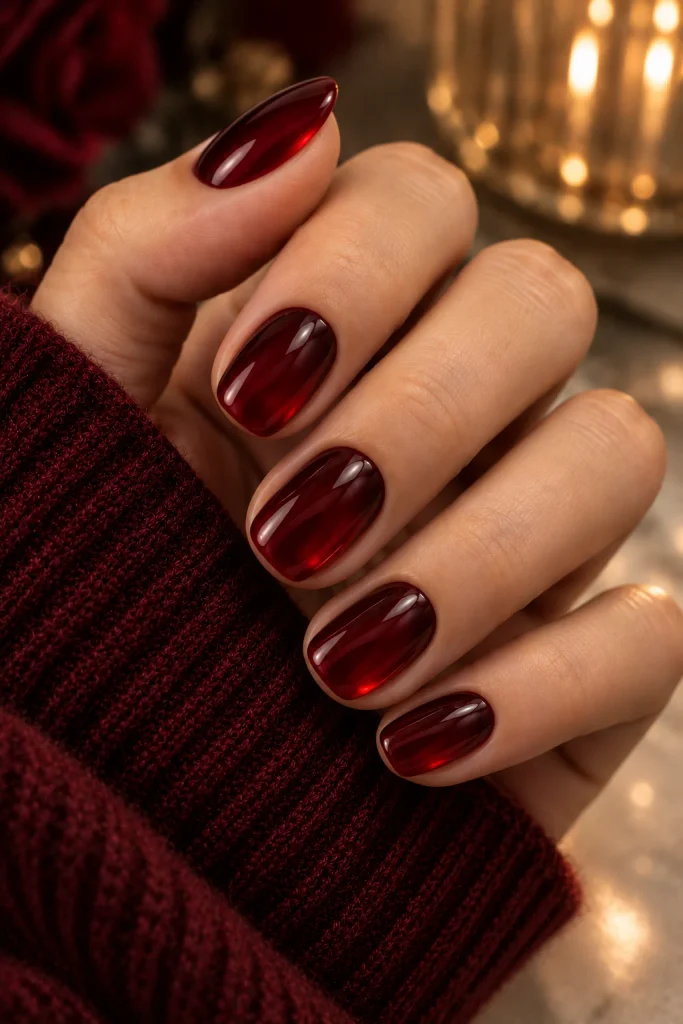
Jelly polish is translucent and juicy. In deep red, it looks like stained glass or a glossy cherry candy.
It is soft, shiny, and a little dark. These sheer classy halloween nails also grow out gracefully, because small gaps and chips are much less visible than they are with opaque colors.
Best for: Short nails and low-maintenance wearers.
How to get it: Build three thin layers of jelly polish for depth. Finish with a thick top coat for that wet look.
17. Black Tips on a Sheer Burgundy Base
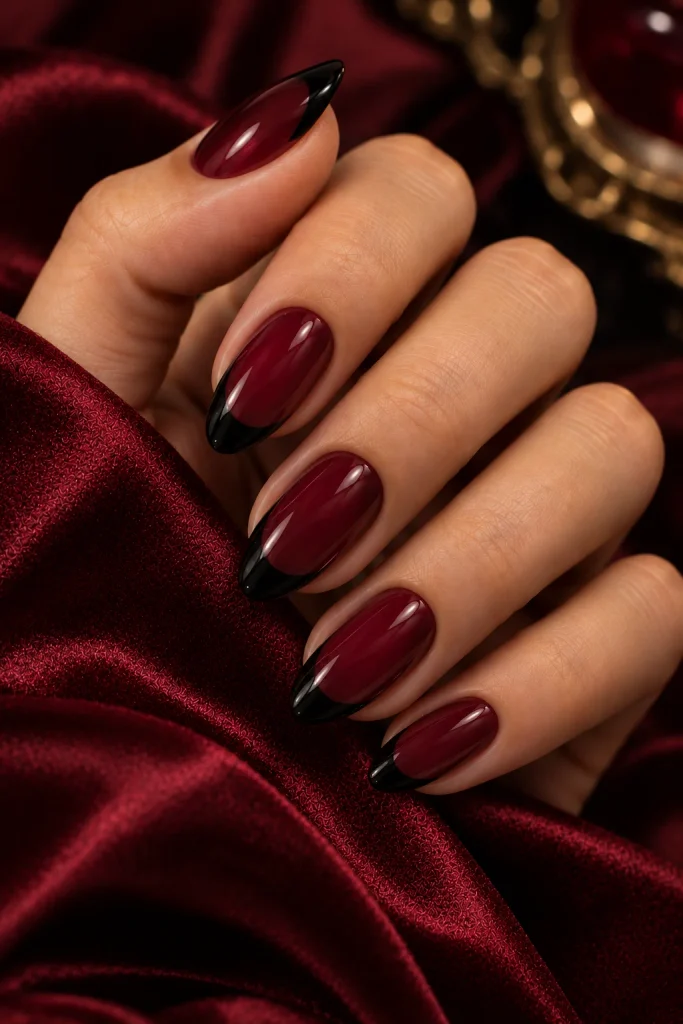
Take the French idea and add a color twist. A sheer burgundy base with black tips feels rich and layered.
The two dark tones blend gently, so nothing looks harsh. These are quiet classy halloween nails that suit both short and medium lengths well.
Best for: Anyone who wants a two-tone moment.
How to get it: Apply a sheer burgundy first. Then paint a clean black tip with a thin brush and cover everything with a top coat.
18. Minimal Black Line Art on Nude
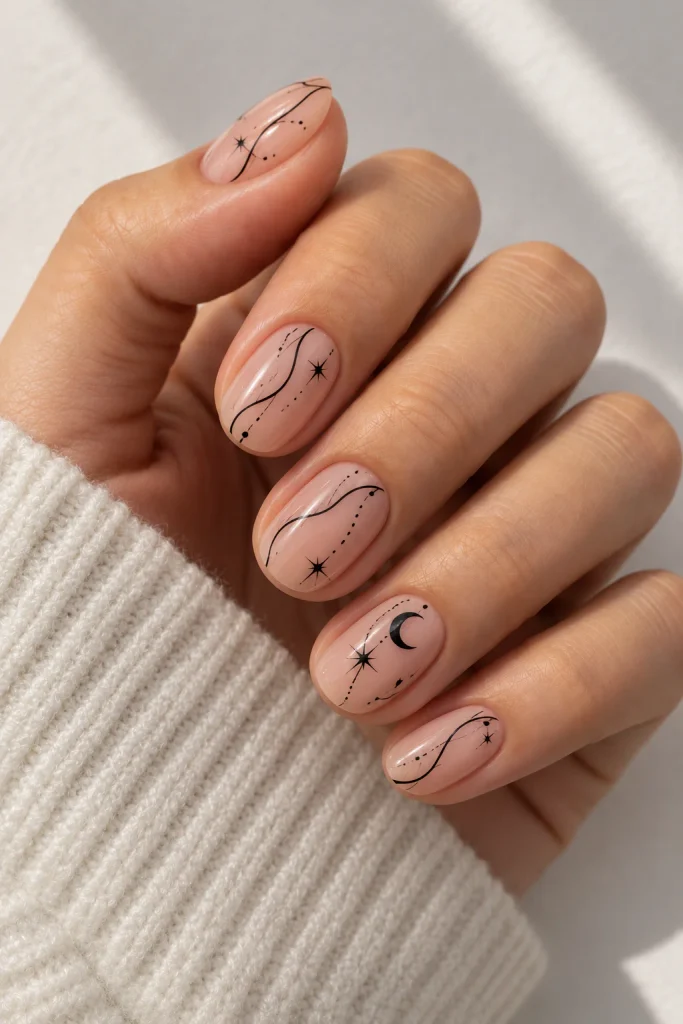
Draw thin black lines on a nude base. Think crossing lines, small stars, or a tiny crescent placed off-center.
The negative space keeps the design modern. This is a clean way to wear classy halloween nails if you prefer art that looks like a sketch in a notebook.
Best for: Minimal fans and short nails.
How to get it: Use a very fine brush and a steady hand. Rest your wrist on a table for support. Keep the lines sparse and let the nude base show.
19. Pewter and Silver Smoke Nails
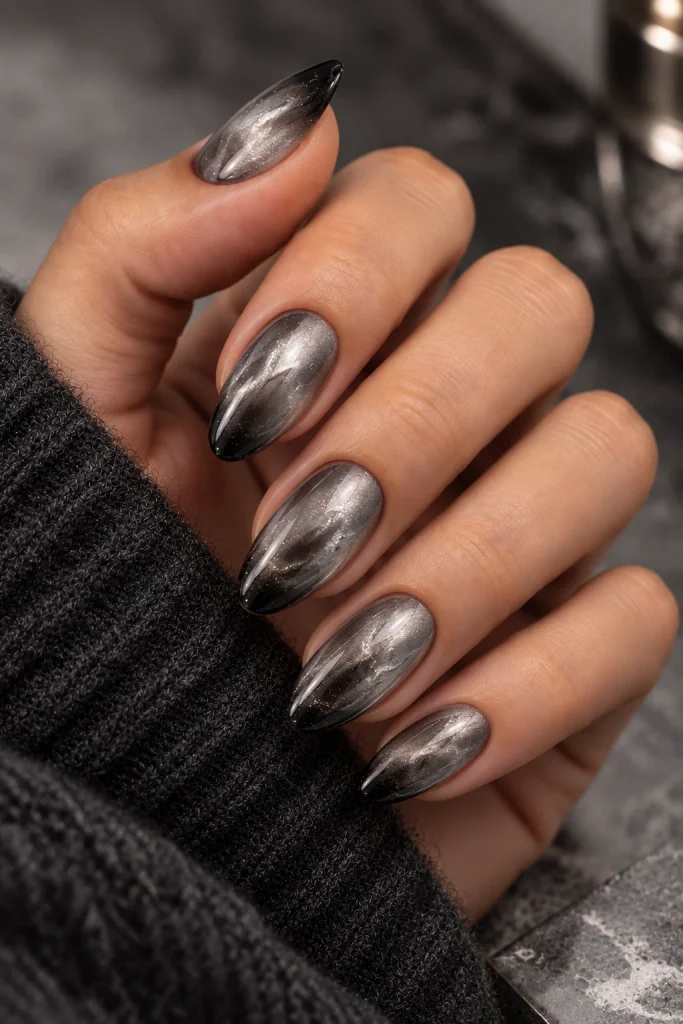
Silver and pewter shades feel cool and ghostly. Blend them with a hint of black at the tips for a mist effect.
The result is moody but light. These classy halloween nails are great if you want a seasonal look that is not warm-toned or heavy.
Best for: Cool undertones and metallic lovers.
How to get it: Sponge silver over a gray base, then dab black near the free edge. Blend with a clean sponge and seal with top coat.
20. Tortoiseshell with a Dark Twist
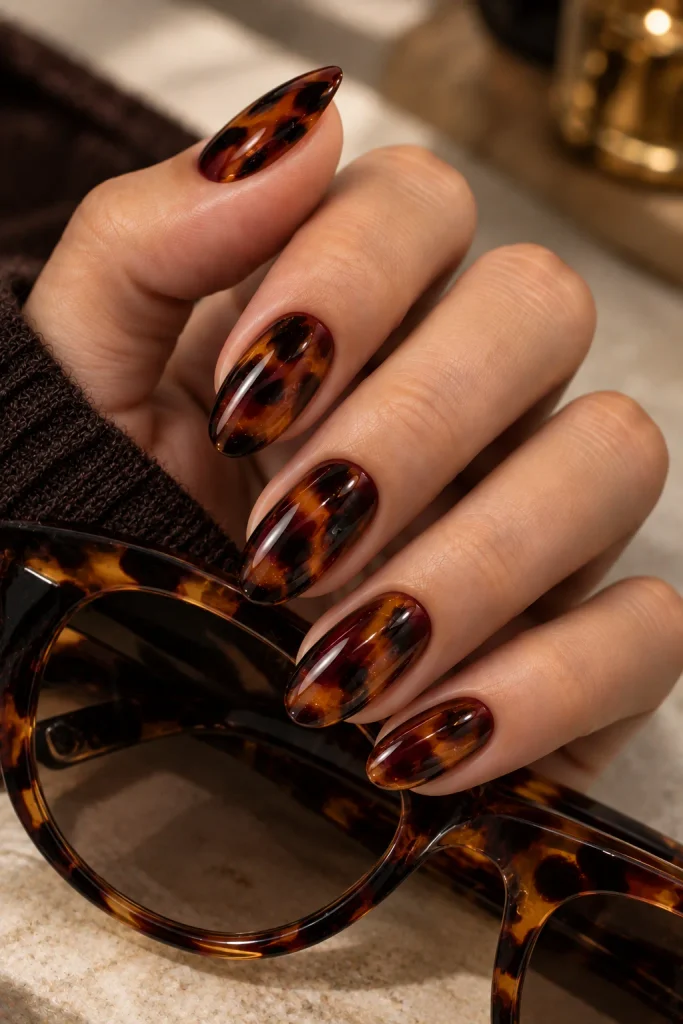
Classic tortoiseshell uses amber and brown. Swap in deep burgundy and black spots for a darker, moodier version.
The pattern looks like glossy, luxe material. It is one of the more fashion-forward classy halloween nails, and it adds visual interest without any icons.
Best for: People who love animal-print texture.
How to get it: Apply a sheer amber base, then dab burgundy and black blobs with a small brush. Blur the edges slightly and finish with a top coat.
21. Black Moon Phase Nails
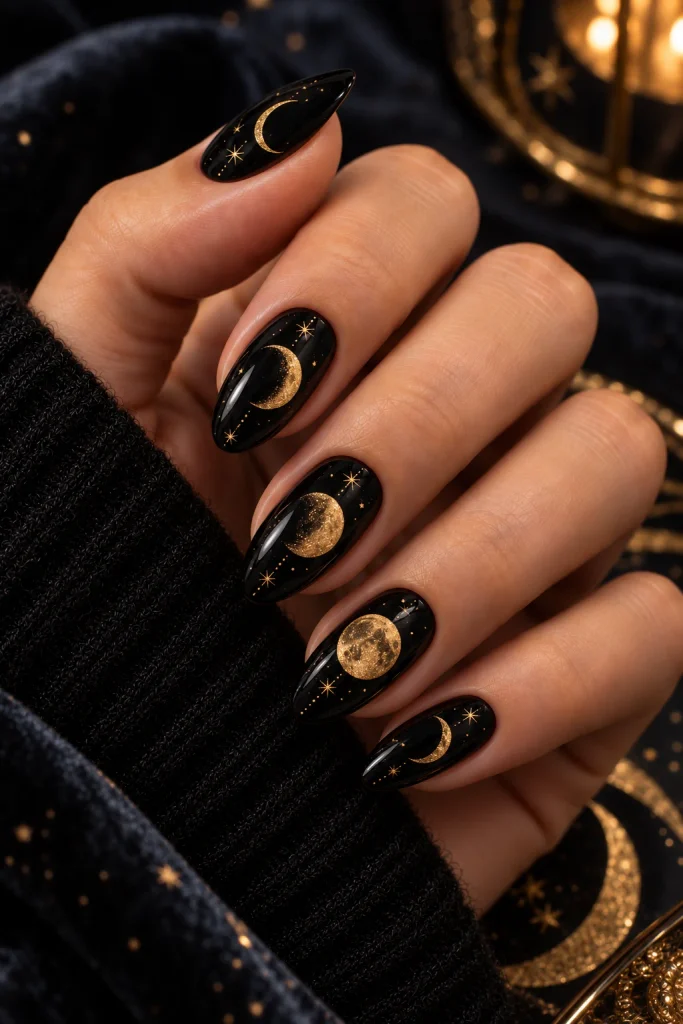
Place a row of moon phases across your nails. Use gold or silver on a black base, from a thin crescent to a full moon.
It feels celestial and calm. These classy halloween nails have a mystical quality that suits anyone who loves jewelry and symbols.
Best for: People who enjoy designs that tell a story.
How to get it: Use a dotting tool for the full moon, then shift the dot to shape the crescents. Tiny nail stickers are a faster option if you do not want to paint by hand.
22. Dark Velvet Plum with Gold Foil Flakes
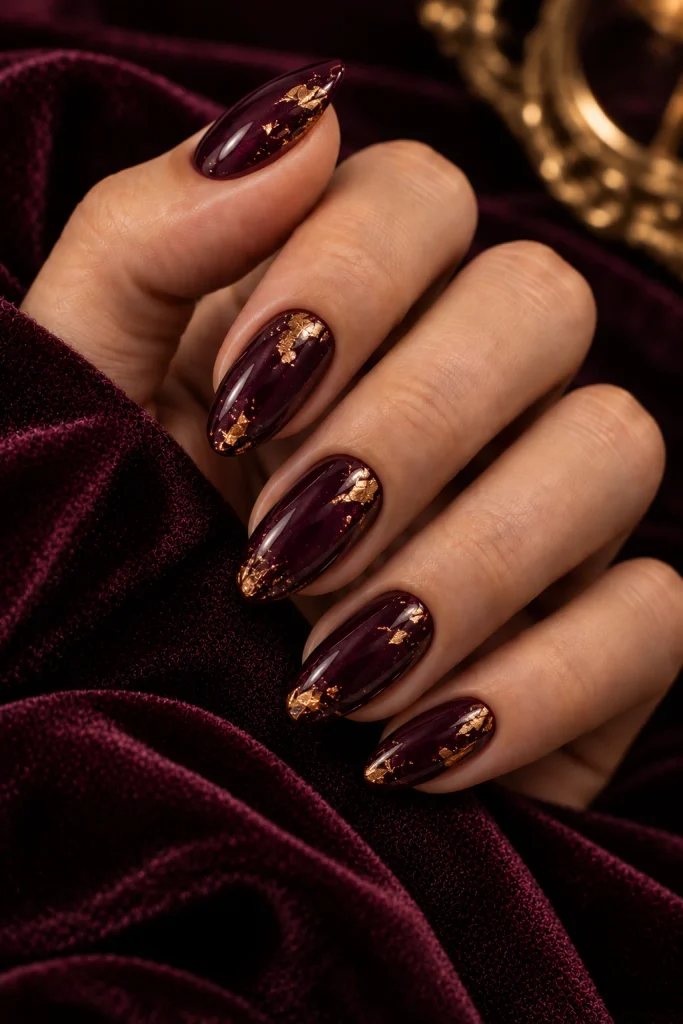
Scatter a few gold foil flakes over deep plum polish. The flakes shine like tiny embers in the dark.
Keep them sparse and place them near the cuticle or the tip. Used lightly, foil makes classy halloween nails look like a luxury edit instead of a craft project.
Best for: Glam lovers who like shimmer.
How to get it: Press flakes onto tacky polish with tweezers. Cover with a thick top coat to smooth the edges so nothing snags on your hair or sweaters.
23. Black Rose Nail Art
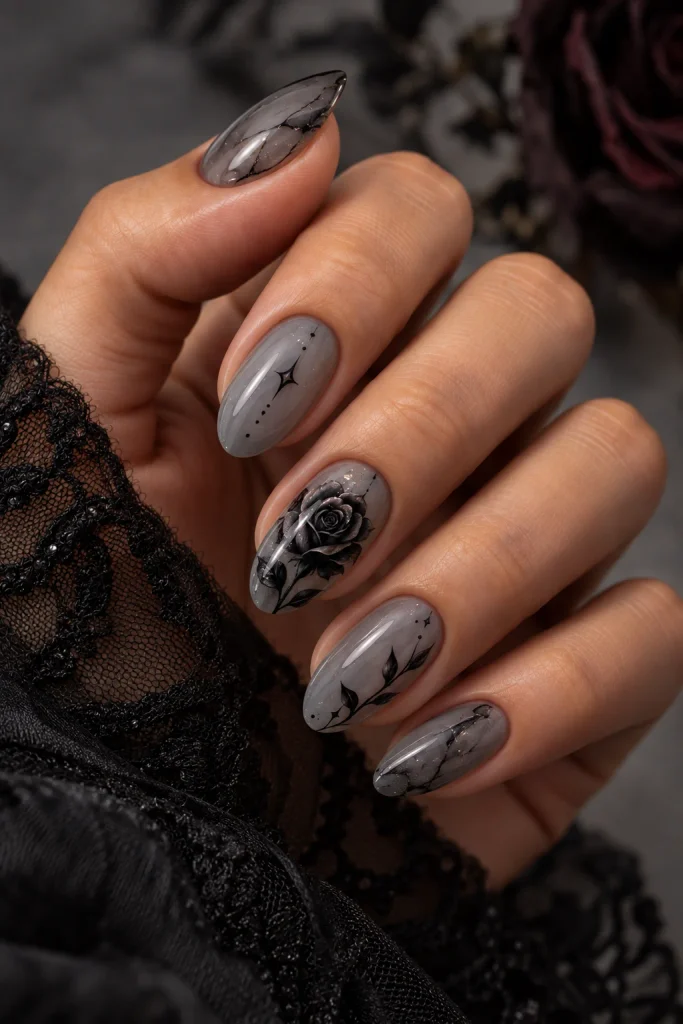
A single black rose on a soft gray or nude nail looks gothic and romantic at the same time.
Roses feel timeless, which keeps the look from seeming too holiday-themed. These might be the most elegant classy halloween nails for special events, such as a gallery opening or a night at the theater.
Best for: Detail lovers with a steady hand, or anyone willing to visit a salon.
How to get it: Ask your nail tech for a hand-painted rose. At home, try a rose decal and seal it well with two layers of top coat.
24. Press-On Black Stiletto Nails
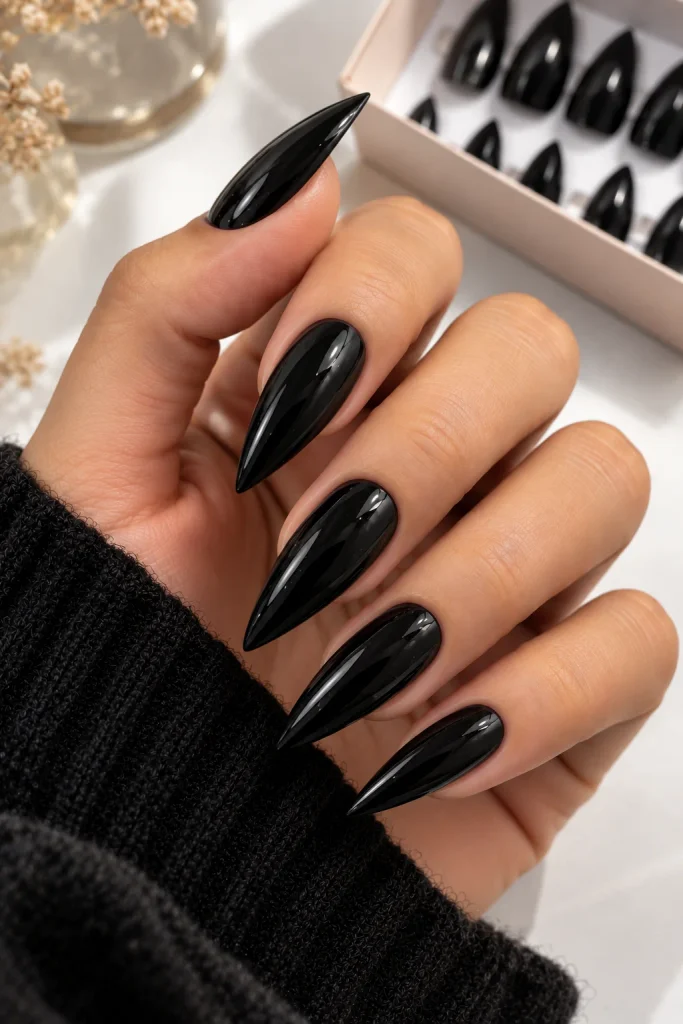
Short on time? Press-ons give you a full set in minutes. A glossy black stiletto set looks sharp and dramatic.
Modern press-ons look natural and can last for days. A reliable option such as Press-On Nails makes classy halloween nails easy, even if you have never done your own manicure.
Best for: Beginners and busy schedules.
How to get it: Size each nail first. Clean and lightly buff your natural nail, then press each one down and hold for about 30 seconds.
25. Dark Cherry with a Gold Cuticle Line
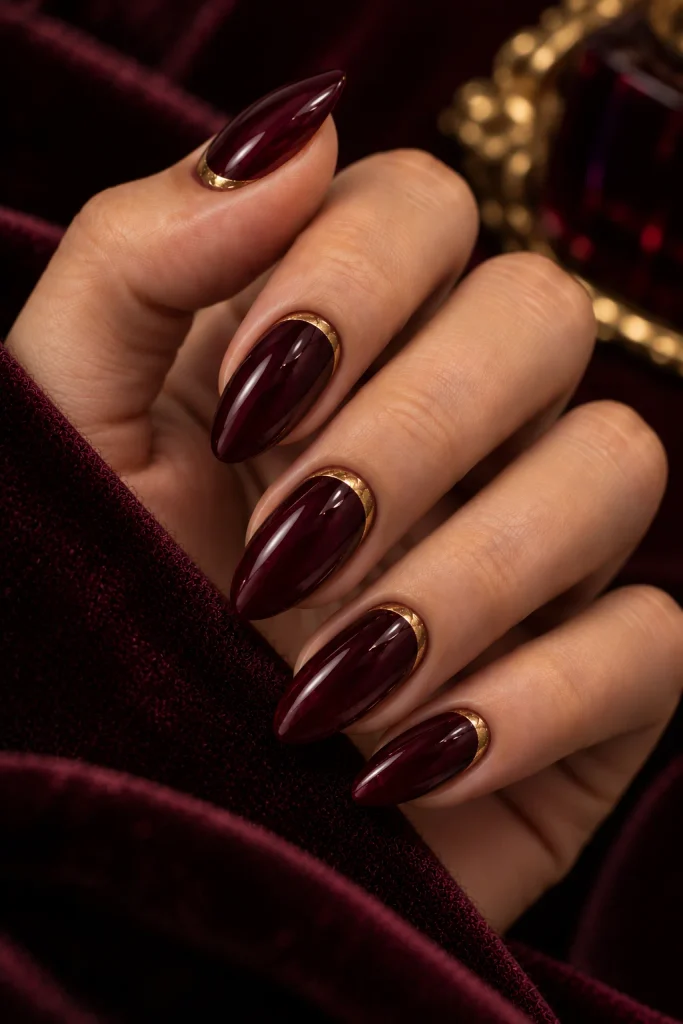
Paint nails dark cherry, then trace a slim gold line near the cuticle. It looks like a tiny crescent of jewelry.
The detail is small but sophisticated. It is a fitting finale among classy halloween nails, because it proves that one thin line of metallic can transform a whole set.
Best for: Wearers who like quiet details.
How to get it: Use a thin brush and a steady hand, or use gold striping tape for a perfectly straight line. Seal it with a top coat so the metallic does not scratch off.
What Makes Halloween Nails Look Classy?
Before the ideas, here is the simple formula. It helps you judge any design, even ones that are not on this list.
The palette is tight. Stick to two or three shades. Black, burgundy, plum, forest green, bone white, and metallic gold are the safest picks. A small palette is the first rule of classy halloween nails.
There is one focal point. One accent nail or one small detail is enough. When every nail has a different icon, the set looks busy and loses its polish.
Suggestion beats illustration. A thin web line says “spooky” more elegantly than a full cartoon spider. Hint at the theme and let people fill in the rest.
The finish is clean. A sharp shape, tidy cuticles, and a glossy top coat make even a plain black manicure look expensive. Neat work matters more than complicated art.
The length is wearable. Short and medium nails feel modern and easy. Long nails can still be classy if the design is restrained.
Keep these five points in mind as you scroll. Each idea below follows them.
Best Nail Shapes for Classy Halloween Nails
The shape you pick changes how a design feels. Here is a quick guide to help you match the form to the mood.
Almond. Soft and elegant. It elongates the fingers and suits glossy, dark colors. It is the most flattering choice for most hands.
Short square. Clean and practical. It looks great in oxblood and cream finishes, and it holds up well to daily tasks.
Short round or squoval. Gentle and neat. It is a safe pick for sheer jelly colors and minimal line art.
Oval. Gentle and timeless. It works well with nude bases and soft, sheer designs.
Coffin. Bold and modern. Keep it at medium length so the set stays classy and does not tip into costume territory.
Stiletto. Dramatic and fashion-forward. It looks best with simple, solid colors and a flawless finish.
If you are unsure, start with almond. It flatters most hands and suits nearly every design in this list. If you type a lot or work with your hands, choose a shorter length and a rounded edge.
Best Colors for Classy Halloween Nails
A smart palette does half the work. Use this cheat sheet when you are standing in front of a wall of polish.
Black. The classic. Choose a glossy or matte finish and skip chunky glitter.
Oxblood and burgundy. Rich, warm, and easy to wear in any setting.
Plum and mauve. Soft but moody, with a romantic feel.
Forest green. Unexpected and elegant, especially in a cream finish.
Gray, pewter, and silver. Cool and ghostly, perfect for ombre and smoke effects.
Gold accents. Use them sparingly to add a jewelry-like touch to classy halloween nails.
Bone white. Ideal for fine art on dark or nude bases.
A simple trick: choose one main color, one support color, and one metallic. For example, black, burgundy, and gold. This three-part rule keeps your set balanced.
Best Finishes for a Polished Look
Color is only part of the story. The finish changes how a shade looks and feels.
Glossy cream. The most classic option. It looks clean and works on every shape.
Matte. Velvety and modern. It makes dark shades look deeper and more dramatic.
Chrome and mirror. Reflective and bold. Best when used in a single color across all nails.
Cat eye and magnetic. A soft band of light that moves as you do. It adds depth without art.
Jelly and sheer. Translucent and juicy. It is forgiving and grows out neatly.
Glazed. A pearly, soft shimmer. It adds a modern glow to deep colors.
You can mix finishes in one set, but keep it simple. A matte base with a glossy accent nail, for instance, feels intentional and chic.
How to Choose a Design That Suits You
Not every idea fits every person. Ask yourself three quick questions.
What is your daily routine? If you work in an office, go for oxblood, forest green, or black French tips. If you want something for a night out, try cat eye, chrome, or foil.
How much time do you have? Solid colors and press-ons take little time. Marble, florals, and hand-drawn art take longer or need a salon visit.
What is your skill level? Beginners should start with one color and a good top coat. Once that feels easy, add one small accent such as a gold line or a web on a single nail.
Matching the design to your life is the best way to enjoy classy halloween nails for the whole season, not just for one photo.
How to Do Classy Halloween Nails at Home
You can create a salon-quality set with a little prep and patience. Here is a simple routine.
Step 1: Prep. Push back your cuticles gently, shape your nails, and wipe them with alcohol so the polish sticks. Keep the skin around your nails soft with an oil .
Step 2: Base coat. A good base prevents staining and helps color last. A rubberized formula adds grip and reduces chipping.
Step 3: Color. Use two thin coats instead of one thick one. Thin layers dry faster and look smoother. Wait a minute between coats.
Step 4: Detail. Add lines, dots, or foil with a clean brush. Work on one nail at a time so the polish does not dry before you finish.
Step 5: Top coat. This step is what makes classy halloween nails look polished. A high-shine option like Gel Couture Top Coat gives a gel-like finish without a lamp.
Finally, cap the free edge of each nail by running the brush along the tip. This seals the polish and helps it last longer.
How to Make Classy Halloween Nails Last Longer
A good manicure should last at least a week. These habits help.
Wear gloves when you wash dishes or clean. Water and soap weaken polish over time.
Apply cuticle oil once a day. It keeps the skin soft and the nails flexible.
Add a fresh layer of top coat every two to three days. It refreshes the shine and seals small scratches.
Avoid using your nails as tools. Opening cans and scraping labels causes chips fast.
Take care when removing dark polish. Soak a cotton pad in remover, press it on the nail for a few seconds, then wipe once. This stops black pigment from staining your skin.
Give your nails a rest between sets if they feel thin or dry. Healthy nails hold color better.
Common Mistakes to Avoid
Too many themes at once. A bat, a pumpkin, and a skull on one hand will break the classy feel. Pick one idea and let it breathe.
Thick polish layers. They bubble and peel. Use thin coats every time.
Skipping the top coat. Without it, even the best classy halloween nails look dull and wear down faster.
A messy cuticle area. Clean edges matter more than complex art. Use a small brush dipped in remover to tidy up.
Too much glitter. A little sparkle can be pretty. A lot of glitter makes a set look like a craft project.
Ignoring your skin tone. Warm skin loves oxblood, forest green, and gold. Cool skin often prefers plum, silver, and a cool-toned black.
Frequently Asked Questions
What are classy Halloween nails?
Classy Halloween nails are subtle, polished designs that hint at the spooky season without using cartoon icons. They rely on deep colors like black, burgundy, and plum, clean shapes, and small details like a gold line or a single web accent.
What colors work best for classy Halloween nails?
The best colors are black, oxblood, burgundy, plum, forest green, gray, and bone white. Metallic gold and silver work well as small accents. Keep the palette to two or three shades for the most elegant result.
What nail shape is best for classy Halloween nails?
Almond and short square shapes are the safest choices. Almond looks elegant and flattering, while short square feels clean and practical. Coffin and stiletto work for bolder looks if you keep the design simple.
Can I do classy Halloween nails at home?
Yes. Many designs on this list use simple steps like a single color, a top coat, or one accent nail. Press-on sets are a good option if you want a fast result with no drying time.
How do I keep black nail polish from looking cheap?
Use thin coats, a quality formula, and a thick glossy top coat. Keep your cuticles clean and your shape consistent. Those three habits make black classy halloween nails look salon-made.
Are matte nails or glossy nails more elegant?
Both can look elegant. Glossy nails feel classic and bright, while matte nails feel modern and a little edgy. Choose the finish that suits your outfit and your comfort level.
How long do Halloween nails last?
Regular polish lasts about five to seven days. Gel polish can last two weeks or more. Press-ons usually last from several days to two weeks, depending on prep and glue.
Final Thoughts
Elegance in nail art comes from restraint. Pick a rich color, keep the shape clean, add one small detail, and seal it with a shiny top coat. That is the whole secret behind the best classy halloween nails.
Start with the idea that matches your comfort level. If you are new to nail art, try glossy black almonds or oxblood squares. If you love detail, try the black rose or the moon phase set.
Save this list to your nail board so you can come back whenever you are ready for your next manicure. Whichever set you choose, your classy halloween nails will look polished, personal, and effortlessly chic.