Pumpkin and ghost nails get old fast. If you want a set that gets compliments, you need something with more thought behind it.
That is where unique Halloween nails come in. They mix texture, color, and clever details so your manicure looks styled, not themed. Think smoky chrome, tiny stitched seams, velvet magnetic polish, and gothic lace.
This guide gives you 30 unique Halloween nails ideas, sorted from simple to advanced. Each one has a clear description, a difficulty level, and a quick tip from a working manicure routine. You will also find shape advice, product picks, and a short FAQ.
Save your favorites to your Pinterest board as you scroll. Most of these designs work on short, medium, or long nails. If you are new to nail art, start with the easy ones. They look polished with very little practice.
Ready to find your set? Let’s start.
What Makes Halloween Nails Truly Unique?
Not every spooky manicure stands out. The best unique Halloween nails share three traits.
1. A clear focal point. One bold detail beats five small ones. Pick a hero element, such as a drip, a web, or a chrome finish.
2. A limited palette. Two or three colors keep the set looking expensive. Black, burgundy, and bone white work almost every time.
3. Texture. Matte, glossy, glitter, velvet, and chrome all add depth. Mixing two finishes is a simple way to make a design look custom.
Keep these three rules in mind as you browse. They also help you adapt any idea below to your own taste.
Easy Unique Nails for Beginners
These designs need basic tools and very little time. They are the best starting point if you want unique Halloween nails without a steep learning curve.
1. Blood Drip French Tips
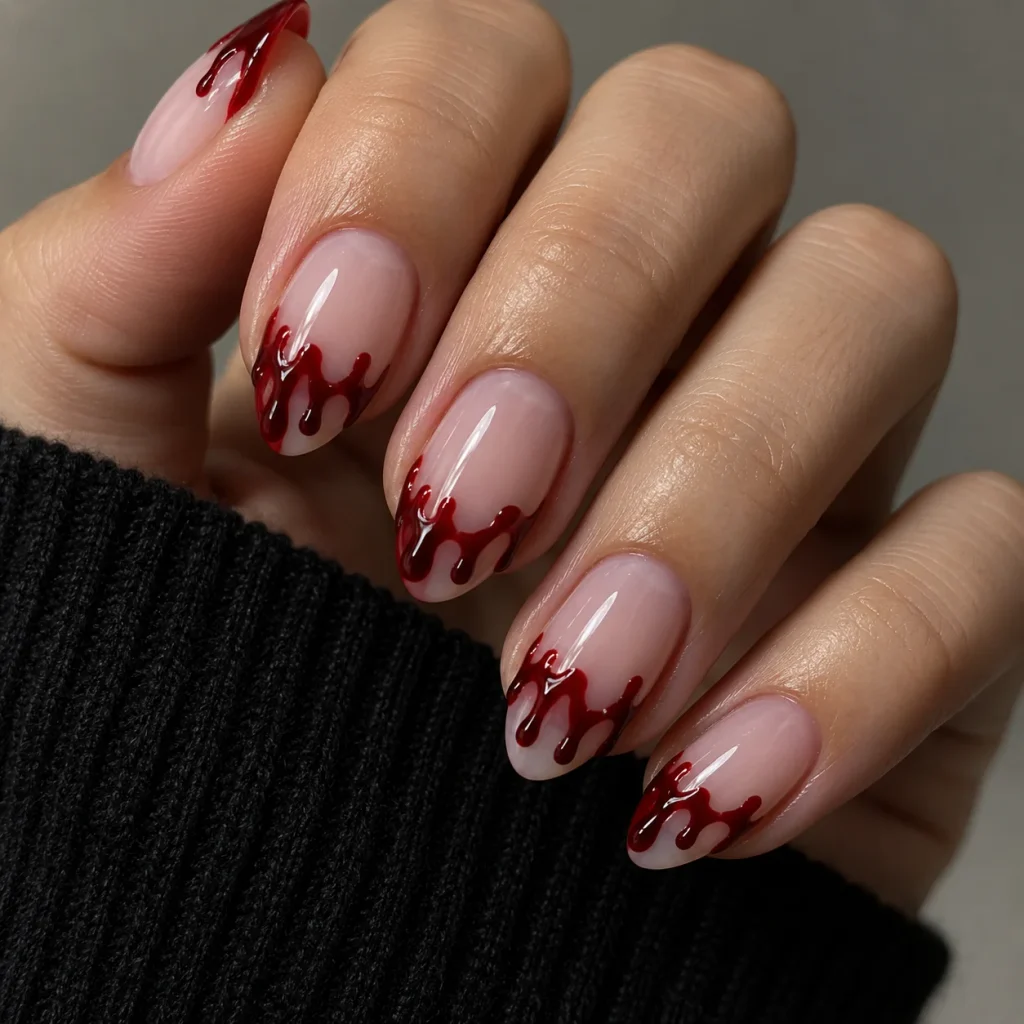
Start with a sheer nude or milky base. Then paint a deep red tip that drips down in uneven lines. The drips should vary in length so the look feels natural.
This is one of the most popular unique Halloween nails because it is bold but still clean. Add a glossy top coat to make the red look wet.
Difficulty: Easy. Tip: Use a thin brush and thicken the polish slightly on the cap. Thicker polish drips better.
2. Black Micro French
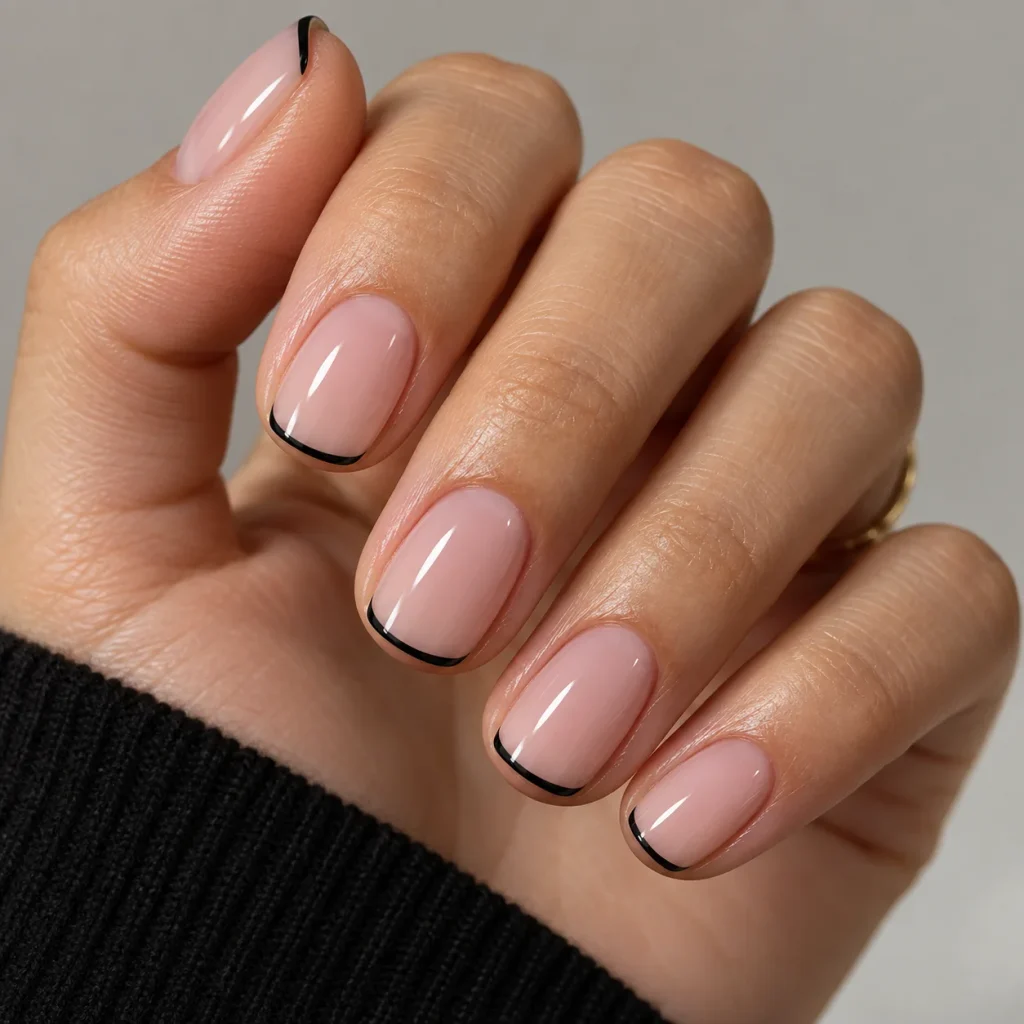
Paint a thin black line along the free edge of each nail. Keep the line almost hair-thin. The rest of the nail stays sheer pink or clear.
This minimalist take on unique Halloween nails suits short nails and work settings. It reads as chic first and spooky second.
Difficulty: Easy. Tip: Rest your pinky on the table to steady your hand while you draw the line.
3. Single Spider Web Accent
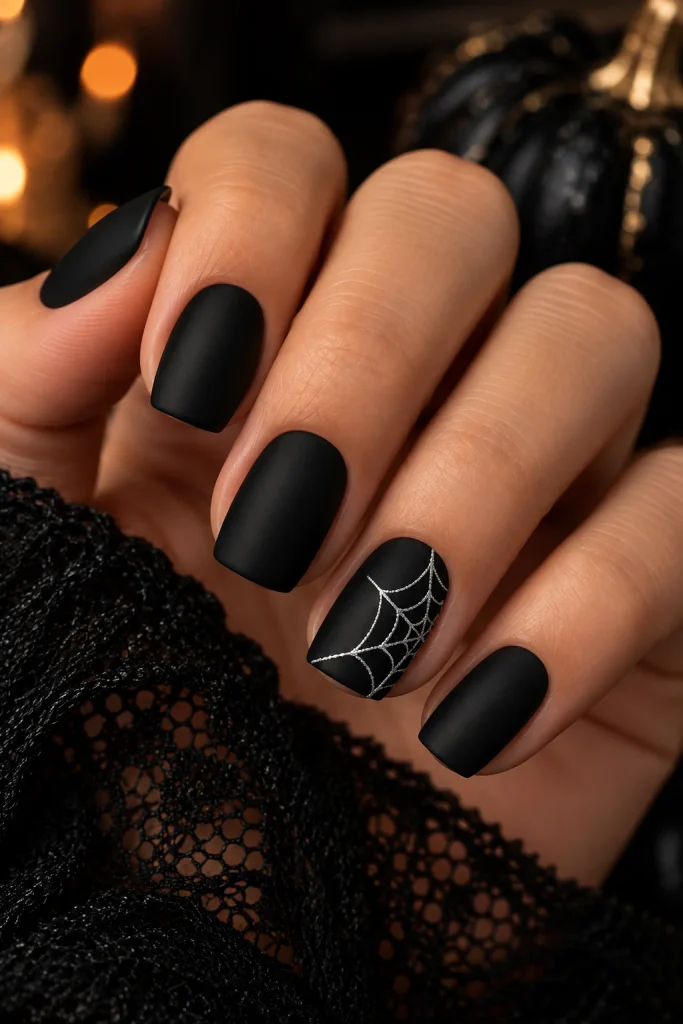
Paint all nails in a matte black or deep plum. On the ring finger, draw a simple web using a fine brush and silver or white polish.
A single accent keeps unique Halloween nails from looking busy. Start with three straight lines from one corner, then curve small arcs between them.
Difficulty: Easy. Tip: A nail art dotting tool and brush set makes the thin web lines much easier to control.
4. Burgundy and Black Half Moon
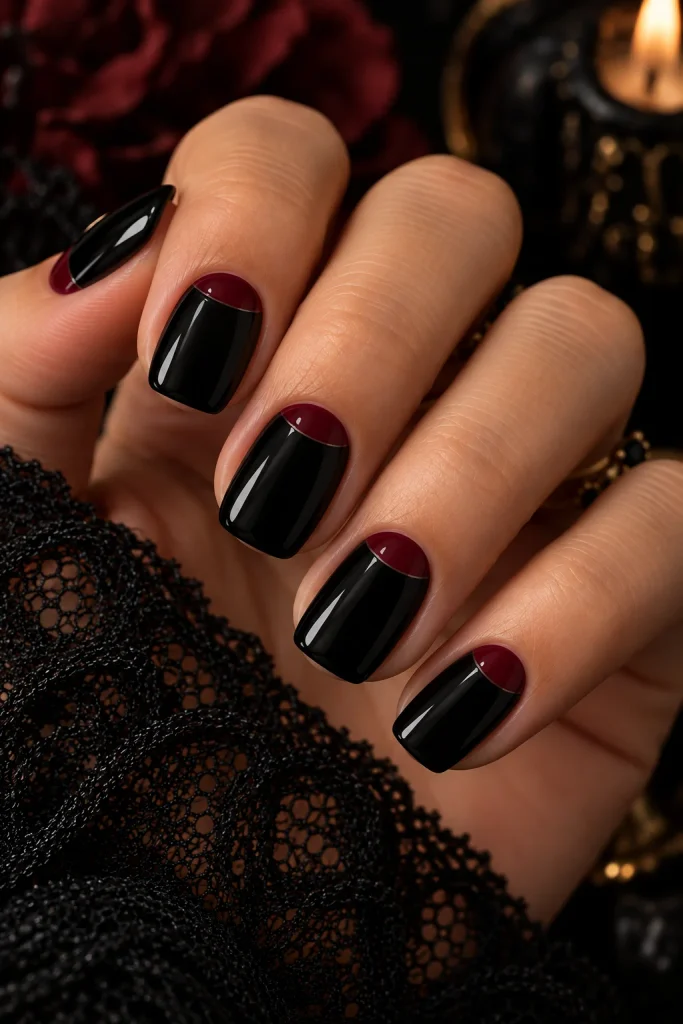
Paint the nail in black. Leave a small crescent at the base bare or fill it with burgundy. The contrast looks sleek and modern.
Half moon designs make unique Halloween nails feel fashion-forward. Use a reinforcement sticker as a guide for a clean curve.
Difficulty: Easy. Tip: Remove the sticker while the top layer is still slightly wet to avoid ragged edges.
5. Ghost White Sheer Gradient
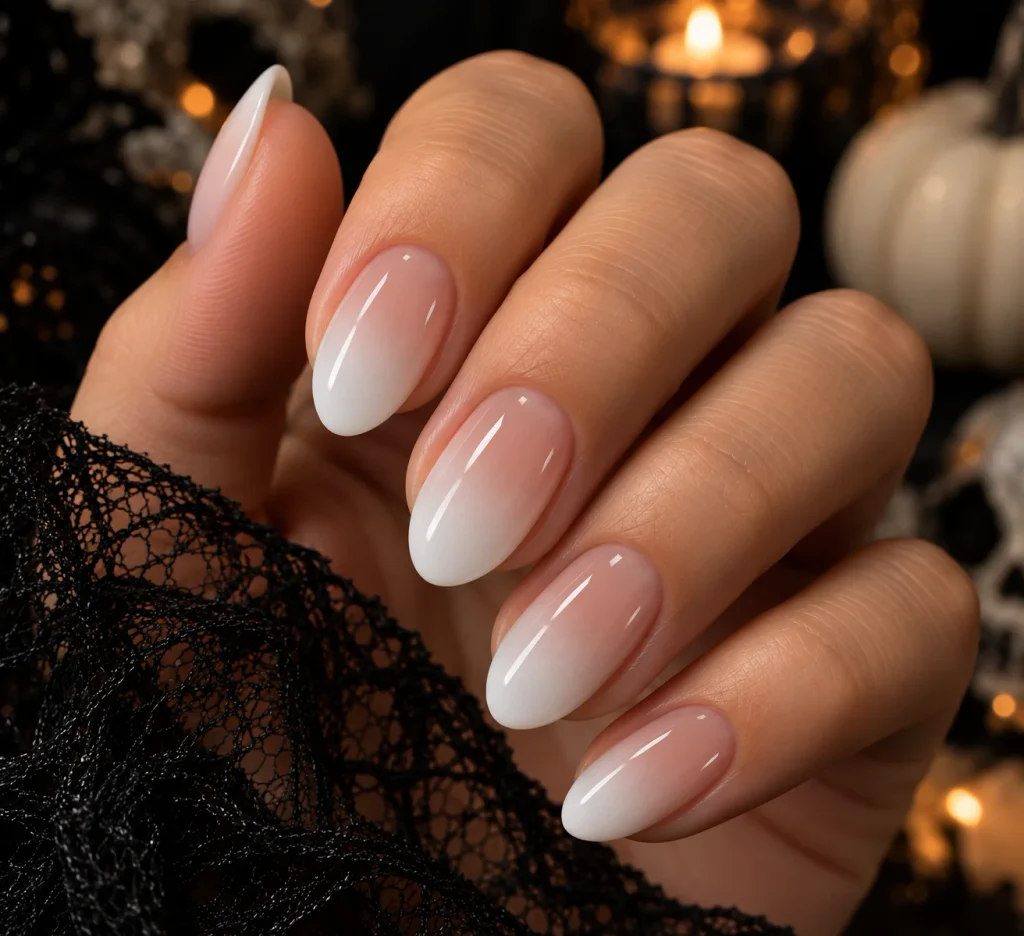
Fade a milky white polish from the tip down to a clear base. The soft ombré looks like mist or a faded spirit.
This quiet style of unique Halloween nails works on every skin tone. Use a makeup sponge to blend the white for a smooth fade.
Difficulty: Easy. Tip: Dab, do not drag. Two thin layers blend better than one thick layer.
6. Tiny Stitched Seams
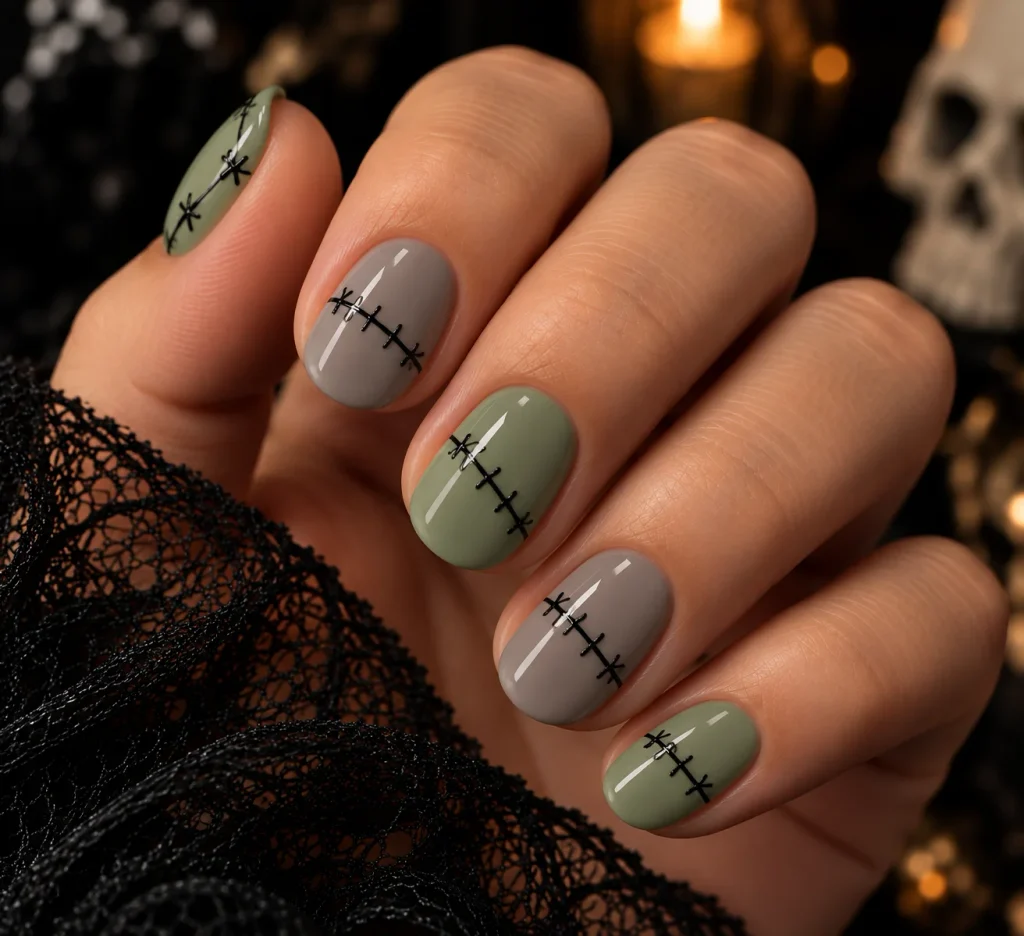
Paint your nails in a flat color such as sage green or dusty gray. Then draw a thin black line across the nail with short cross-stitches on top.
The look is playful and slightly eerie, which makes it one of the most original unique Halloween nails here. It works well on short nails.
Difficulty: Easy to medium. Tip: Draw the long line first, then add stitches in even spacing.
7. Matte Black with Glossy Moon
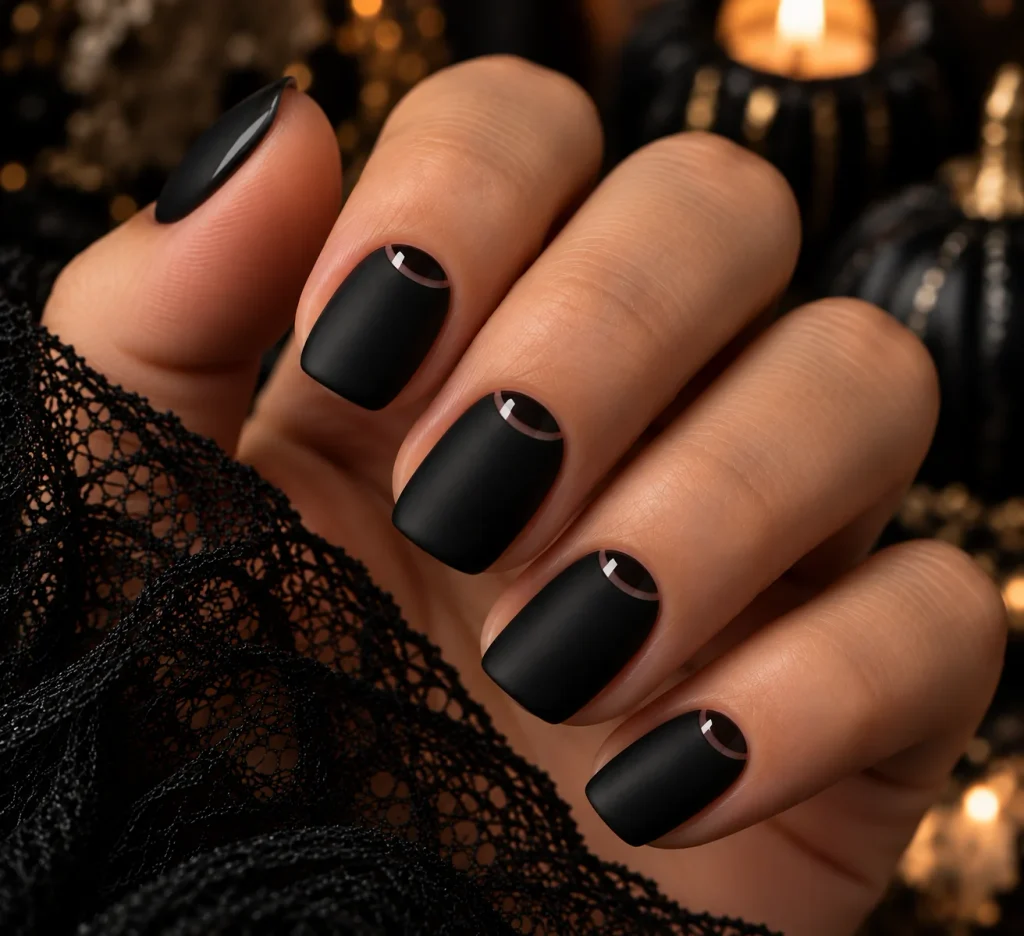
Apply a matte top coat over black polish. Then paint a small crescent in glossy clear polish near the cuticle. The contrast shows up only in the light.
This subtle detail gives unique Halloween nails a hidden surprise. Many people will not notice it right away, which is part of the charm.
Difficulty: Easy. Tip: Let the matte coat dry fully before adding the gloss detail.
Dark and Moody Unique Halloween Nails
Deep shades and rich finishes create a gothic look. These unique Halloween nails feel elegant, almost like jewelry.
8. Oxblood Velvet Magnetic Nails
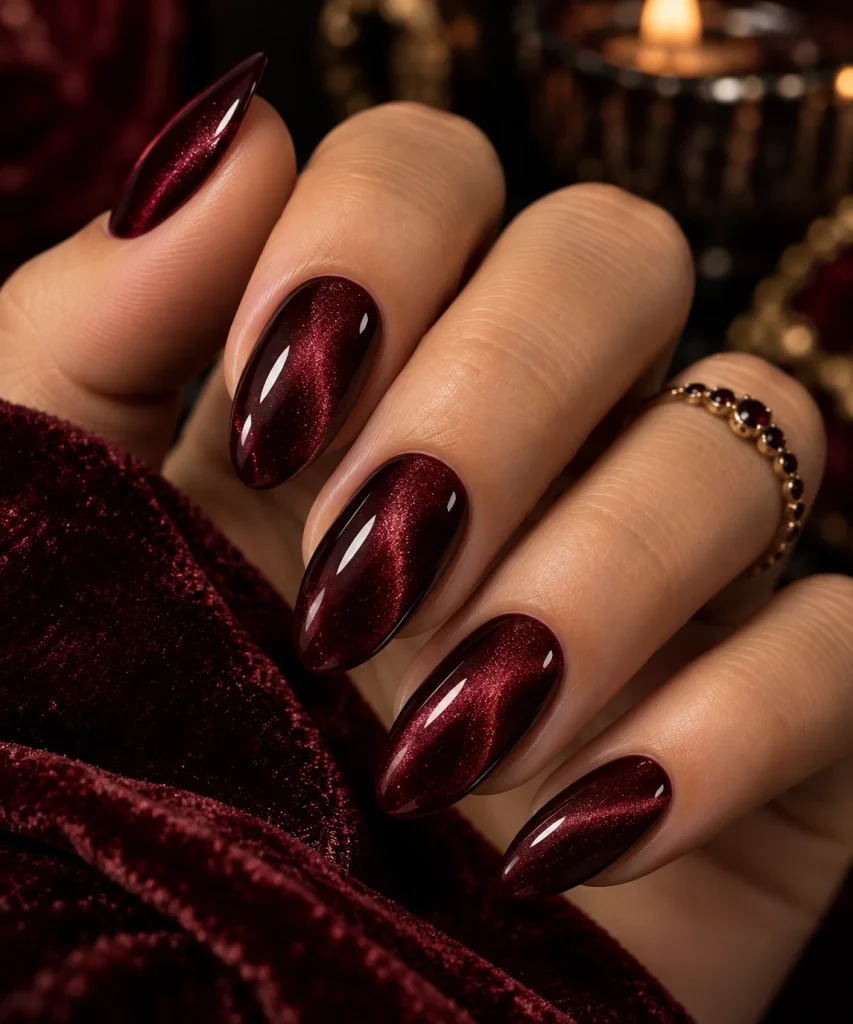
Use a magnetic gel polish in deep red or wine. Hold a magnet over the wet polish to create a soft, shimmering sheen that looks like velvet.
These unique Halloween nails shift with the light. They need a gel system and a lamp. A Beetles gel nail polish kit is a budget-friendly way to start.
Difficulty: Medium. Tip: Hold the magnet about two millimeters above the nail for five to ten seconds before curing.
9. Black Cherry Glass Nails
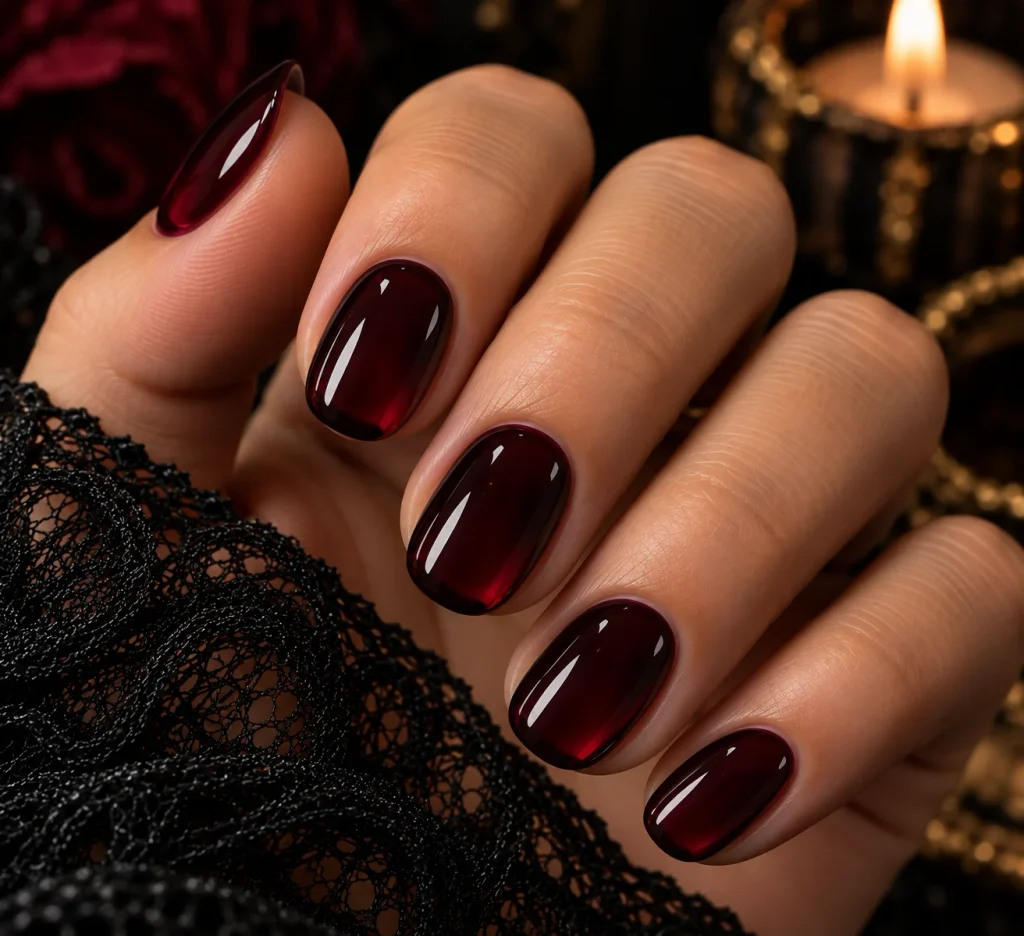
Layer sheer black cherry polish over a clear base. The color looks like stained glass or dark fruit skin.
Short nails look especially good in this style of unique Halloween nails. Add a high-shine top coat to push the depth even further.
Difficulty: Easy. Tip: Build the color in three thin coats instead of one heavy one.
10. Gothic Lace Overlay
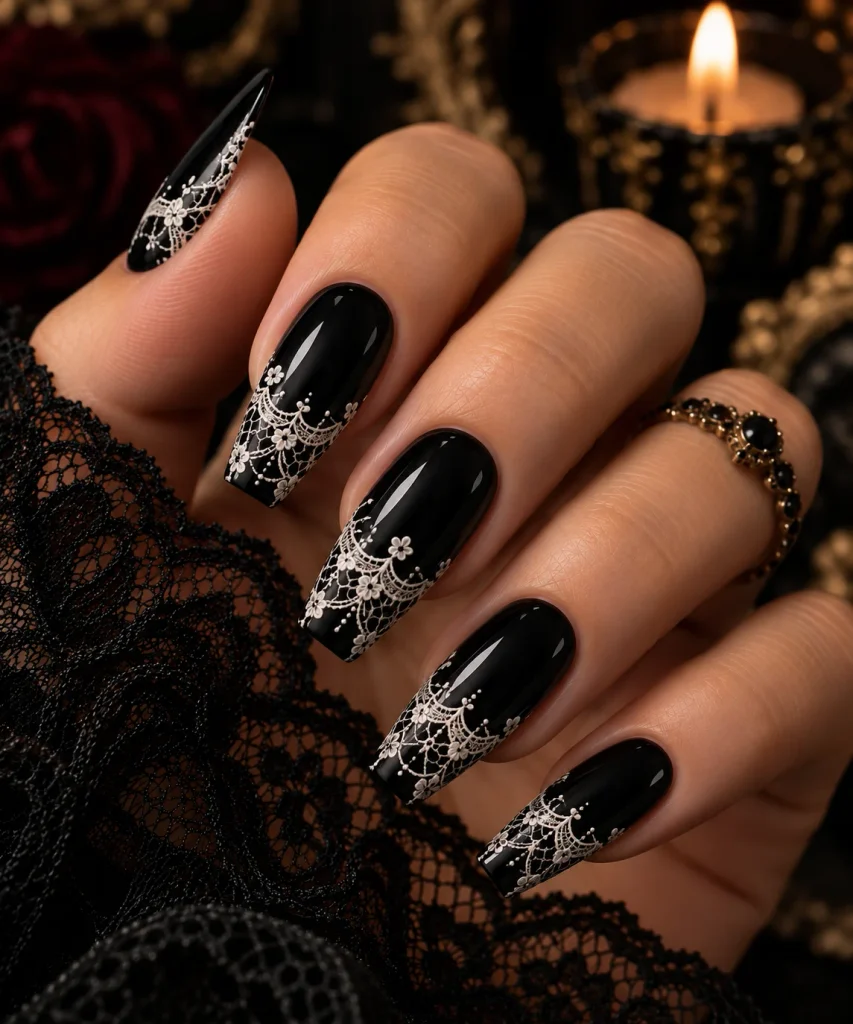
Paint your nails in black and use a fine brush to draw delicate white lace patterns across the tips. Think scallops, dots, and tiny flowers.
Lace is a classic among unique Halloween nails because it looks luxe and a bit Victorian. Keep the pattern at the edges so the center stays clean.
Difficulty: Hard. Tip: Use a lace sticker if freehand feels too hard.
11. Deep Plum Cream
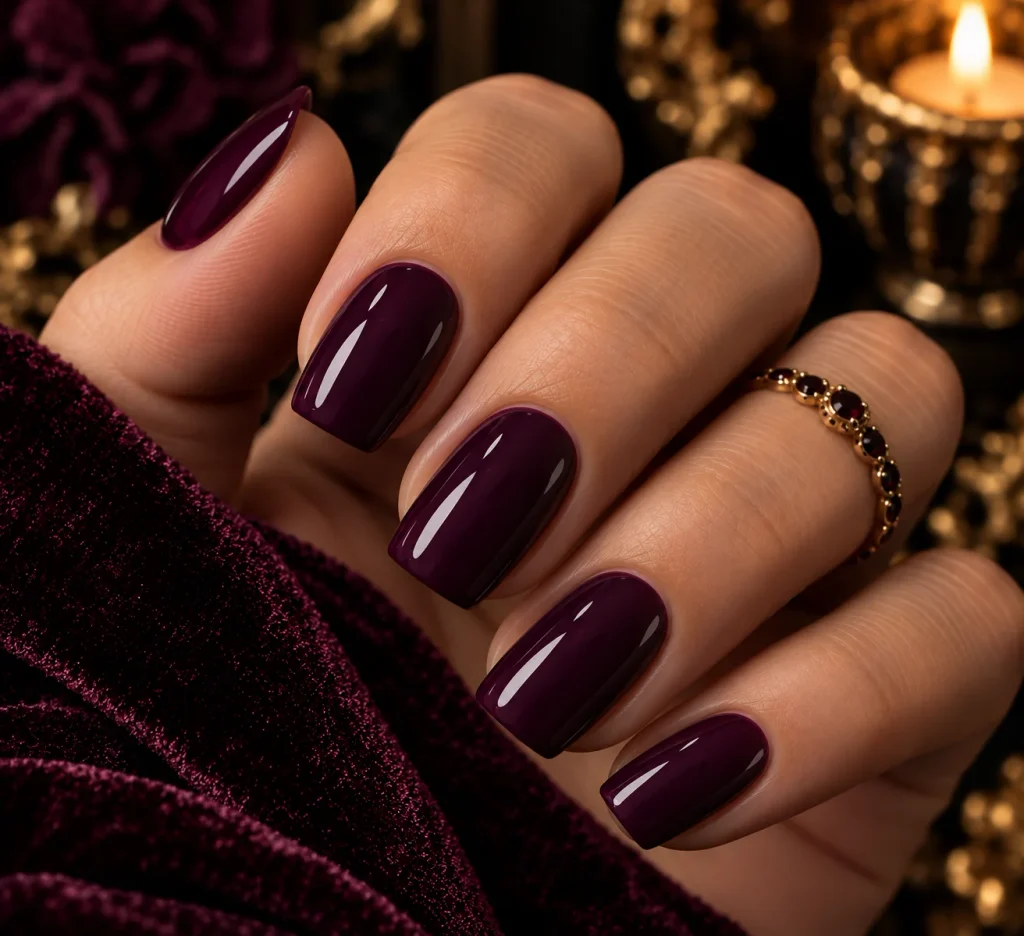
Choose a rich plum cream polish with no glitter and no art. Let the color do the work.
A single bold shade proves that unique Halloween nails do not need complex art. Make sure the formula is opaque in two coats.
Difficulty: Easy. Tip: Cap the free edge of the nail with polish to prevent chipping.
12. Smoky Charcoal Ombré
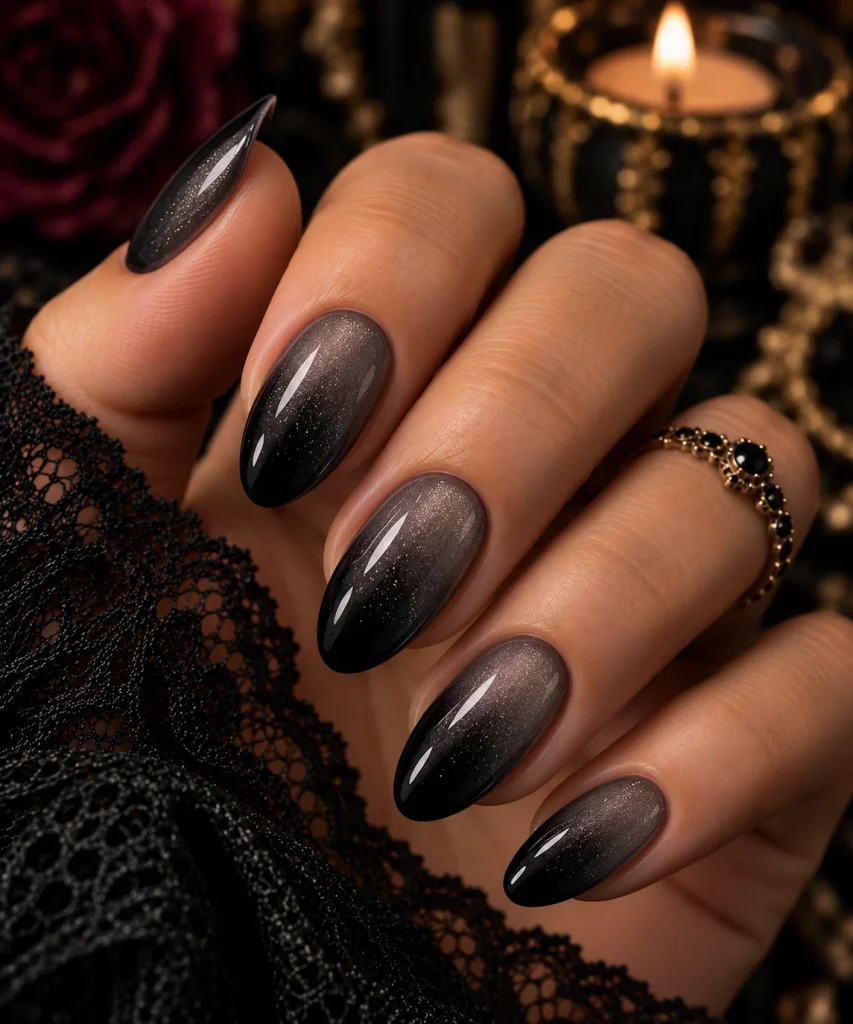
Blend charcoal gray into black from the cuticle to the tip. Add a sheer shimmer top coat for a smoky effect.
These unique Halloween nails mimic eyeshadow, which makes them feel very editorial. They work well on almond and oval shapes.
Difficulty: Medium. Tip: Use a sponge and tap lightly. Clean up the skin edges with a brush dipped in remover.
13. Dark Floral Hand-Painted Nails
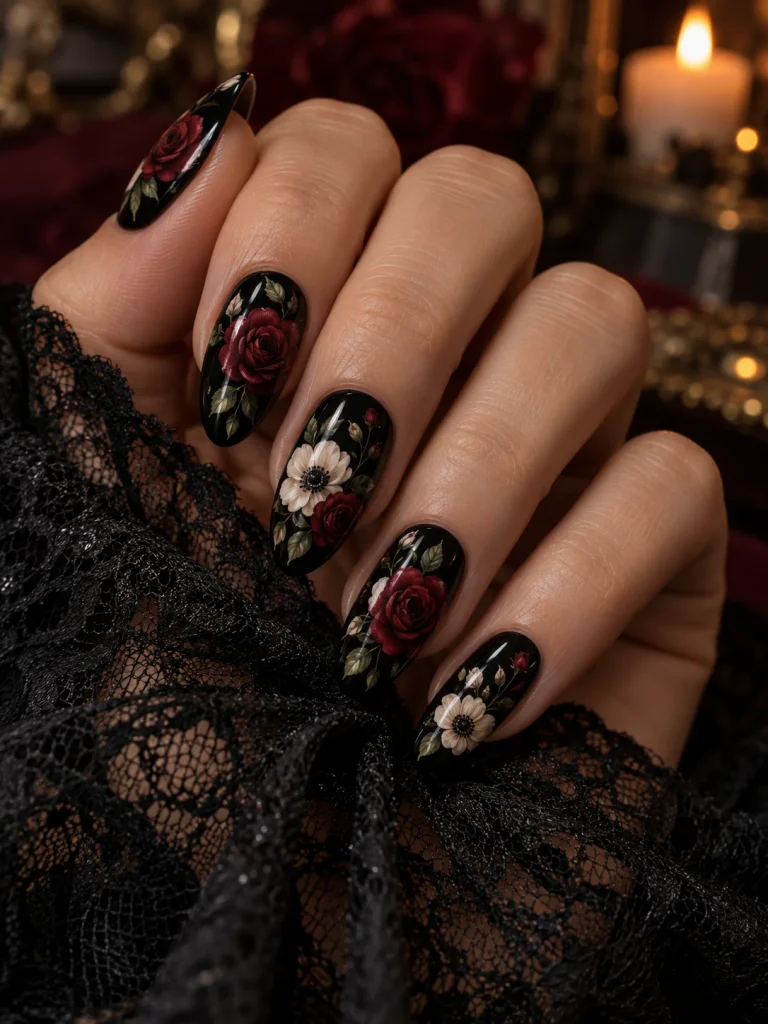
Paint a black base and add small roses or poppies in deep red and bone white. Add tiny green leaves for balance.
Dark florals are a modern favorite in unique Halloween nails. The contrast between soft petals and a black base feels romantic and a little dangerous.
Difficulty: Hard. Tip: Start with a dot in the center and build petals outward in small curved strokes.
14. Olive and Black Marble
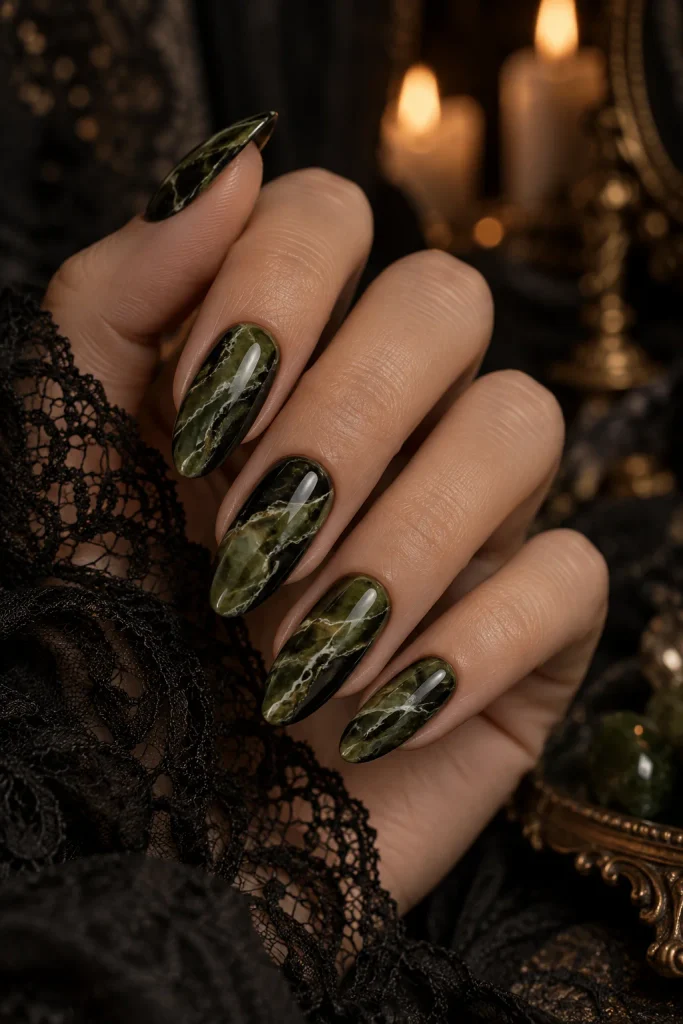
Swirl olive green and black polish together with a thin brush while the base is wet. Add a few white veins for a stone look.
Marble keeps unique Halloween nails from feeling too literal. It also hides small mistakes because the pattern is meant to be uneven.
Difficulty: Medium. Tip: Less is more. Overworking the swirl turns it muddy.
Chrome, Glitter, and Shine
If you like light-catching finishes, these nails deliver. They look modern and photograph well.
15. Black Chrome Mirror Nails
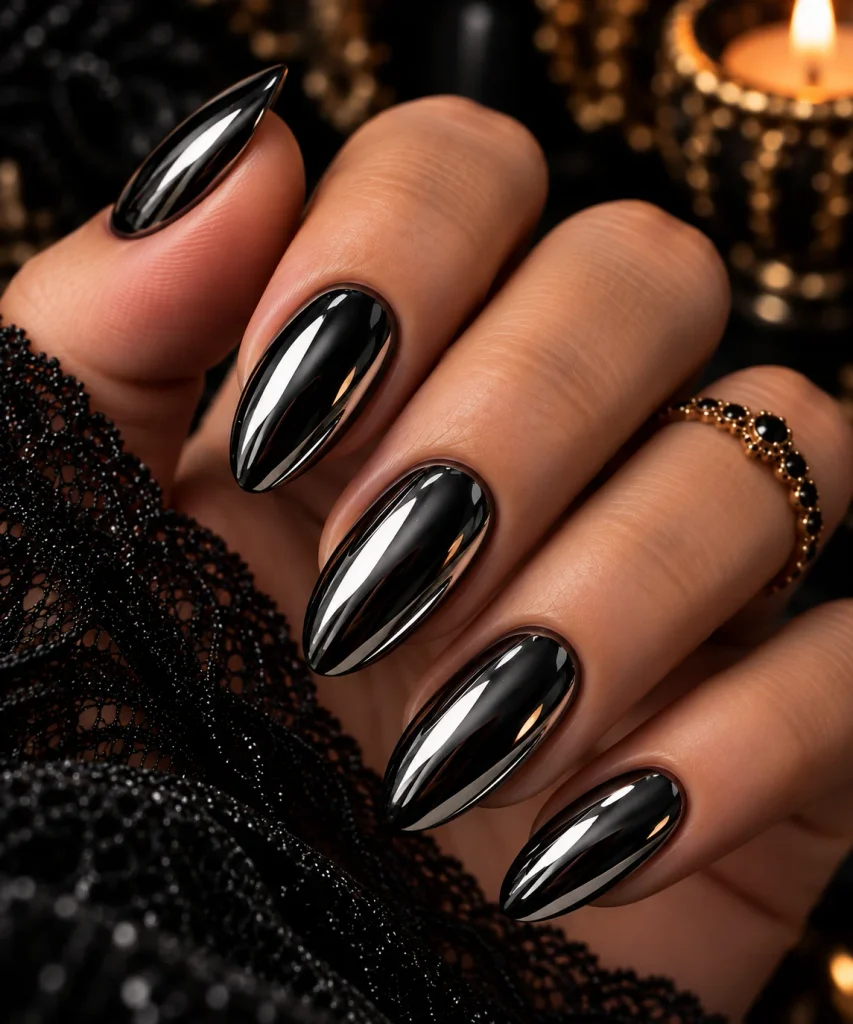
Apply a black gel base and cure it. Rub chrome powder over the surface with a silicone applicator. Seal it with a no-wipe top coat.
Black chrome is one of the most striking unique Halloween nails because it looks like liquid metal. A Makartt LED nail lamp helps cure each layer evenly at home.
Difficulty: Medium. Tip: Chrome powder only sticks to a tacky layer. Do not wipe the base coat before applying.
16. Purple Aura Nails
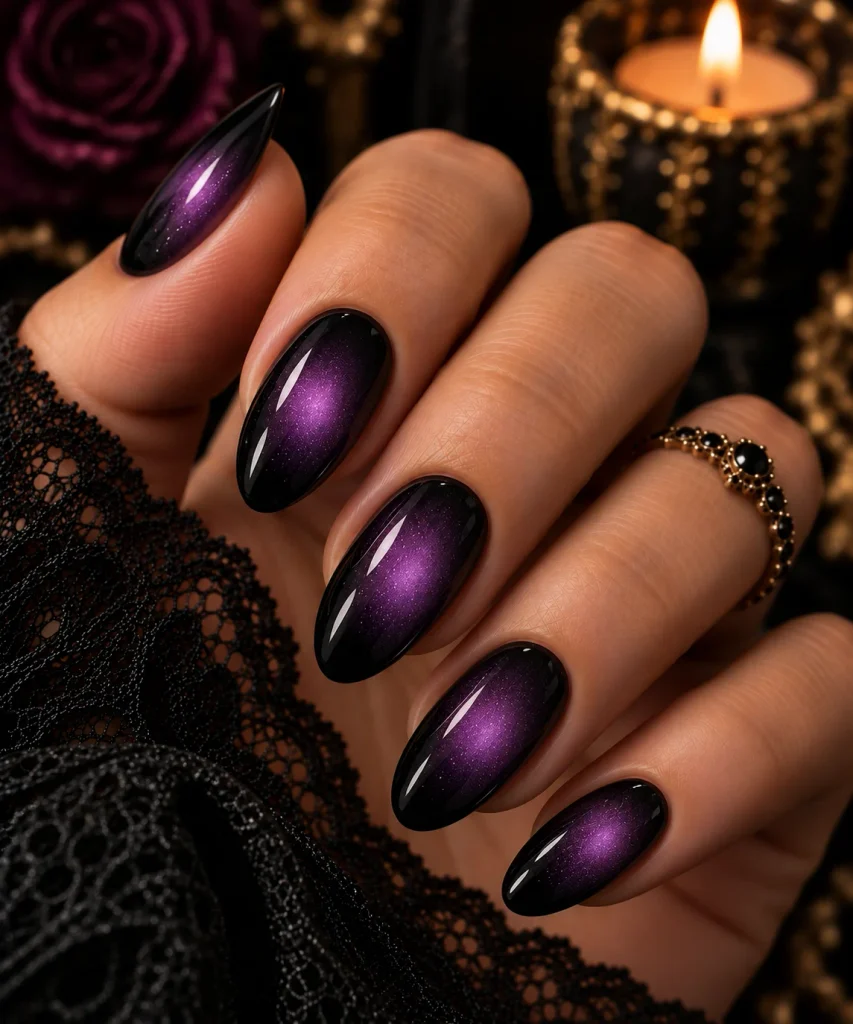
Spray or sponge a soft violet glow in the center of each nail, fading to black at the edges. The effect looks like a haunted halo.
Aura designs bring a trendy twist to unique Halloween nails. Keep the center bright and the edges dark for the strongest glow.
Difficulty: Medium. Tip: Use an airbrush or a soft eyeshadow brush with a gel polish for a smoother fade.
17. Bat Wing Chrome Tips
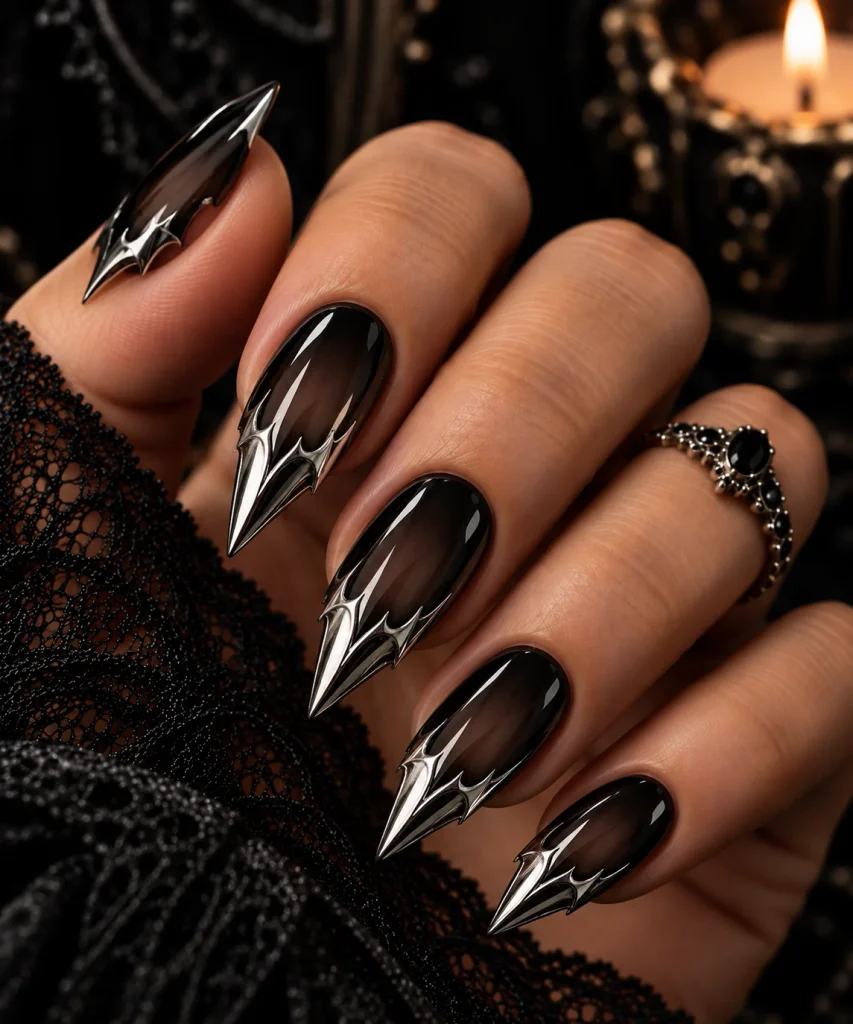
Paint a silver chrome tip shaped like a pointed bat wing. Keep the rest of the nail black or sheer.
The sharp tip gives unique Halloween nails a graphic edge. This design looks best on medium or long almond nails.
Difficulty: Medium. Tip: Use striping tape to mark the points before you apply the chrome.
18. Bone Glitter Fade
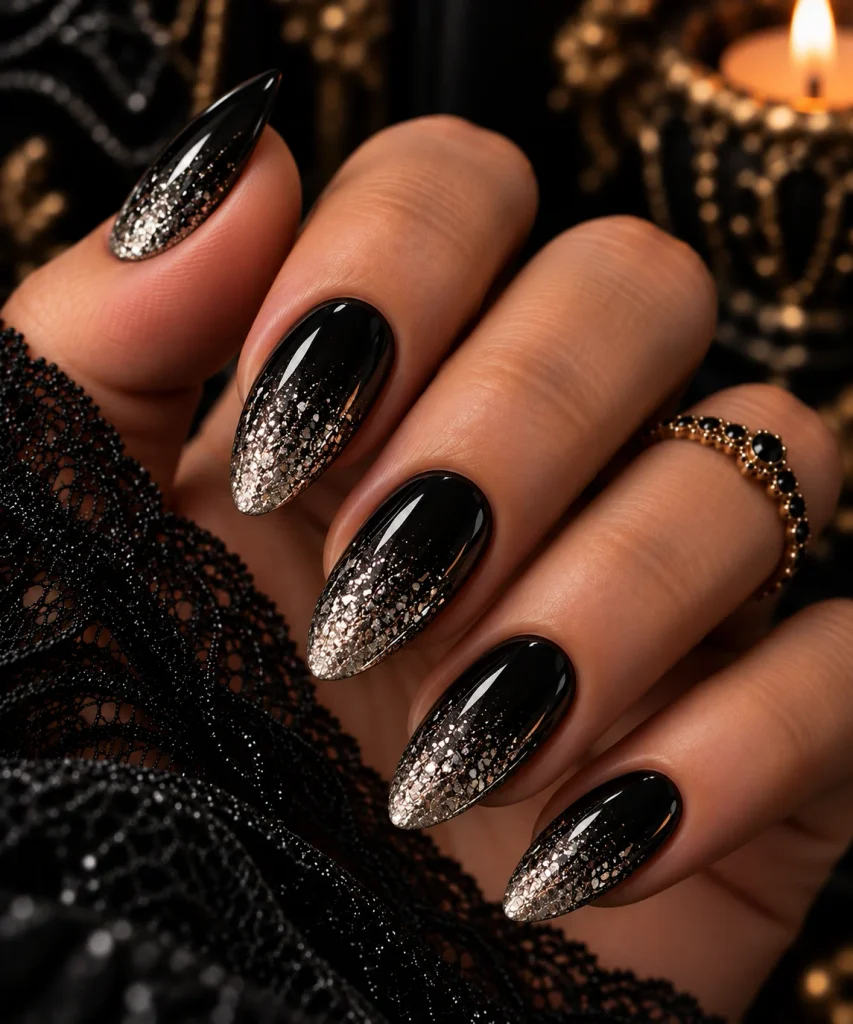
Fade a fine silver or ivory glitter from the tip toward the center of a black nail. It looks like ash or scattered bone dust.
This sparkly entry in unique Halloween nails gives you shine without color overload. Use a fine, not chunky, glitter for a refined look.
Difficulty: Easy to medium. Tip: Press glitter on with a dry sponge rather than brushing it across the nail.
Looking for more unconventional manicure inspiration? Don’t miss these western nails for a fresh mix of bold colors and textures.
19. Cracked Glass Holographic
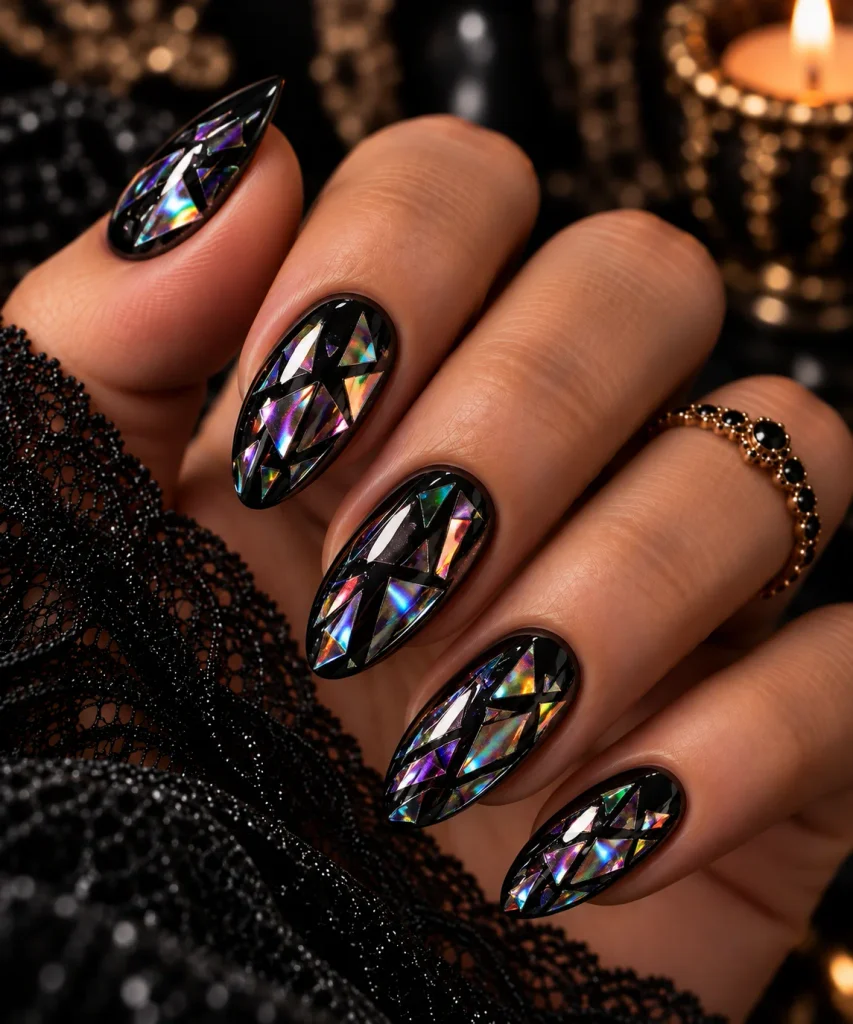
Place thin holographic film pieces on a dark base so they look like shattered glass. Seal with a thick top coat.
This sharp, modern style is a great choice for unique Halloween nails with a futuristic edge. Use tweezers to place each shard.
Difficulty: Medium. Tip: Keep shards small and angular for a realistic broken look.
20. Gunmetal Cat Eye
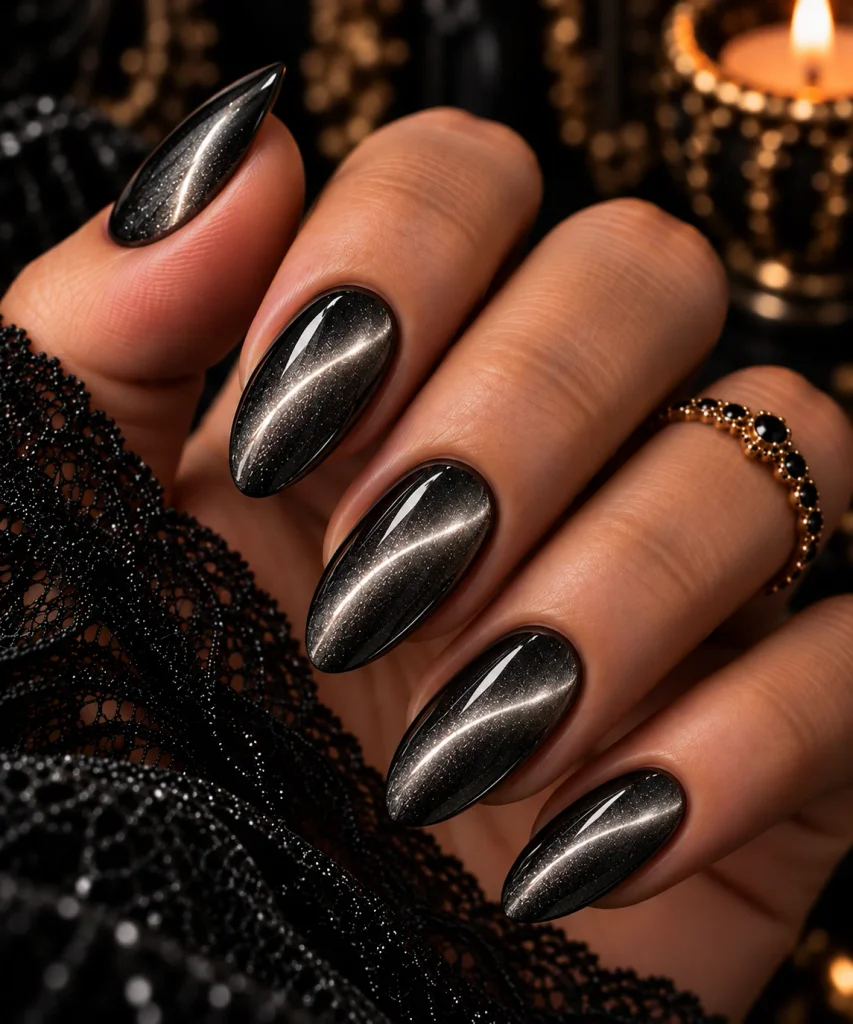
Use a magnetic polish in gunmetal gray to create a single slim line of light across the nail. It resembles a cat’s eye at night.
Cat eye magnets create instant depth, which is why these unique Halloween nails look so high-end. Move the magnet in one direction for a clean line.
Difficulty: Medium. Tip: Work one nail at a time so the polish does not settle before you use the magnet.
Creative Nail Art: Unique Halloween Nails with Character
These designs use small illustrations, but they stay stylish..
21. Tiny Eyeball Accents
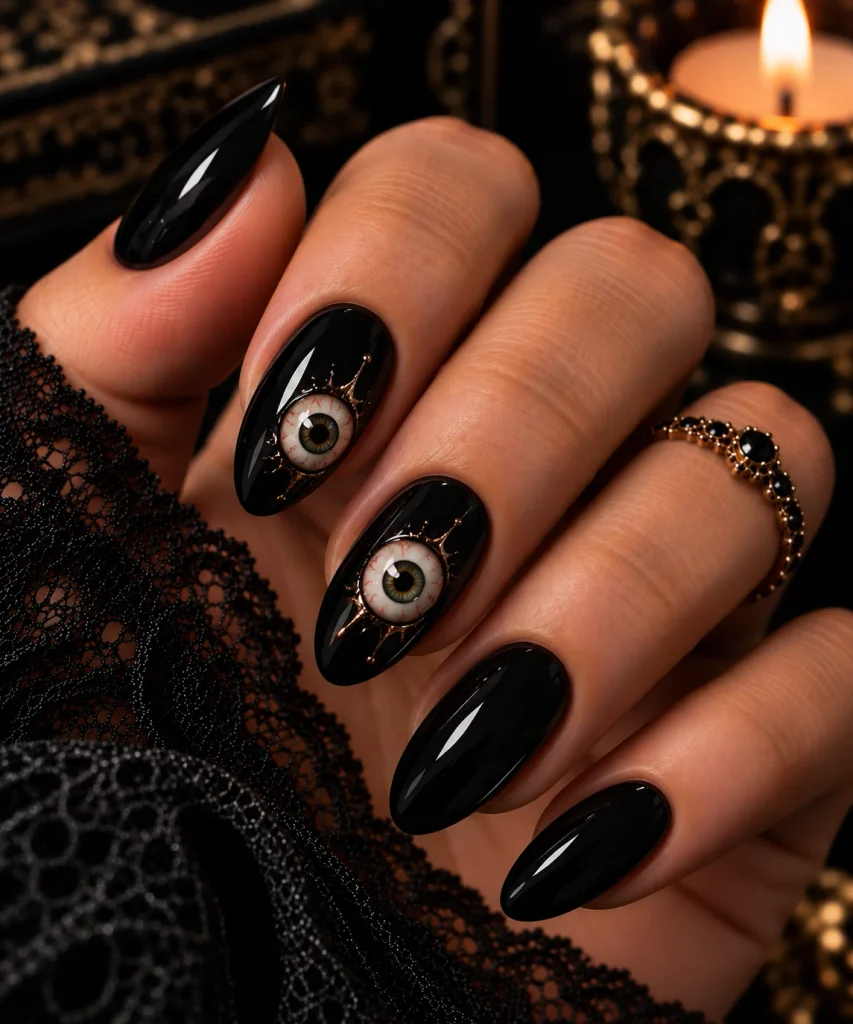
Paint one or two nails with a small eye: a white oval, a colored iris, and a black pupil. Leave the other nails in a solid dark shade.
Subtle eyes make unique Halloween nails memorable. Keep them small so they do not look cartoonish.
Difficulty: Medium. Tip: Use a dotting tool for the iris and pupil to get perfect circles.
22. Negative Space Skeleton Hand
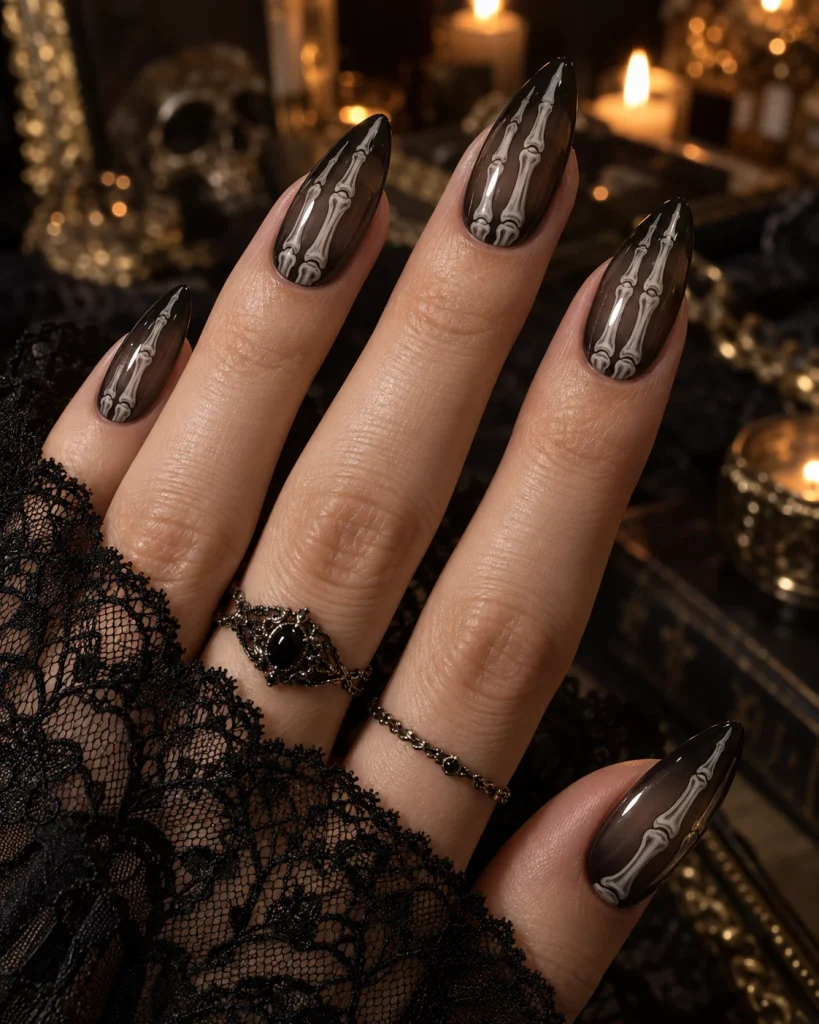
Leave the nail bare in the center and paint thin white bones on a sheer black or clear base. Each nail looks like an X-ray.
This design takes unique Halloween nails into graphic territory. Draw a long line for the finger bone, then add small knuckle ovals.
Difficulty: Hard. Tip: Practice on a nail tip or palette before you paint your real nails.
23. Moon Phase Trail
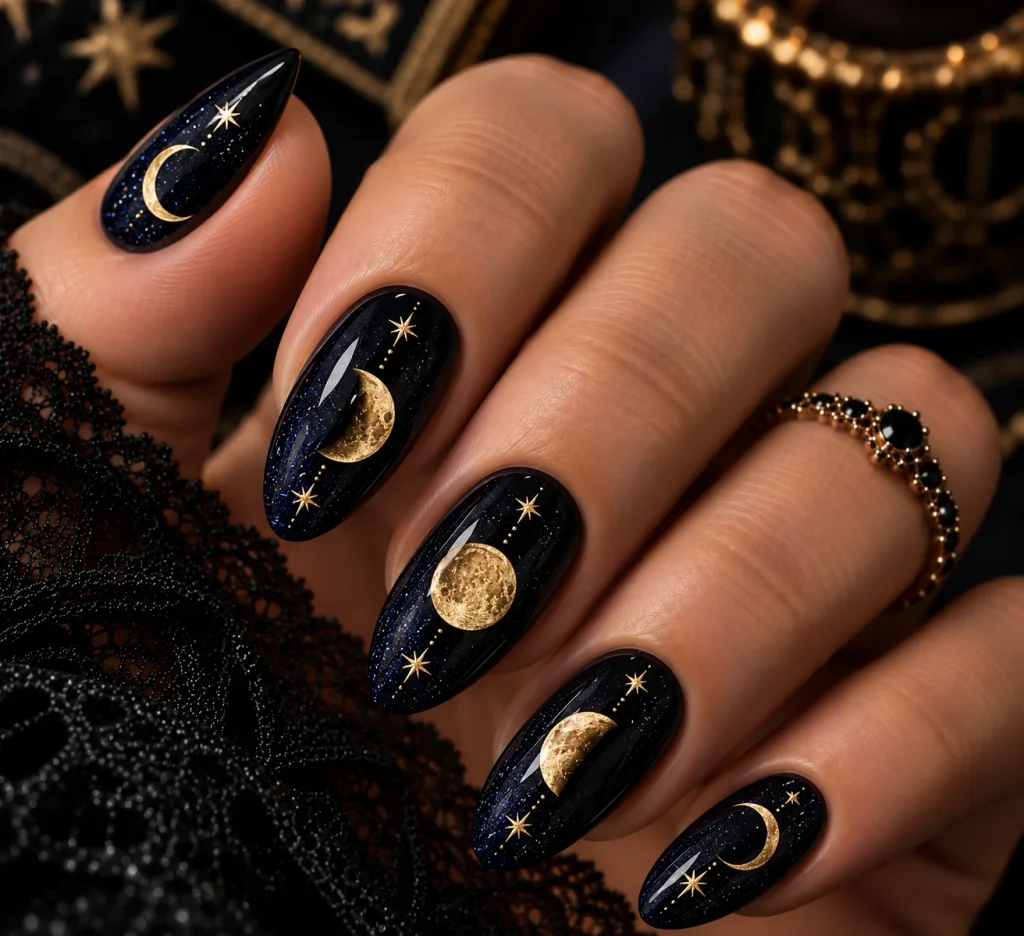
Paint each nail in a dark navy or black base and add a different moon phase to each finger in gold or silver. Together they form a lunar cycle.
This celestial approach to unique Halloween nails feels calm and mystical. Metallic foil makes the moons look crisp.
Difficulty: Medium. Tip: Place foil on a tacky layer and press it with a silicone tool.
24. Cobweb Over Color Block
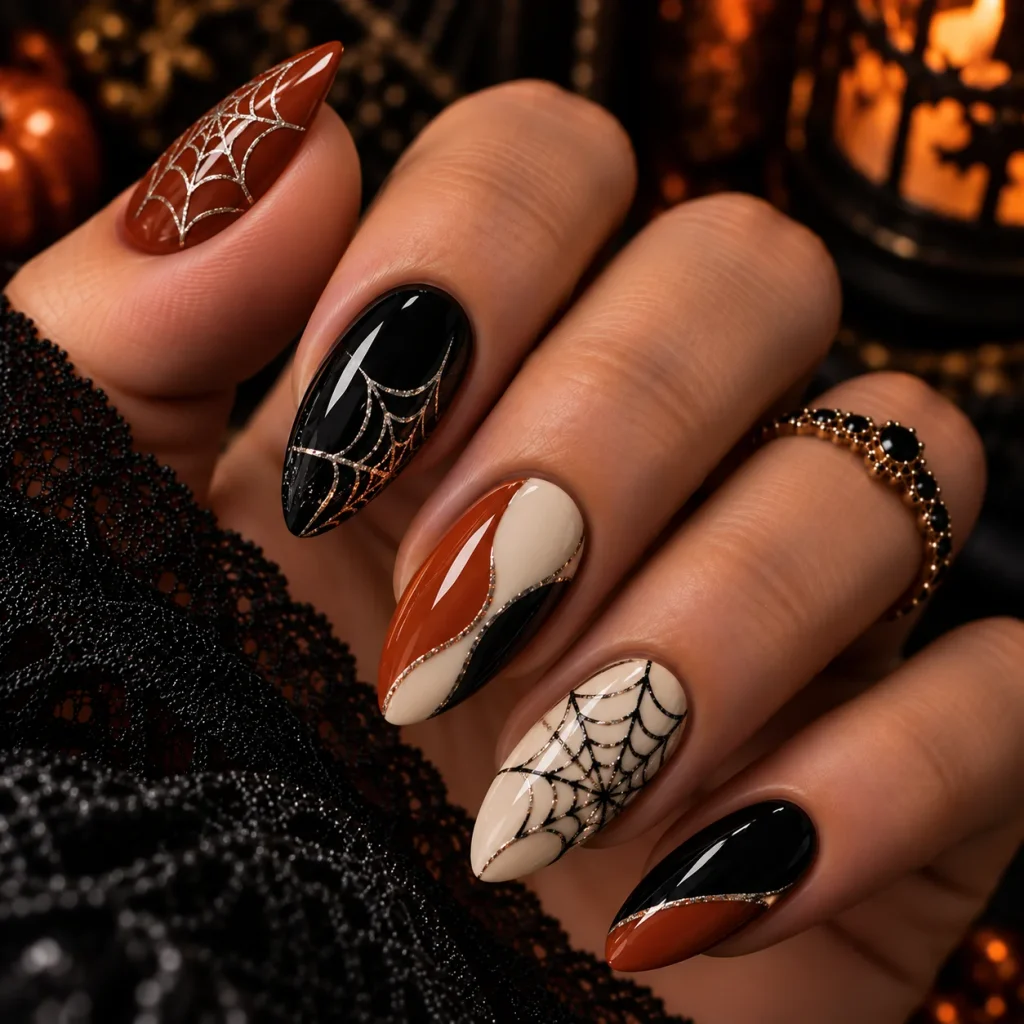
Paint each nail in a bold block color such as rust, black, and cream. Draw thin web lines over the top in white or silver.
Color blocking gives these nails a trendy structure. The web adds the spooky detail without taking over.
Difficulty: Medium. Tip: Draw webs on only two or three nails to keep the look balanced.
25. Snake Skin Texture
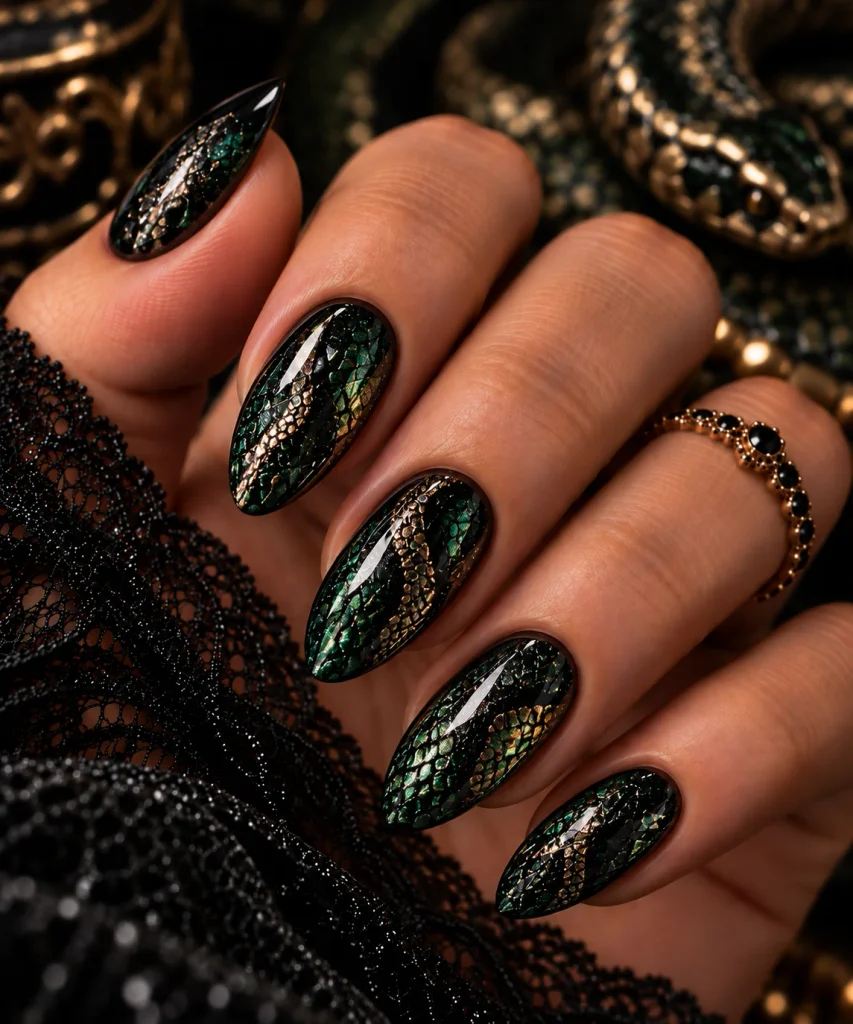
Use a snake skin stamping plate or a thin brush to create a scale pattern in deep green or black. Add a metallic sheen on top.
Snake skin is a distinctive way to make unique Halloween nails feel bold and tactile. A nail stamper helps you get even scales.
Difficulty: Medium. Tip: Stamp on a fully cured base for the sharpest print.
26. Candle Wax Drip
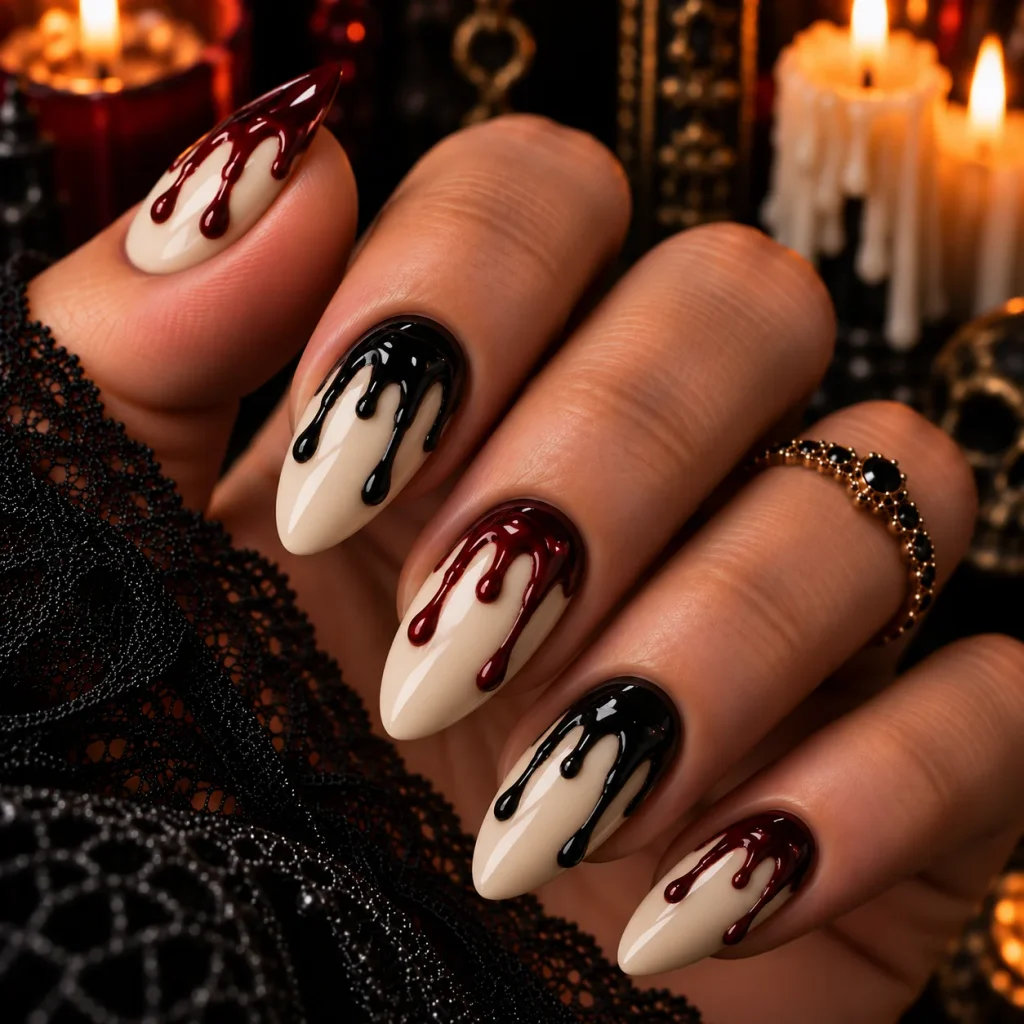
Paint a cream or ivory base. Add melted wax drips in black or burgundy from the cuticle down, as if wax is sliding down a candle.
This is a more moody spin on the drip trend in unique Halloween nails. Thick polish gives the best 3D look.
Difficulty: Medium. Tip: Let each drip cure slightly before you add the next one.
27. Mismatched Mood Set
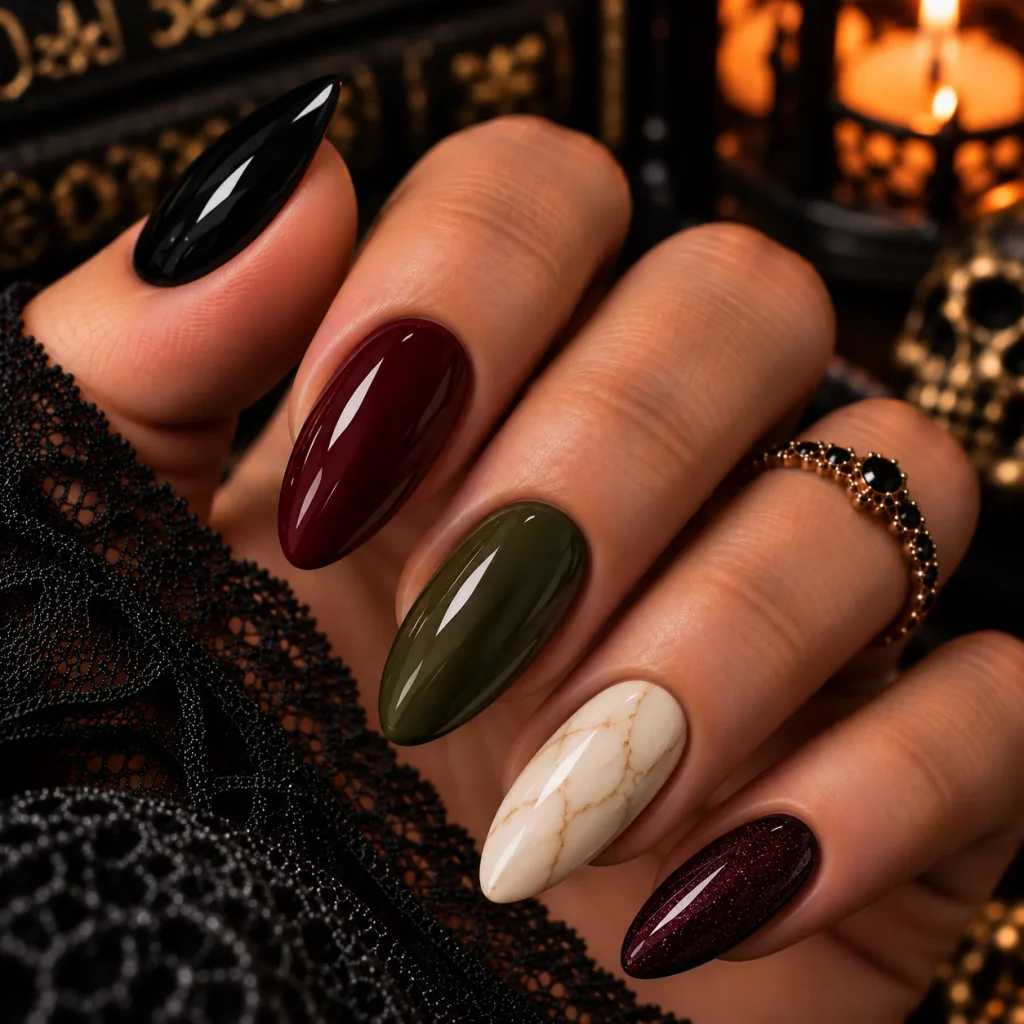
Pick four coordinated shades, such as black, wine, olive, and bone. Paint each nail a different color from this palette.
A mismatched set is an easy route to these nails that look intentional. Keep the finish the same on all nails to avoid chaos.
Difficulty: Easy. Tip: Place the lightest shade on your thumb and ring finger for visual balance.
Statement Shapes and Textures
The nail shape can change the entire mood of a design.
28. Stiletto Claws in Glossy Black
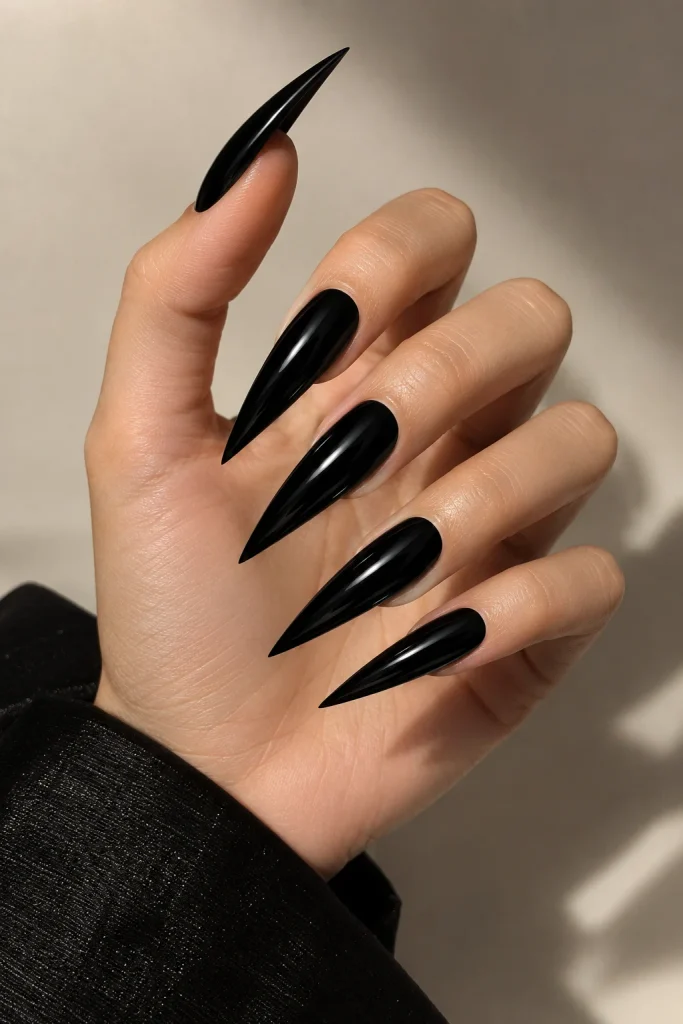
Shape your nails into sharp, narrow points. Finish with a high-gloss black or deep red. No art is needed.
This bold shape makes unique Halloween nails feel theatrical. Use a strong builder gel to protect the thin tips.
Difficulty: Medium. Tip: Press-on stilettos are a lower-risk way to try the shape. Kiss imPRESS press-on manicure sets come in several dark shades.
29. 3D Textured Spikes
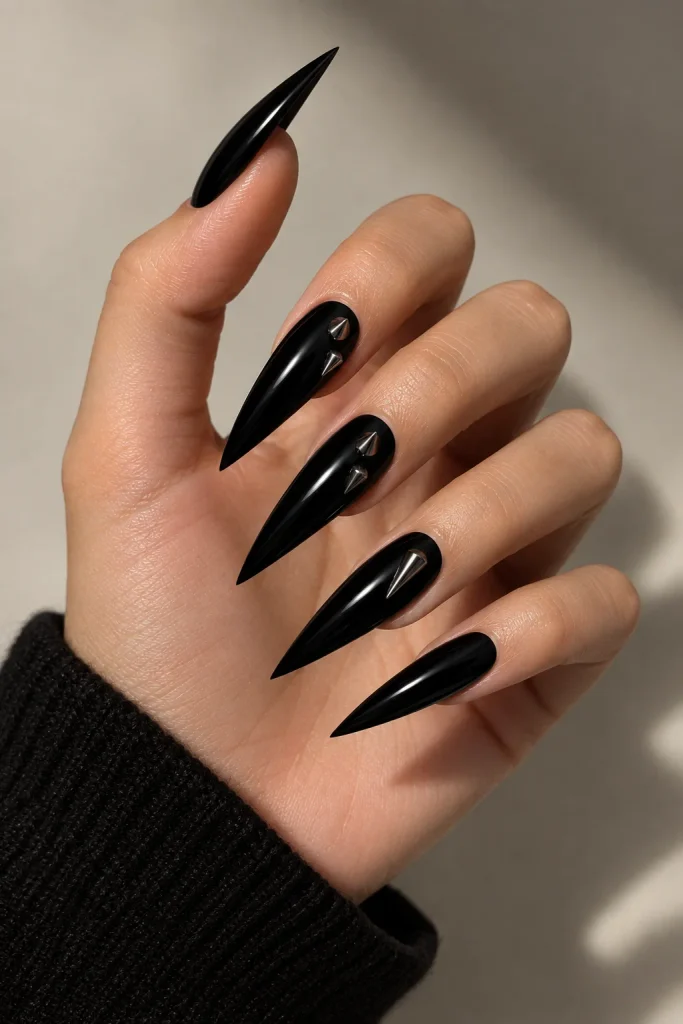
Add small acrylic or gel spikes to one or two accent nails. Paint them black or gunmetal.
Spikes bring edge to these nails and work best as a single feature on an otherwise smooth set. Keep them small so they do not snag.
Difficulty: Hard. Tip: Skip spikes on your dominant hand if you type a lot.
30. Sugar Texture Matte Black
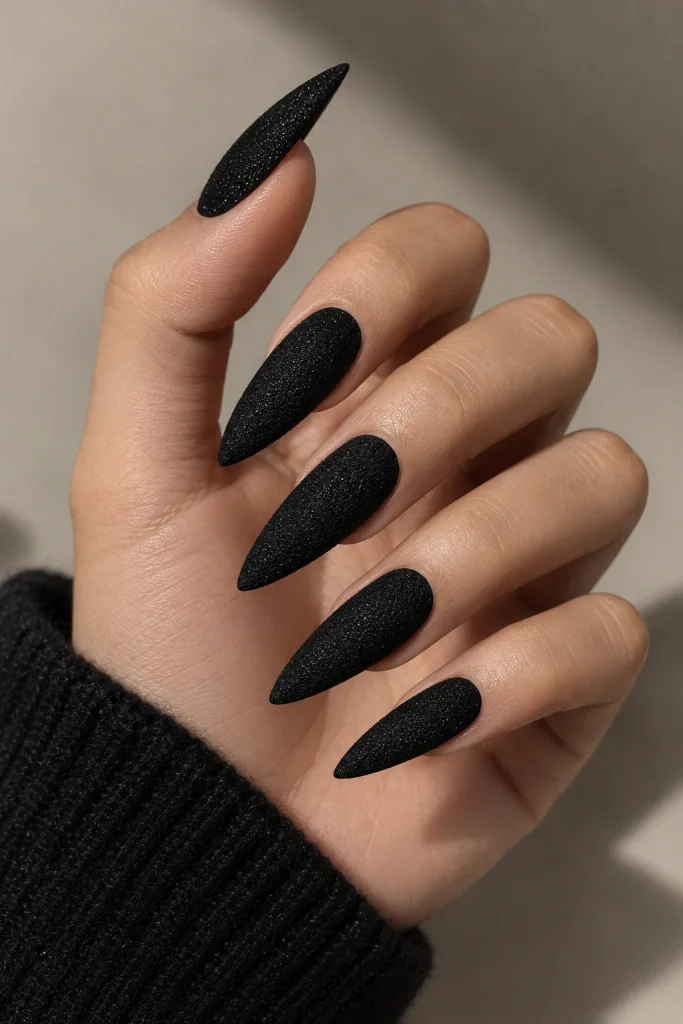
Apply black polish and roll a fine texture powder over the wet surface. The result is a soft, grainy finish.
This tactile look gives unique Halloween nails a surprising twist. It photographs beautifully and hides fingerprints.
Difficulty: Medium. Tip: Finish with a thin matte top coat to lock down the texture.
How to Choose the Right Shape
The right shape makes your art look better. Here is a quick guide.
Short square or squoval: Best for minimal designs, micro French tips, and half moons.
Almond: Best for chrome, gradients, and florals. It elongates the fingers.
Coffin: Best for large art, such as marble, lace, and skeletons.
Stiletto: Best for dramatic, bold unique Halloween nails with simple finishes.
Oval: Best for soft ombré and glass-style nails.
If you are unsure, start with almond. It is flattering on most hands and works with almost every design on this list.
Color Combinations That Elevate Unique Halloween Nails
You do not have to stick to black and orange. These palettes make unique Halloween nails feel more current.
- Black and silver: Sleek and modern. Works with chrome and glitter.
- Burgundy and bone: Warm and romantic. Works with lace and florals.
- Olive and charcoal: Earthy and moody. Works with marble and snake skin.
- Plum and gold: Rich and regal. Works with moon phases and foil.
- Navy and silver: Cool and calm. Works with celestial art and aura nails.
Pick one palette per set. Using one palette consistently is a quick way to make these nails look professional.
Tools and Products for Salon-Quality Nails
You can create most of these looks at home. A few good products make a big difference.
Base and top coat. A solid base protects your nails from staining, especially with dark polish. A OPI Natural Nail Base Coat adds grip so polish lasts longer. For a glossy, long-wearing finish, a Seche Vite dry fast top coat seals art and speeds up drying.
Gel polish and lamp. If you want chrome, magnetic, or aura designs, gel is easier to control. A Beetles gel nail polish kit gives you a range of colors, and a Makartt LED nail lamp cures them at home.
Detail brushes and dotting tools. Webs, lace, and eyeballs depend on control. A nail art dotting tools and brush set covers lines, dots, and florals in one purchase.
Press-ons. If you are short on time, Kiss imPRESS press-on manicure sets give you a clean base with no drying time.
Cuticle oil. Dark colors can highlight dry skin. A daily drop of CND SolarOil cuticle oil keeps cuticles soft so your unique Halloween nails look polished.
Step-by-Step: How to Create Unique Halloween Nails at Home
Follow this simple routine for any design above.
- Prep. Remove old polish, push back cuticles, and shape your nails. Wipe each nail with rubbing alcohol.
- Apply base coat. One thin layer protects the nail and helps the color stick.
- Paint the base color. Use two thin coats. Let each coat dry before the next.
- Add the design. Work slowly. Use a small brush or dotting tool.
- Seal. Apply the top coat and cap the free edge.
- Hydrate. Add cuticle oil once your nails are fully dry.
Patience matters most. Rushing is the number one reason unique Halloween nails smudge or look messy.
Tips to Make These Nails Last Longer
- Cap the tip of every nail with base color and top coat.
- Wear gloves when you wash dishes or clean.
- Reapply top coat every two to three days on regular polish.
- Avoid using your nails as tools.
- Keep your hands moisturized.
Gel designs can last two to three weeks with proper prep. Regular polish usually lasts five to seven days.
Common Mistakes to Avoid
Using too much polish. Thick layers bubble and peel. Thin coats always win.
Skipping the base coat. Dark colors can stain bare nails yellow.
Overcrowding the design. The best unique nails have one clear focus.
Ignoring cuticle care. Even great art looks messy on dry skin.
Forgetting to cap the edge. This is the top cause of early chipping.
Frequently Asked Questions
What are unique Halloween nails?
These nails are spooky-inspired manicures that use fresh colors, textures, and details instead of common symbols like pumpkins and ghosts. Examples include black chrome, blood drip French tips, dark florals, and velvet magnetic polish.
What colors are best for these nails?
Black, burgundy, plum, olive green, charcoal, and bone white are the most flexible shades. They look rich and modern, and they combine easily with chrome, glitter, or matte finishes.
What are easy unique Halloween nails for beginners?
Start with blood drip French tips, black micro French, a single spider web accent, or a matte black set with a glossy moon. These designs need basic tools and little practice.
Do these nails work on short nails?
Yes. Micro French tips, glass nails, stitched seams, and half moon designs look excellent on short nails. Simple art keeps the set clean and balanced.
How long do these nails last?
Regular polish lasts about a week. Gel manicures last two to three weeks. Using a base coat, capping the edges, and wearing gloves for chores all help extend wear.
Can I do these nails at home?
Absolutely. Most of these designs need a base coat, polish, a thin brush, and top coat. For chrome or magnetic looks, a gel kit and LED lamp give better results.
Which nail shape is best for unique Halloween nails?
Almonds are the most flattering and flexible. Coffin suits large art, while stiletto suits bold, minimal designs. Short squares work well for clean, simple looks.
Final Thoughts
Great nail art comes down to a clear idea, a tight palette, and clean execution. You do not need to paint tiny skeletons or perfect lace to get a standout set.
Start with one of the easy ideas, such as blood drip tips or a matte black set with a glossy moon. Once you feel confident, move on to chrome, aura, or hand-painted florals.
Whichever you choose, unique Halloween nails are about expressing your style with a little edge. Save your favorite designs to your Pinterest board, share this guide with a friend, and take your top three picks to your next manicure appointment or at-home nail night.