Some nail trends fade fast. Ghost face nails have stuck around because they are bold, graphic, and easy to make your own. The design pulls from the famous elongated mask with hollow black eyes and a stretched, open mouth. On a nail, that becomes a striking mix of white, black, and grey.
You do not need to be a pro artist to wear this look. A simple version takes only a few basic shades and a thin brush. A detailed version can include chrome, texture, and 3D charms.
This guide shows 30 ghost face nails ideas, sorted from beginner-friendly to advanced. You will also find the best nail shapes, the tools worth buying, and simple steps for clean lines. Save your favorites as you scroll, and take this list to your nail tech or try it at home.
What Are Ghost Face Nails?
These nails are nail art designs that recreate the classic ghost mask. The mask has two teardrop eyes and a long, drooping mouth on a pale, stretched face. Nail artists translate that shape onto one nail or all ten.
Most designs use a white or off-white base with black details. Some add grey shading, red accents, or metallic finishes for extra depth.
The style works on short, medium, and long nails. It also suits both natural nails and extensions, which makes it flexible for almost any nail routine.
Best Nail Shapes for Ghost Face Nails
Shape changes how the face reads on your nail. Long, narrow nails stretch the face and look dramatic. Short, wide nails show a cute, compact version.
Almond and coffin shapes give you the most room for a long mouth. Square and oval shapes work well for simple, centered faces. Stiletto tips create a very sharp, high-fashion effect.
If you are new to nail art, start with a short square or oval nail. The flat surface makes it easier to paint clean shapes.
30 Ghost Face Nails Ideas
1. Classic Black and White Ghost Face Nails
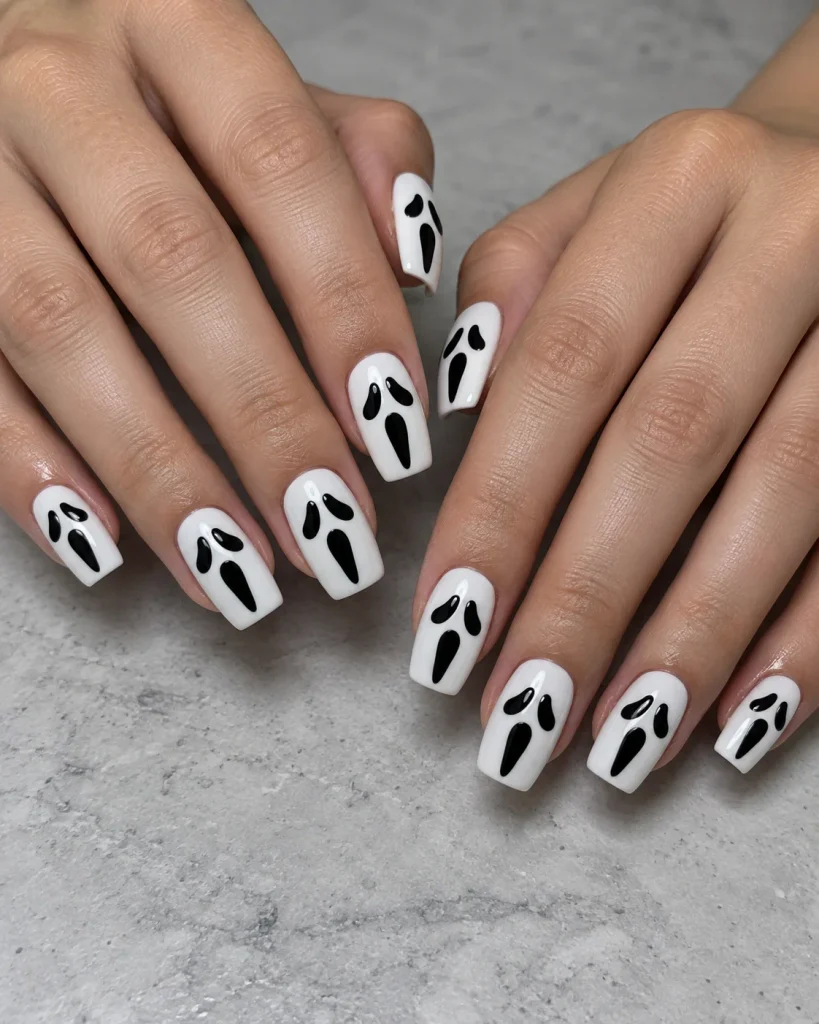
This is the original look and the best place to start. Paint a white base, then add two black teardrop eyes and a long black mouth.
Keep the shapes symmetrical and the lines crisp. A glossy top coat makes the black look deep and sharp.
This design works on any nail length. It also gives you a solid base to learn from before trying harder styles.
2. Short Square Ghost Face Nails
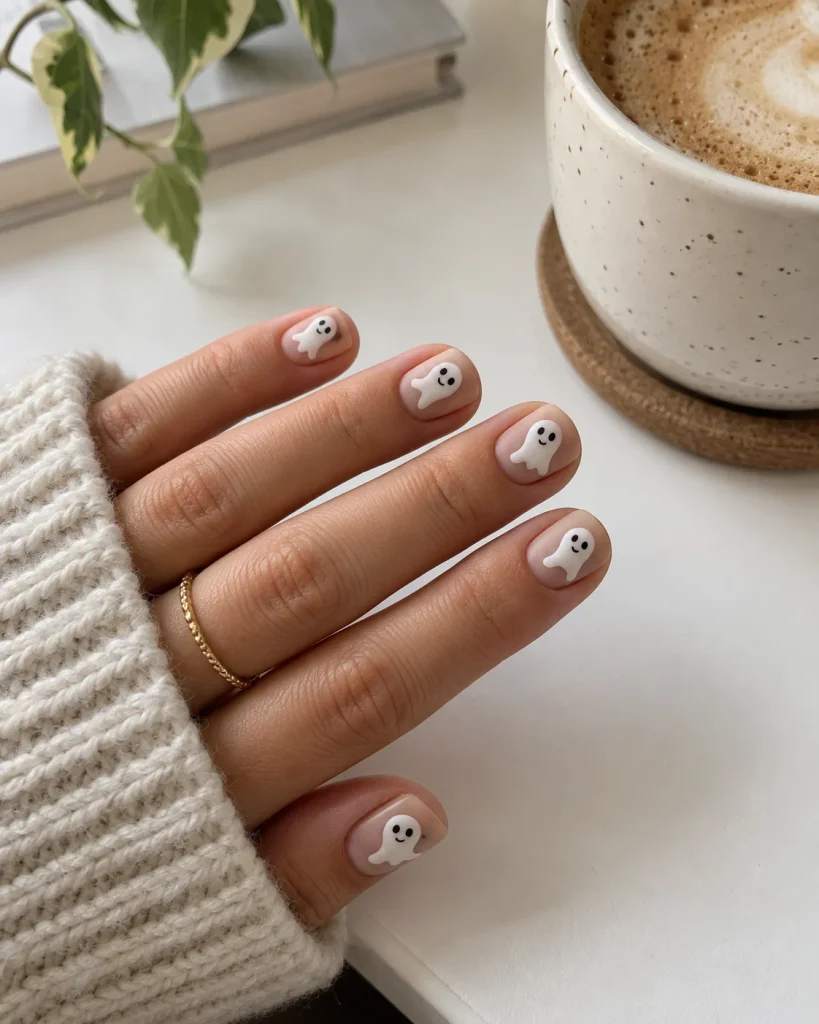
Short nails suit this trend more than you might think. Use a small face with tiny eyes and a short, curved mouth.
Square tips give a clean, flat canvas. That makes symmetry easy to control.
Choose a matte finish for a trendy twist. Short nails look playful and are very easy to wear to work.
3. Almond Ghost Nails
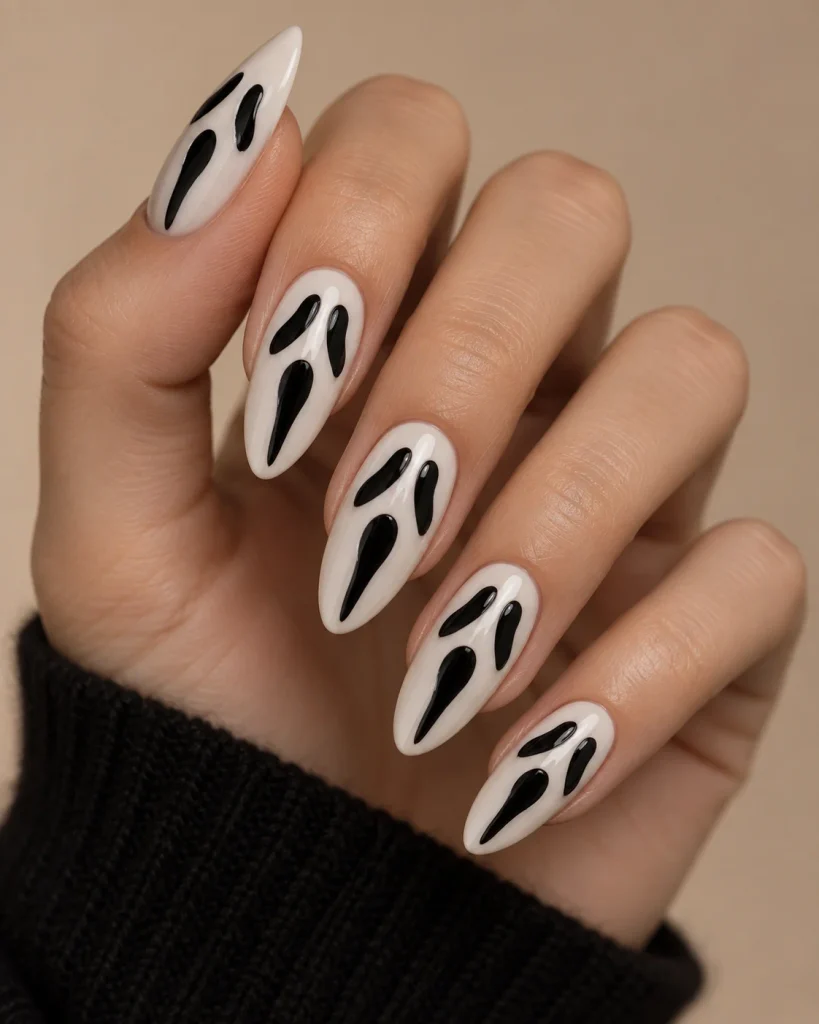
The soft taper of an almond nail is flattering on nearly every hand. It lengthens the fingers and adds a graceful line.
Place the eyes close to the cuticle and let the mouth stretch toward the tip. That mimics the long, drooping shape of the mask.
Almond nails feel elegant and edgy at the same time. They are a strong pick if you want a look that feels polished.
4. Long Coffin Ghost Face Nails
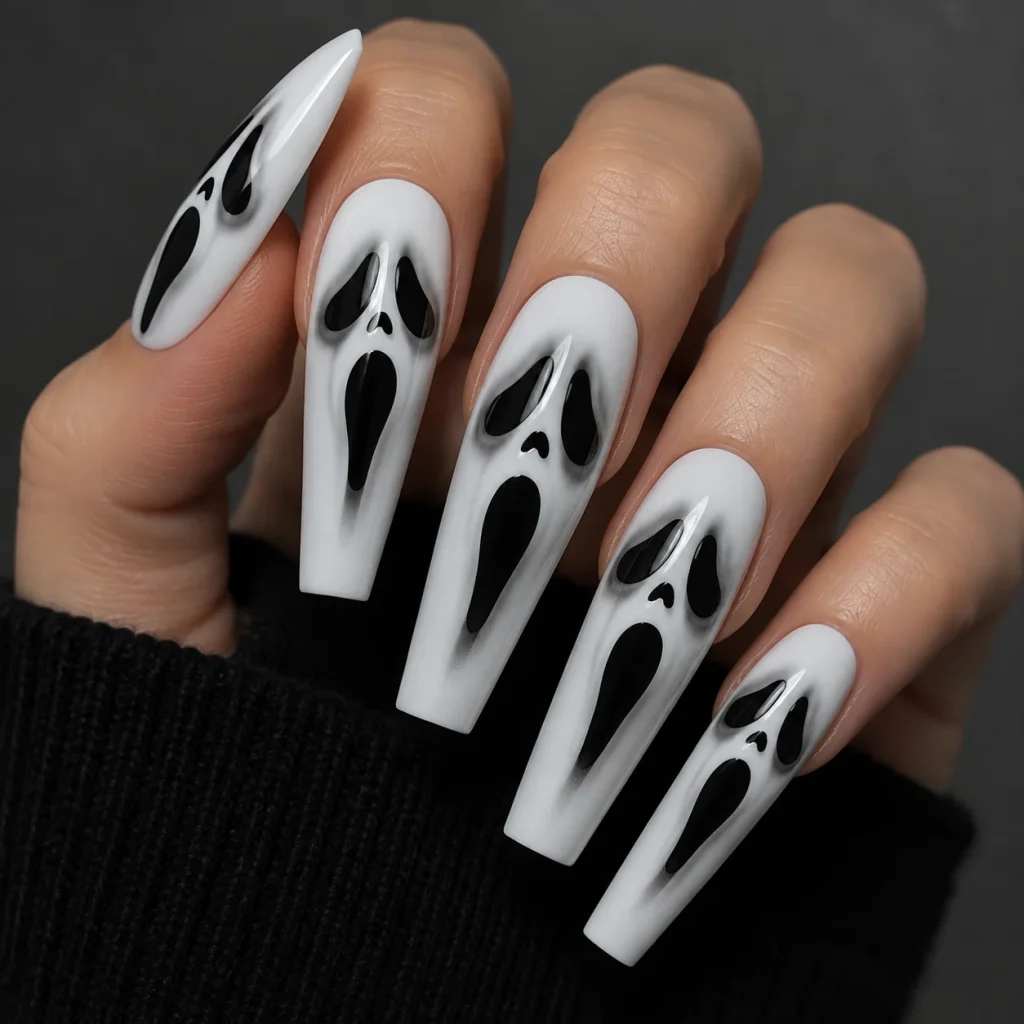
Coffin nails give you the biggest canvas for a dramatic face. The wide tip is perfect for a long, stretched mouth.
Add fine shading around the eyes with a grey wash. This gives the face depth and a hand-drawn feel.
This style takes more time to paint. The payoff is a bold set that stops people mid-conversation.
5. Matte Black with a Glossy Ghost Face
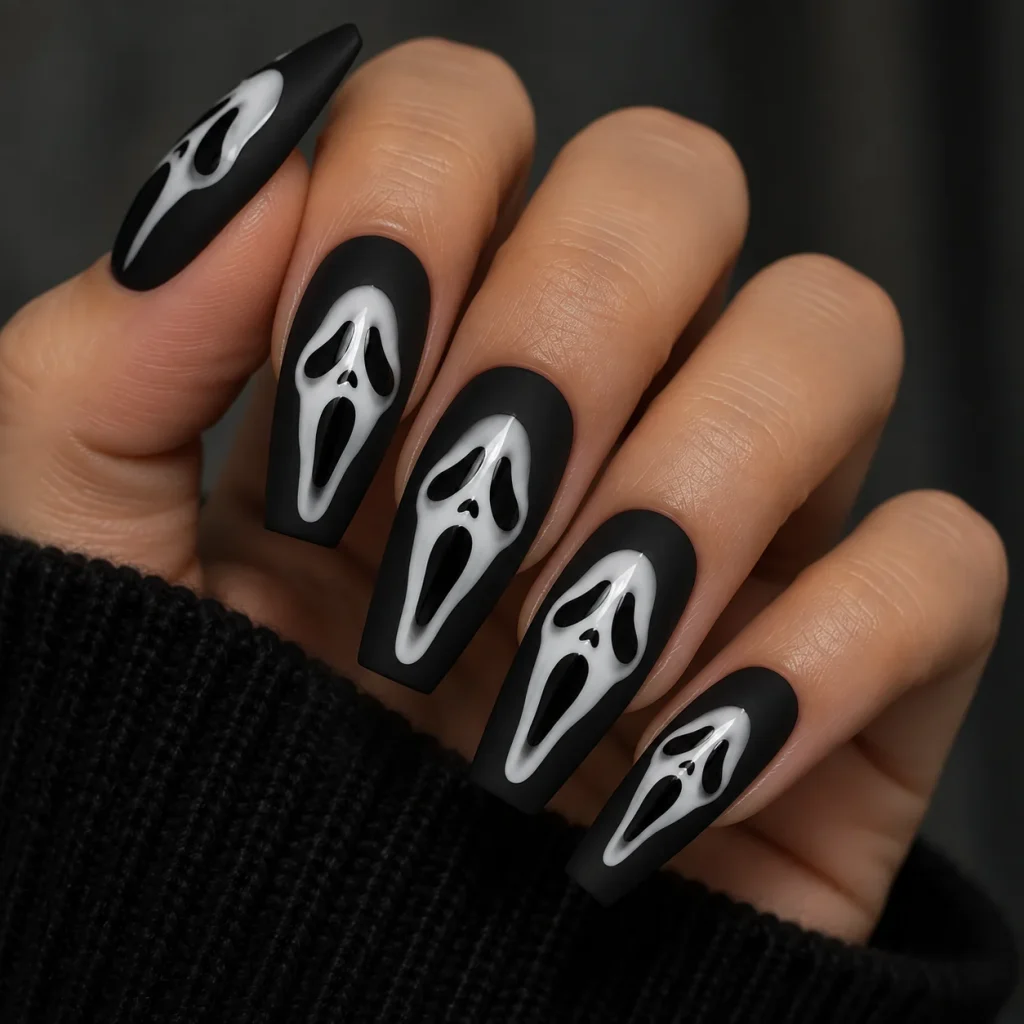
Here is a texture trick that looks expensive. Paint your nails matte black, then add a glossy white ghost face on top.
The contrast in finish makes the face pop without extra color. It also adds a subtle, modern feel.
Use a matte top coat over the black, and keep the face area shiny. This is one of the most photogenic nail designs for social media.
6. Minimalist Single Accent Ghost Face Nail
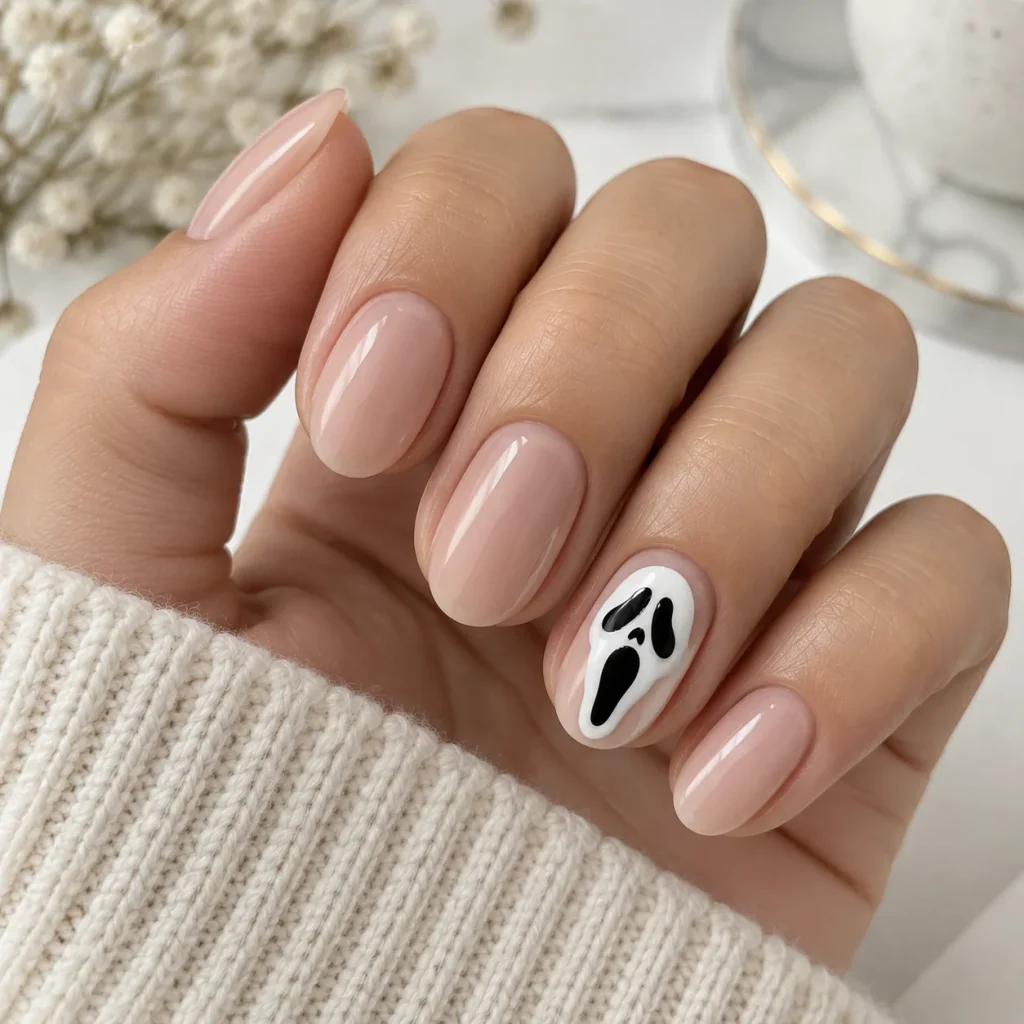
Not ready for ten faces? Paint just one. Keep the other nails a solid white, black, or sheer nude.
Put the face on your ring finger for a balanced look. It draws attention without feeling loud.
A single accent nail is ideal for people who like quiet style. It is also the fastest way to try these nails at home.
7. Negative Space Ghost Face Nails
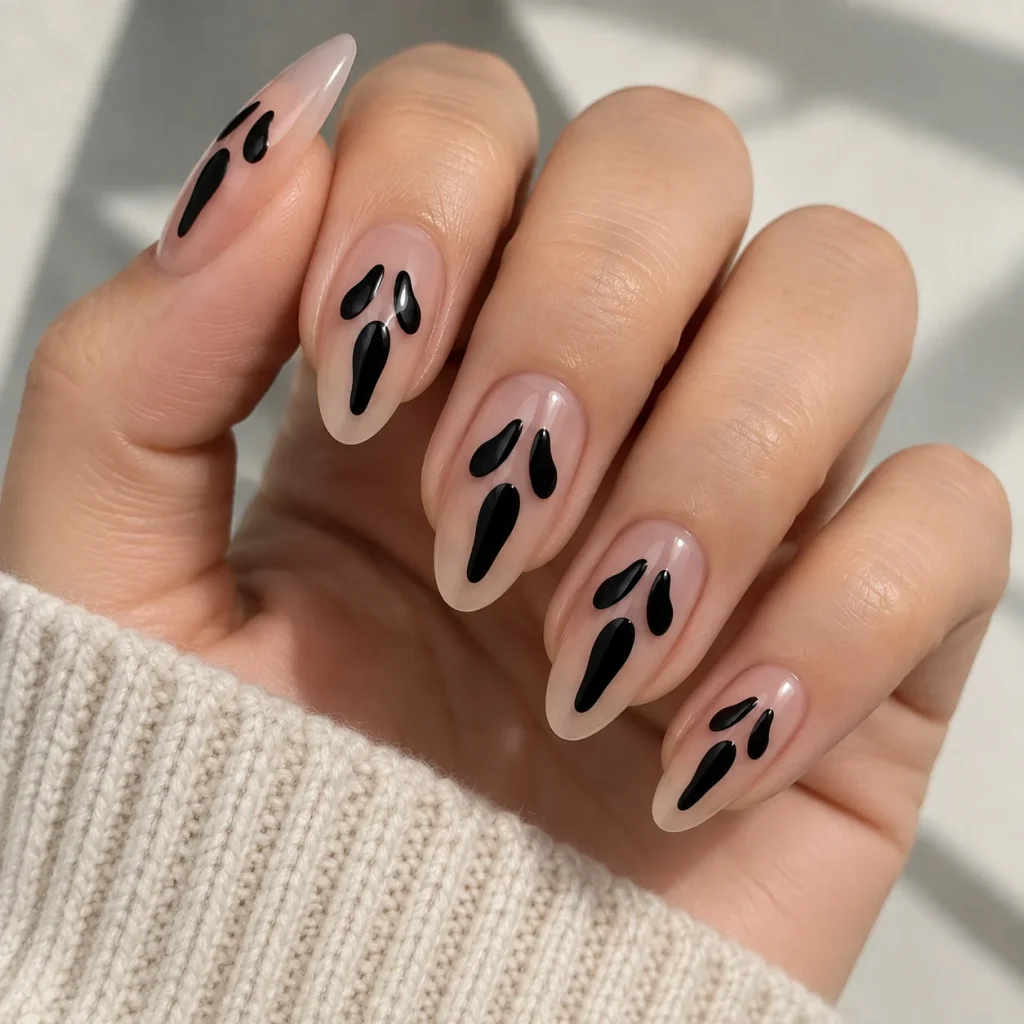
Negative space means leaving parts of the natural nail bare. Here, you paint only the eyes and mouth in black, and let the nail show through as the face.
The result is light and modern. It looks like a sketch rather than a full painting.
This style grows out beautifully. You can go longer between refills because there is no heavy base color near the cuticle.
8. Chrome Silver Ghost Nails
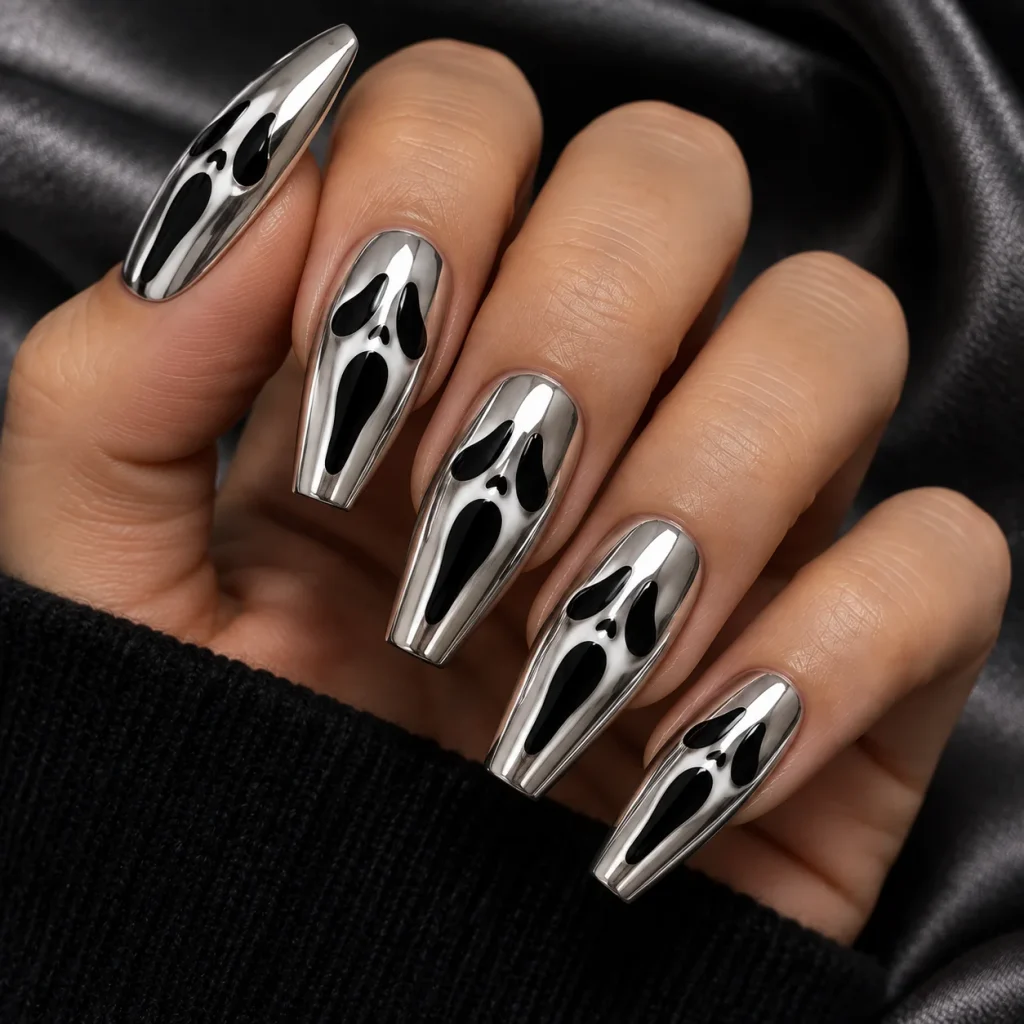
Swap the flat white for a mirror-chrome base. Rub chrome powder onto a black gel layer, then add glossy black features.
The silver finish reflects light and gives the face a futuristic edge. It looks great under both daylight and indoor lighting.
Chrome nails are a fine choice for anyone who loves shine. They photograph well, which helps if you plan to share them.
9. Red Drip Accent Ghost Face Nails
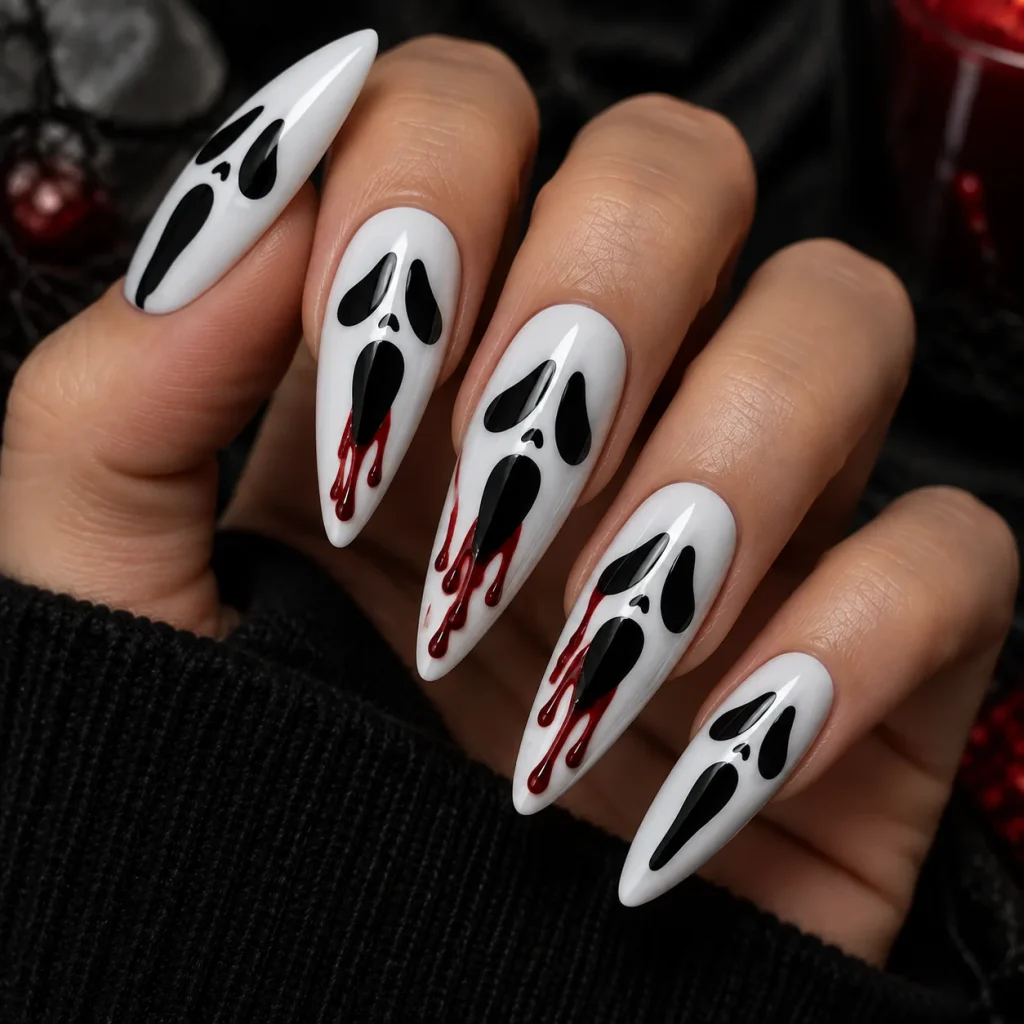
Add a thin line of deep red dripping from the mouth or tip. It creates a dramatic contrast against the white and black.
Use a very fine brush and let the drip taper at the end. Keep it to one or two nails so it stays stylish.
Choose a dark cherry or wine shade rather than bright red. It reads richer and more grown-up.
10. Grey Smoke Fade Ghost Face Nails
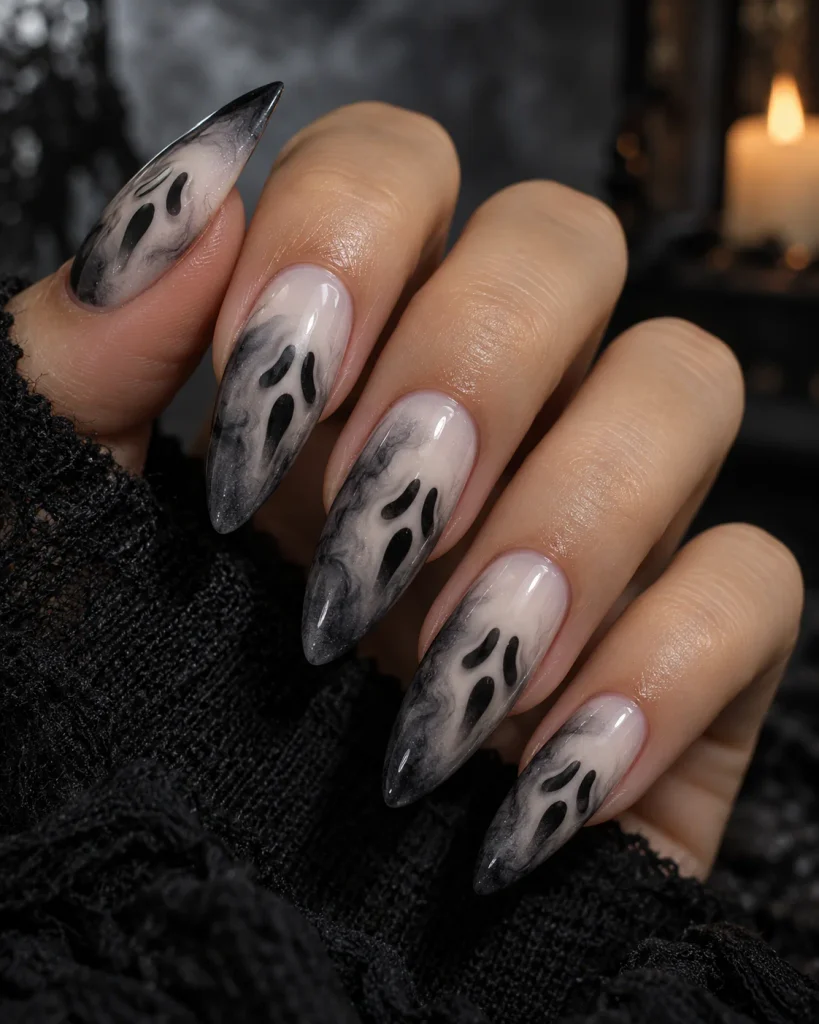
Blend a soft grey shadow around the edges of each nail. Then paint the face in black over a pale base.
The smoky background gives the design a moody, cinematic look. It also softens the harsh line between white and black.
Use a makeup sponge to dab the grey shade for a natural fade. This technique suits medium to long nails best.
11. Glow in the Dark Ghost Face Nails
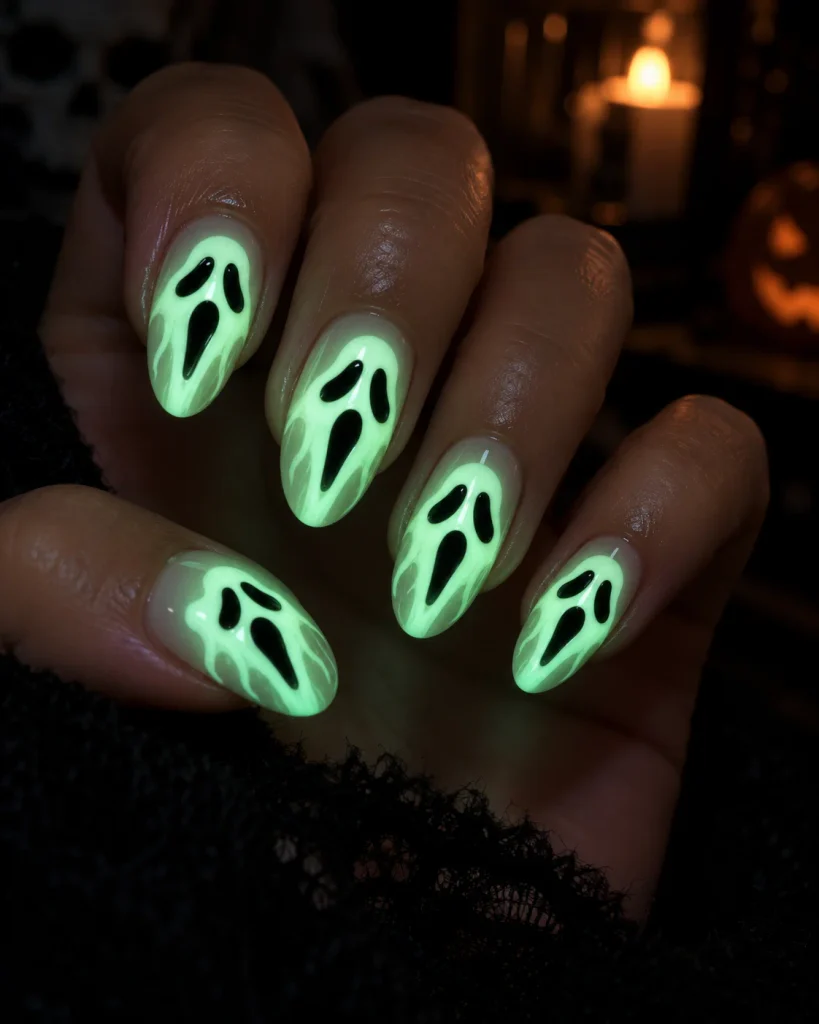
Glow-in-the-dark pigment is a fun finishing detail. Mix it into a clear top coat and paint it over the white parts of the face.
In normal light, the nails look pale and clean. In the dark, they give off a soft green glow.
This is a playful choice for people who love surprises. Keep the black details thick so the contrast stays strong.
12. French Tip Ghost Face Nails
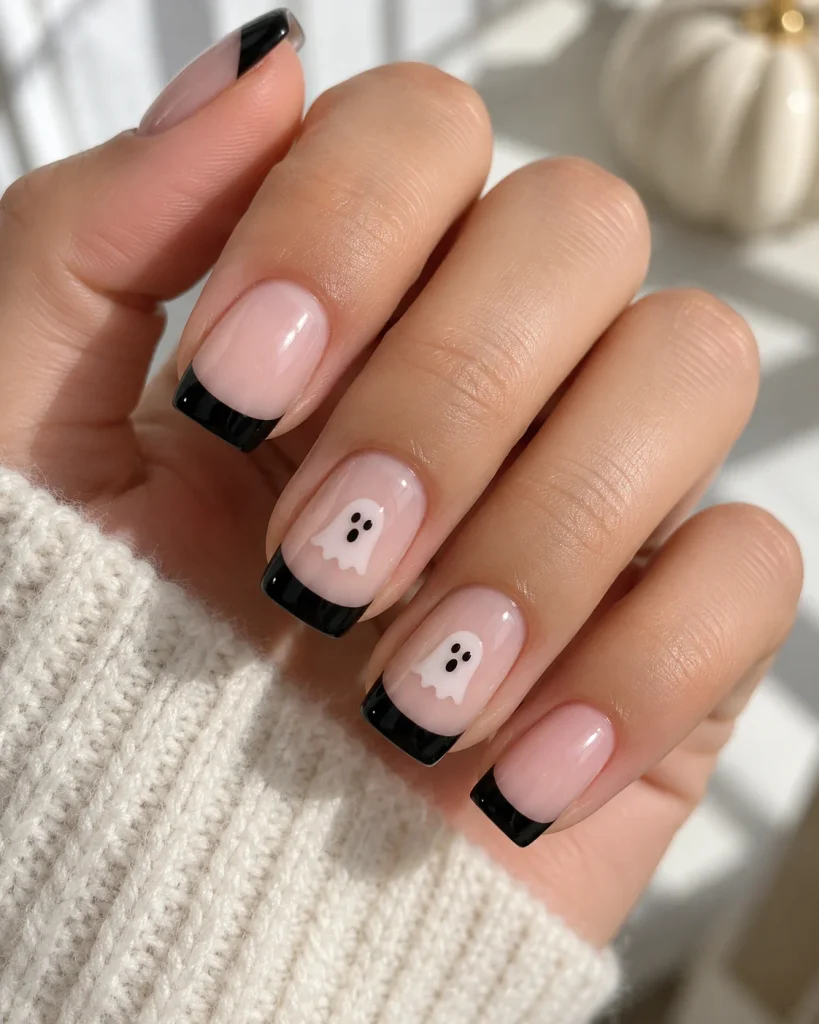
Combine a classic French manicure with a tiny face. Paint the tips in black or white, then place a mini ghost face near the center.
The clean tip line keeps the design neat and wearable. It feels like a bridge between everyday nails and statement art.
Choose a sheer pink or milky base for a soft finish. French ghost face nails look polished enough for the office.
13. Stiletto Ghost Face Nails
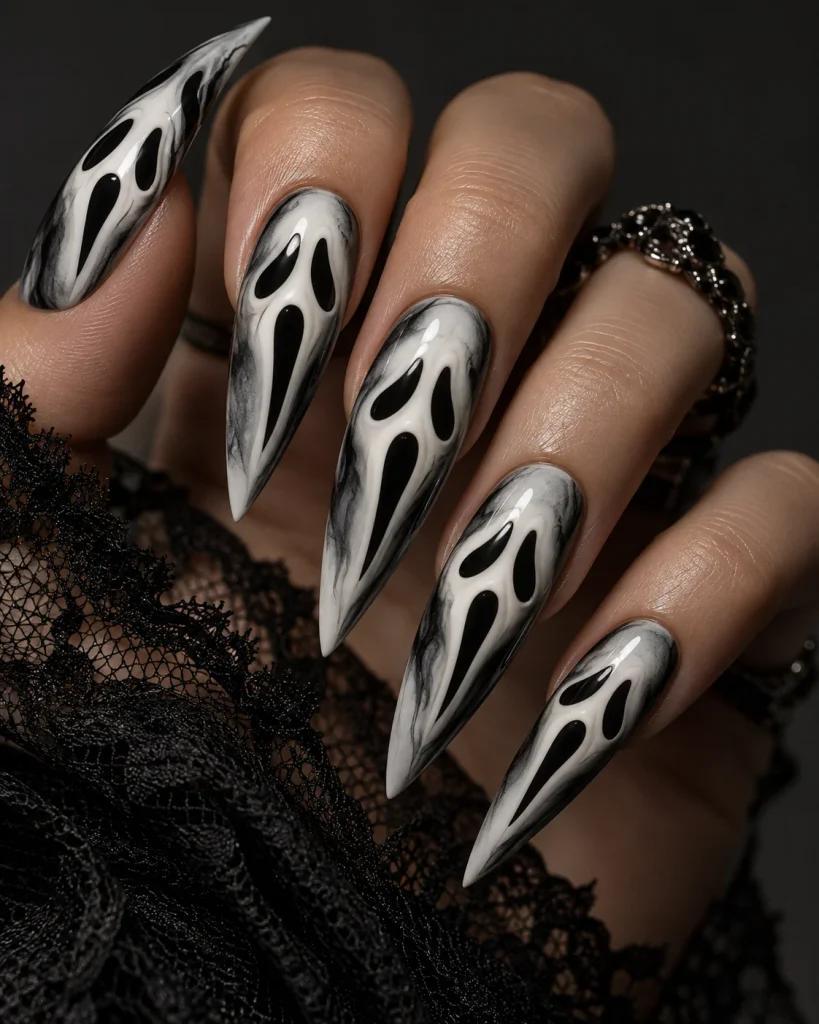
Stiletto nails have a sharp, pointed tip that suits the stretched mask shape. The long, narrow surface makes the face look tall and haunting.
Paint slim, elongated eyes and a very long mouth. Use grey shading to add depth along the sides.
This is a high-maintenance set, so choose strong builder gel or extensions. It is best for confident, bold nail lovers.
14. 3D Charm Ghost Face Nails
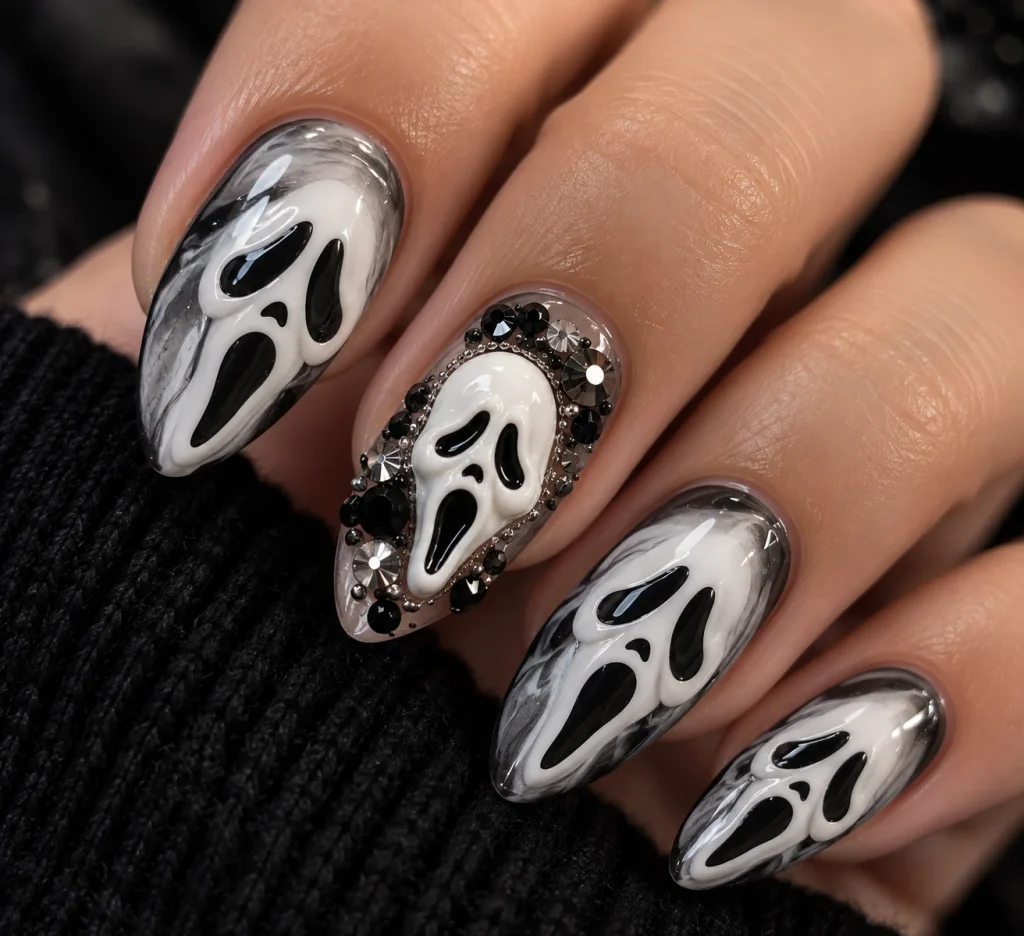
Tiny 3D charms add real texture to the design. Glue small resin ghost faces or black gems to your nails with strong gel adhesive.
Place a charm on an accent nail and keep the rest flat. Too many charms can snag on hair and clothes.
Seal the edges of each charm with a thin layer of top coat. That keeps them secure for the full two to three weeks.
15. Glitter Shadow Ghost Face Nails
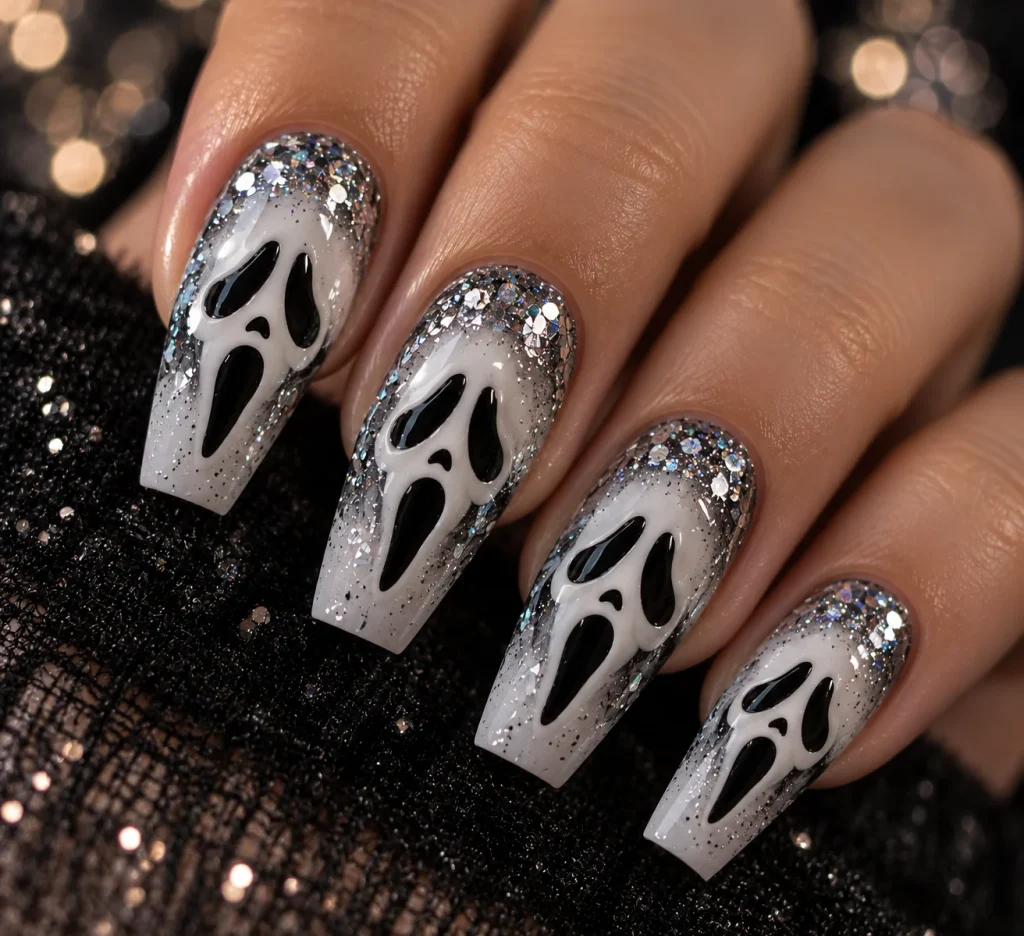
Sweep fine silver glitter across the cuticle area or the tip. Then paint the face over a white or pale grey base.
The sparkle adds glamour without hiding the main shapes. It gives the set a party-ready feel.
Use a fine glitter rather than chunky flakes. It keeps the surface smooth and easy to seal.
16. Ombre Black to White Ghost Face Nails
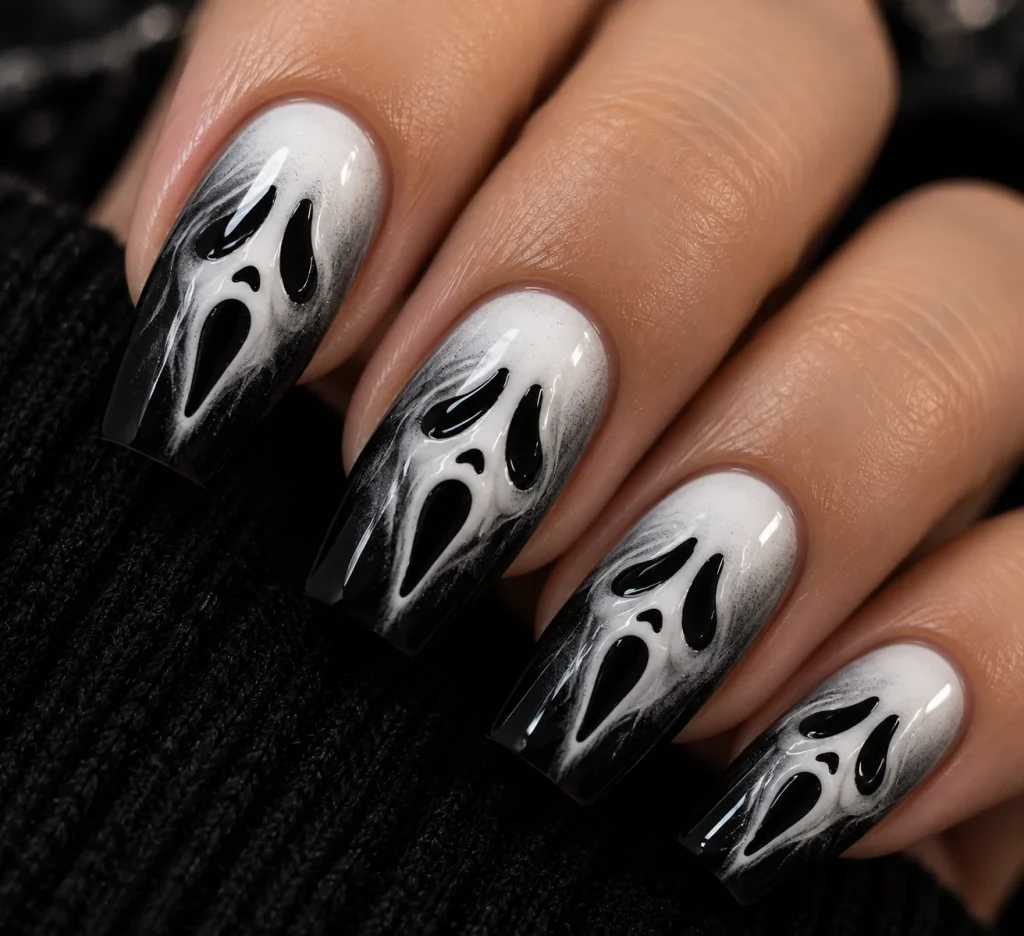
Blend black at the tips into white near the cuticle. Paint the face right over the fade, or leave it only on the white part.
The gradient makes each nail look like it is fading into shadow. It feels moody and soft.
A sponge is the easiest tool for a smooth ombre. Cure each layer fully before adding the face.
17. Cracked Mask Ghost Face Nails
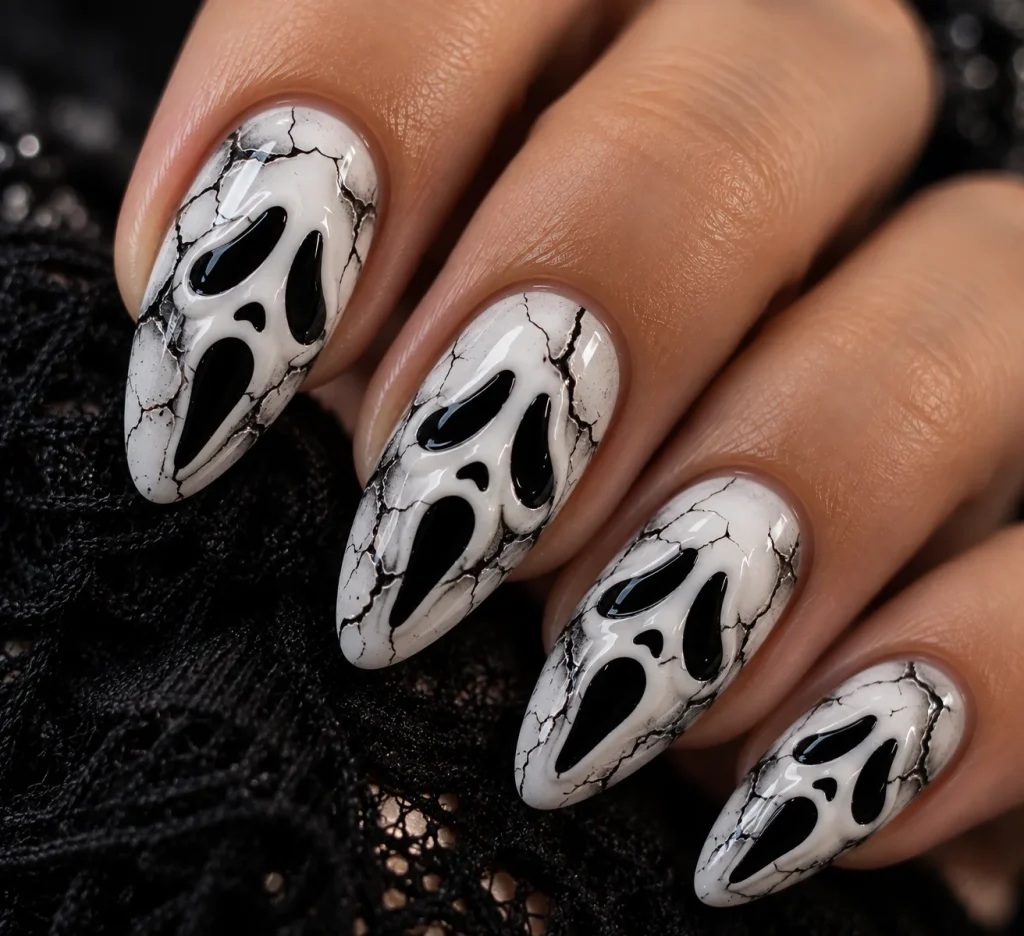
This design adds thin, jagged lines across the face, like a cracked porcelain mask. Use a very fine brush and a steady hand.
Draw the cracks in grey or black. Keep them uneven so they look natural.
The texture adds mystery and makes each nail look unique. It is one of the more artistic ghost face nails ideas on this list.
Ghost Face nails are one of the most iconic choices for Halloween because they combine a classic horror theme with modern nail art styles. For more festive manicure inspiration, don’t miss my collection of October nail designs that includes plenty of autumn and Halloween favorites.
18. Sheer Milky Base Ghost Face Nails
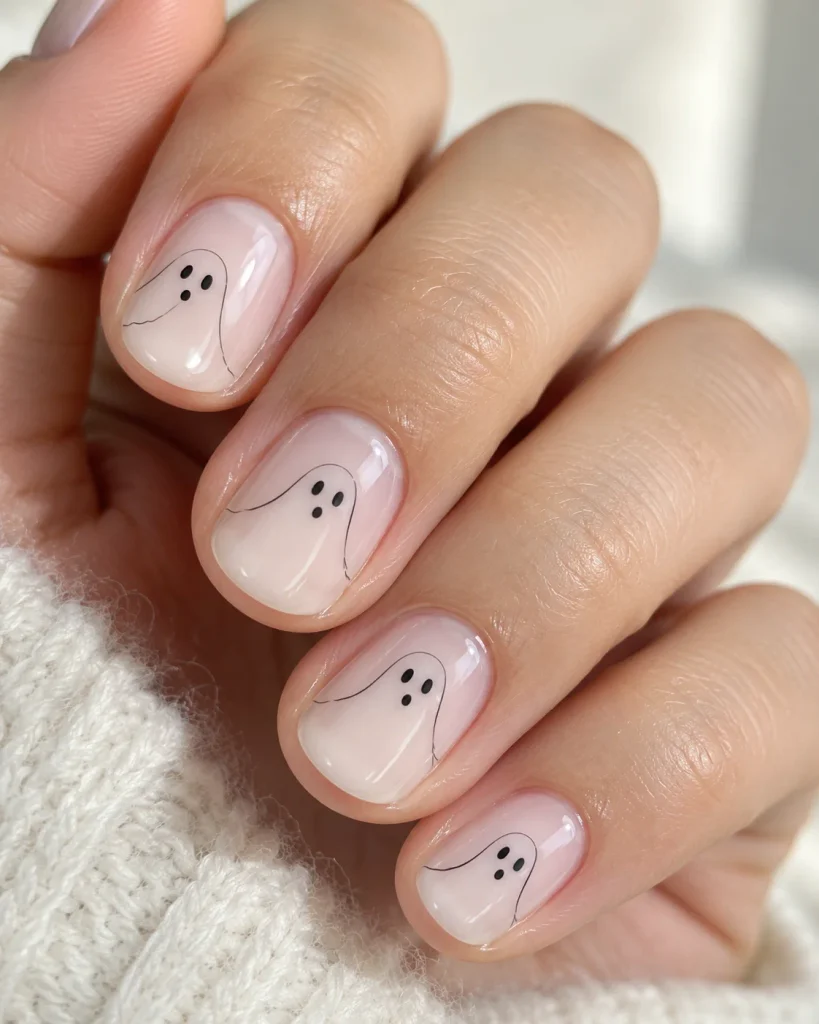
Start with a soft, milky white base instead of solid white. Your natural nail shows through slightly, which gives a clean, glassy look.
Add thin black lines for the eyes and mouth. The sheer base keeps the design delicate.
This style suits short, natural nails. It is easy to wear every day and looks fresh rather than heavy.
19. Checkerboard and Ghost Nails
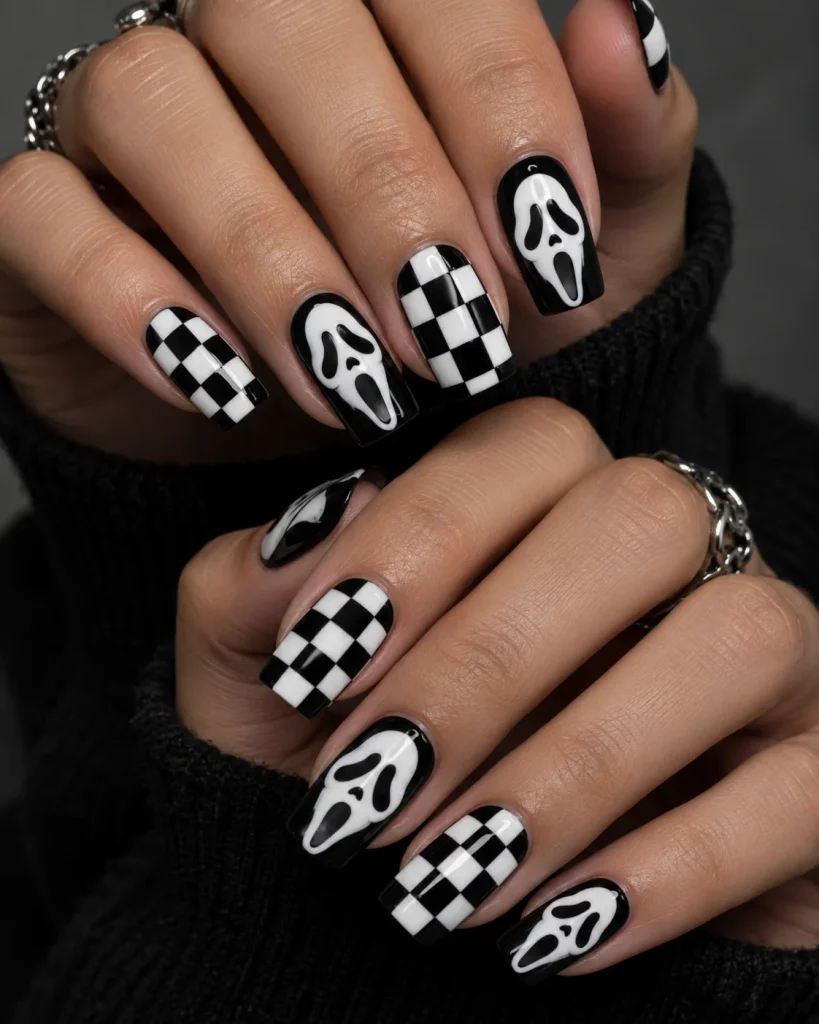
Mix checkerboard squares with ghost faces for a graphic, streetwear feel. Paint black and white checks on some nails, and faces on others.
Use nail tape to keep the squares even. Remove it while the polish is still slightly wet for the sharpest edges.
The pattern adds rhythm to a full set. It is great for people who like bold, high-contrast style.
20. Comic Outline Ghost Nails
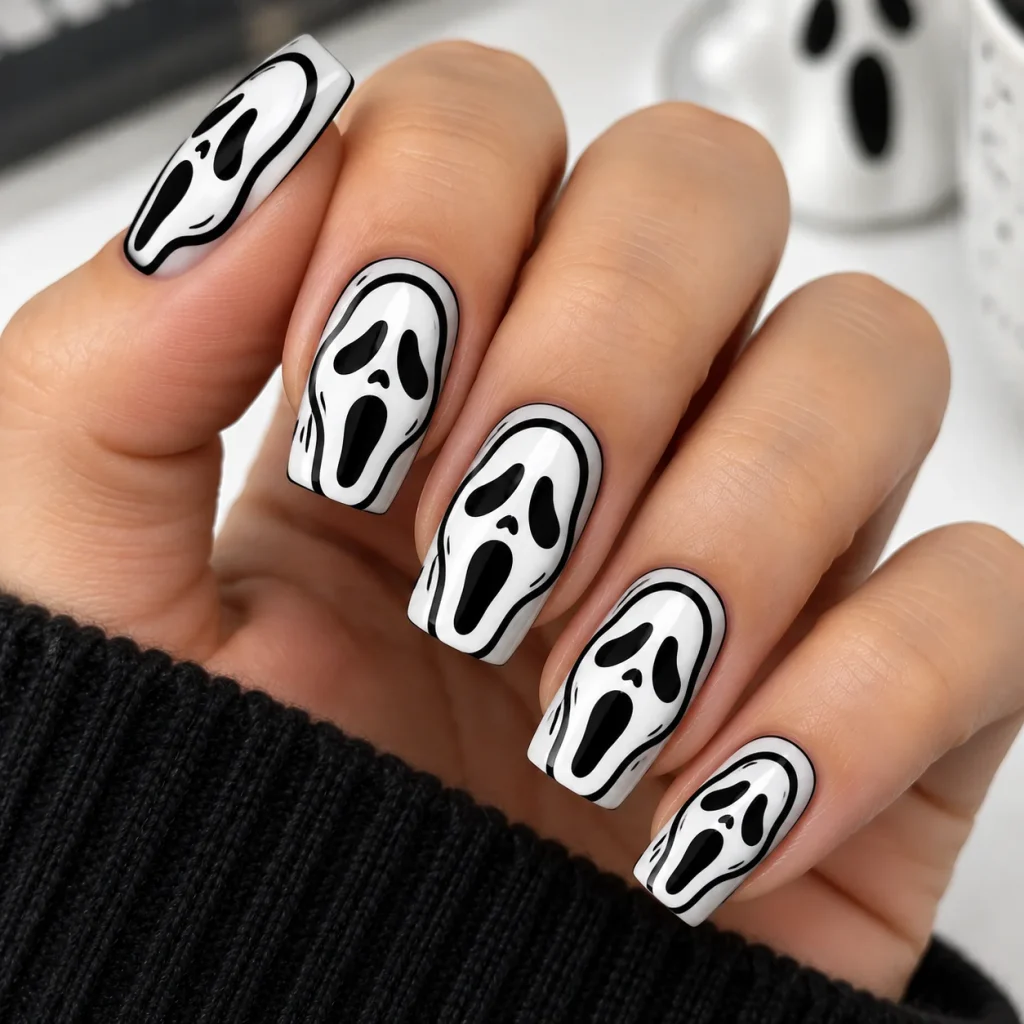
Draw a thick black outline around each face. Fill the inside with flat white or pale grey.
The heavy outline gives a hand-drawn, cartoon effect. It makes the design look bold from far away.
Use a longer liner brush to keep the outline smooth. The nails in this style look like small pieces of pop art.
21. Press-On Ghost Face Nails
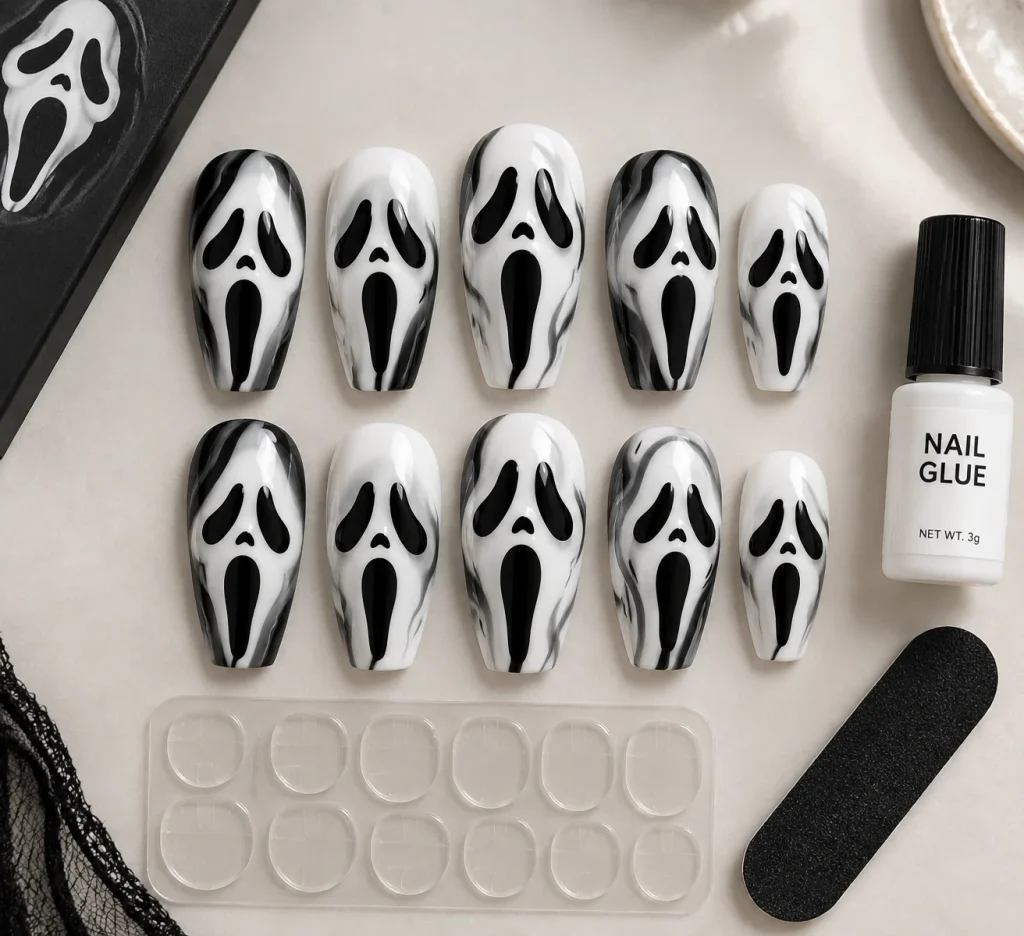
Press-ons are the easiest way to wear this trend. You pick a set, size it, glue it on, and you are done.
They also give you a shape and length that might be hard to grow. A ghost face press-on nail set can look salon-made with almost no effort.
Prep your natural nails well before applying. Push back cuticles and wipe with alcohol so the adhesive holds.
22. Short Oval Nails
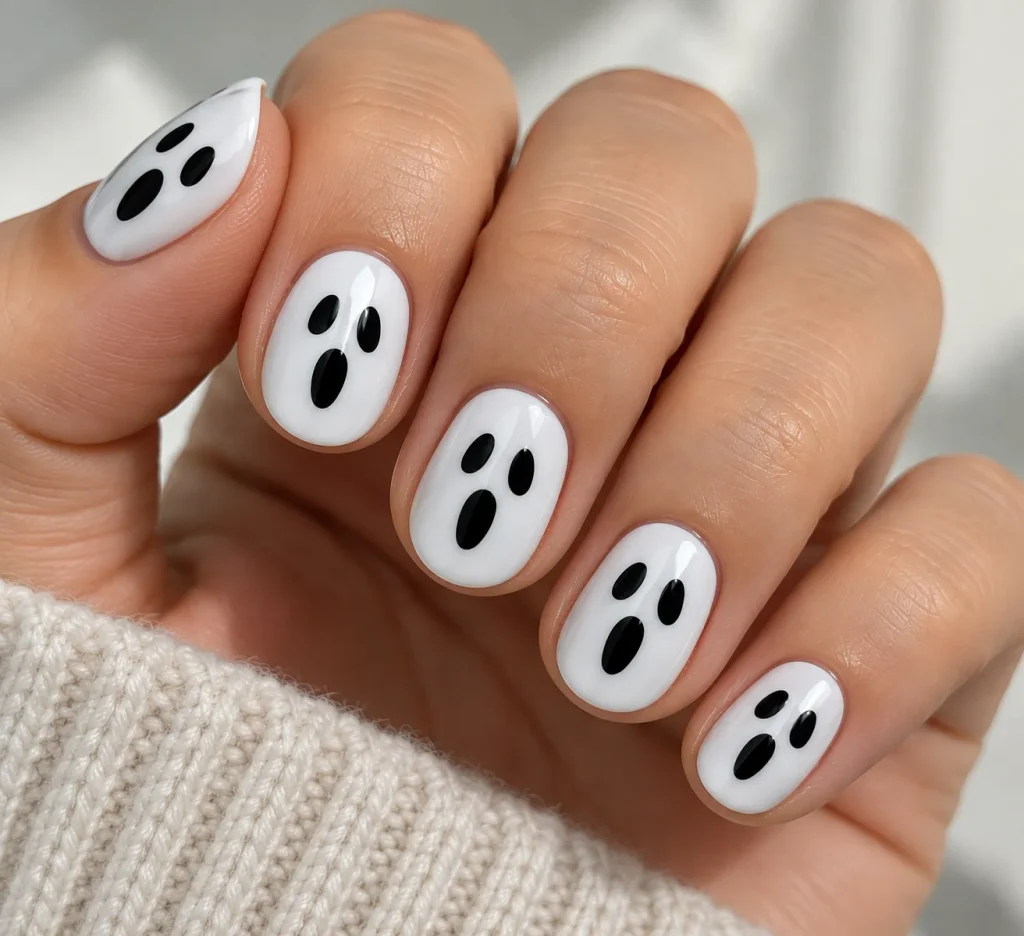
Oval nails have soft, rounded edges that feel clean and gentle. A small ghost face fits the curved shape nicely.
Keep the design centered and simple. Two dot eyes and a short mouth are enough.
This is one of the most comfortable nails styles for daily life. It does not catch on things and it looks neat.
23. Ballerina Ghost Face Nails
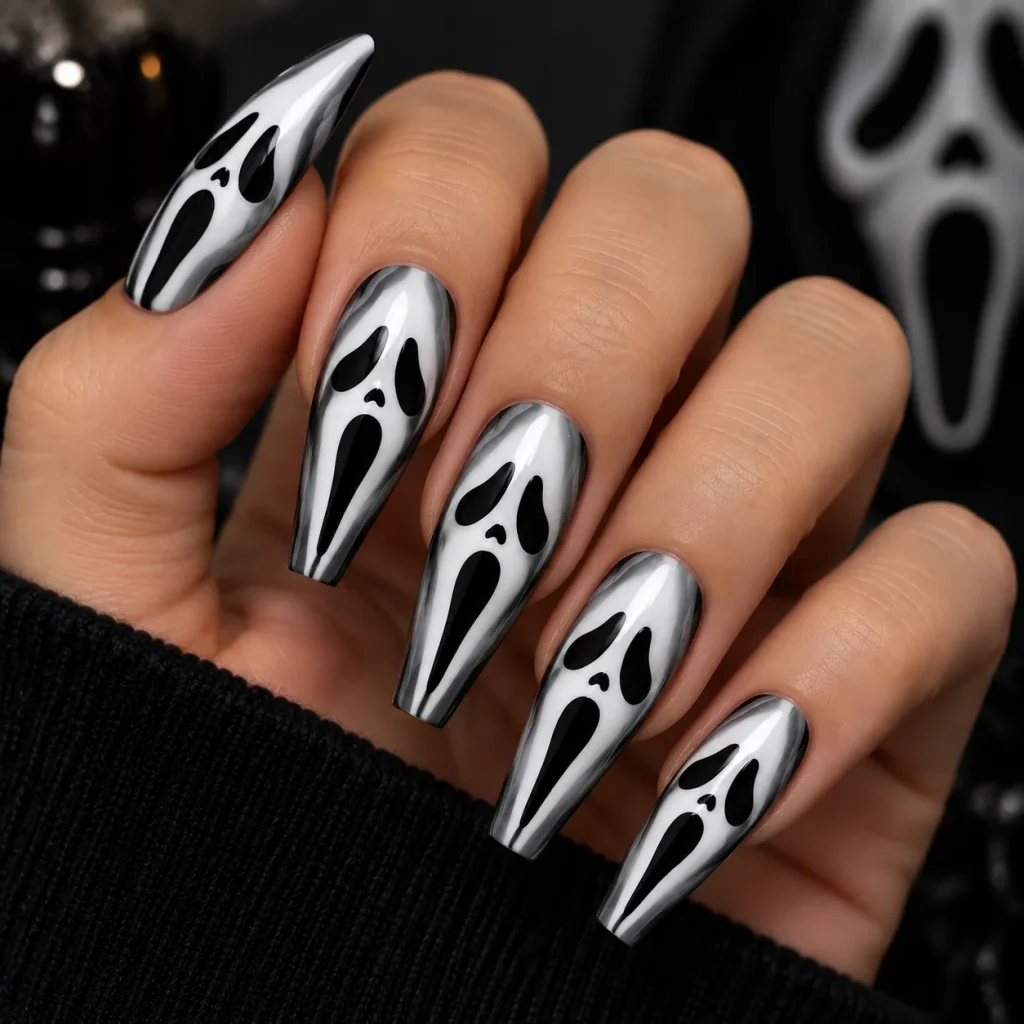
Ballerina nails share the coffin shape but taper a bit more toward the tip. They offer a long, elegant canvas.
Paint a slim face down the center and add a soft grey edge on each side. This adds a shadow effect.
Pair this with a high-shine top coat. The glossy finish highlights the smooth taper.
24. Silver Chain Accent Ghost Face
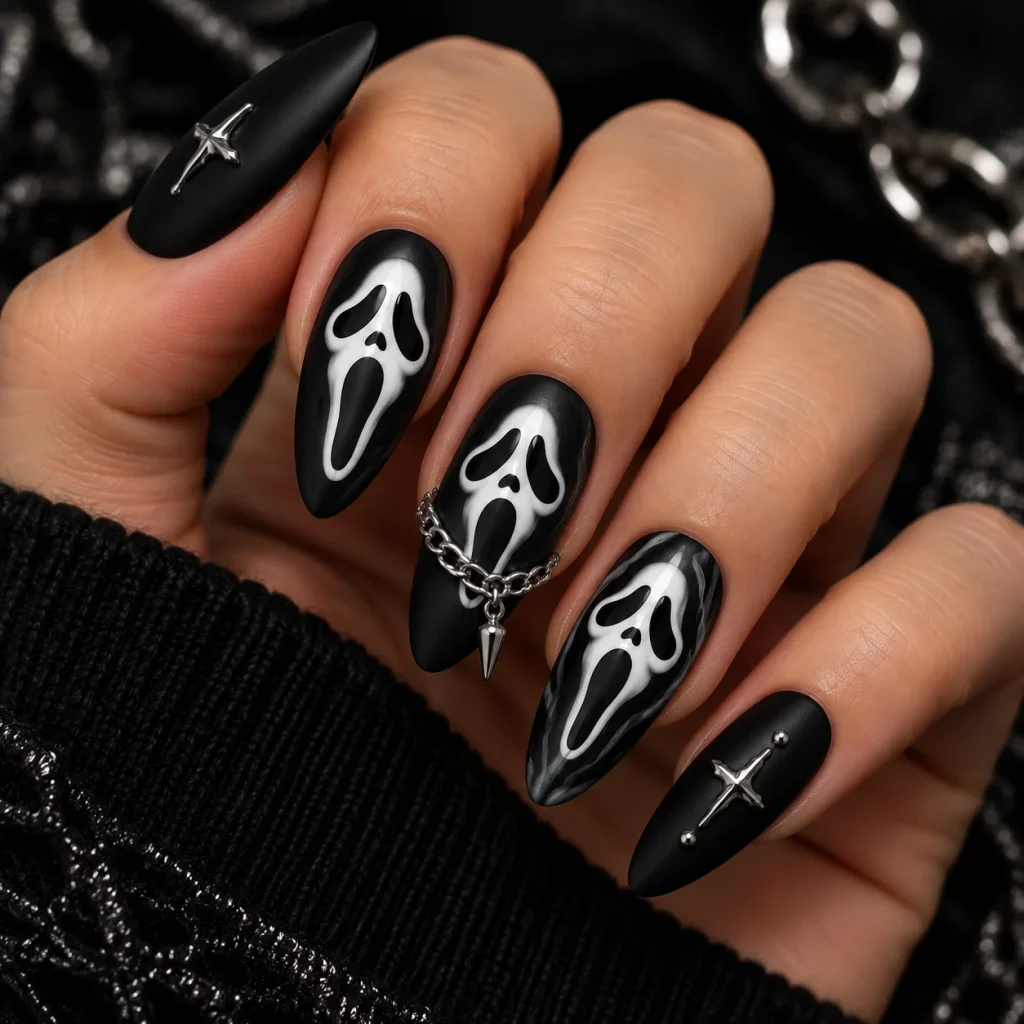
Add a thin silver chain across one nail for a rock-inspired touch. Place it just under the face, or across the base of the nail.
The metal detail brings an edgy, punk vibe. It works best with matte black nails.
Glue the chain in place with strong gel adhesive. Trim the ends carefully so nothing sticks out.
25. Mismatched Ghost Face Manicures
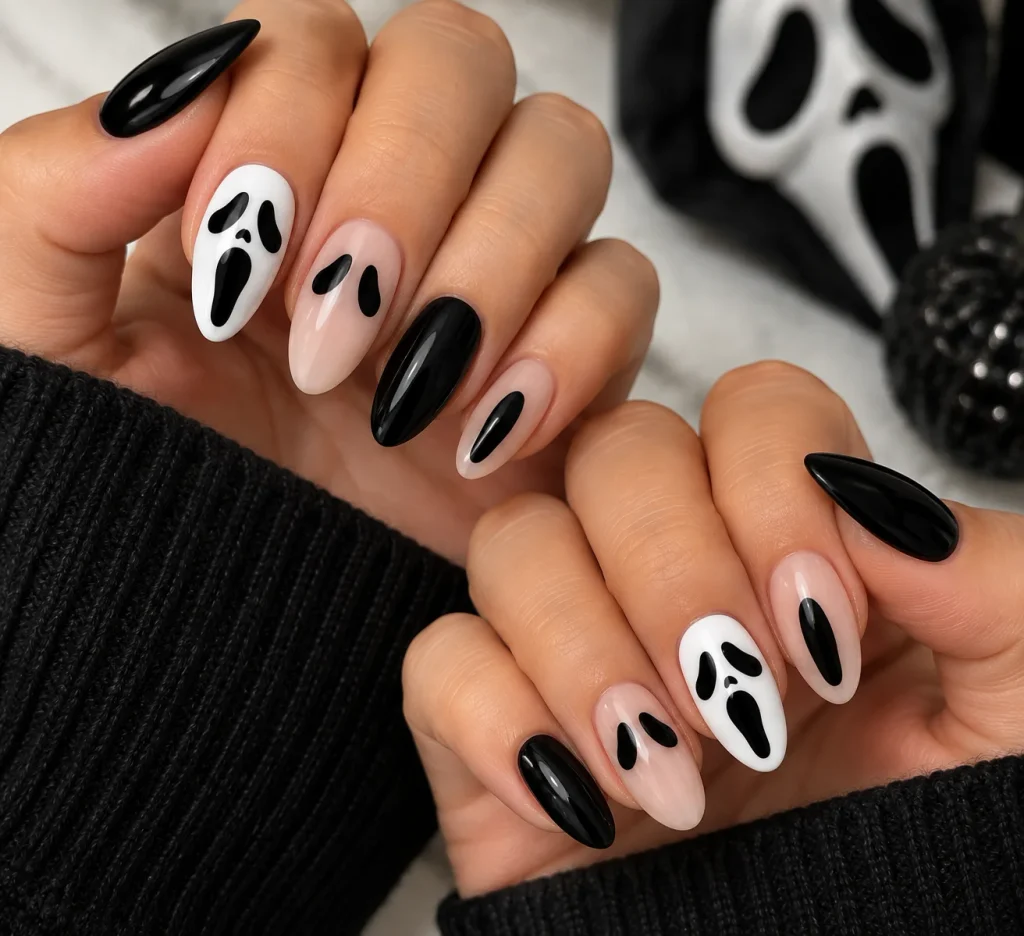
Mix and match a few designs across your hands. One nail has a full face, another only eyes, and another just a black mouth.
Balance the set with two or three solid black nails. This keeps the look intentional.
Mismatched ghost face nails feel playful and modern. They also let you try several ideas in a single manicure.
26. Holographic Nails
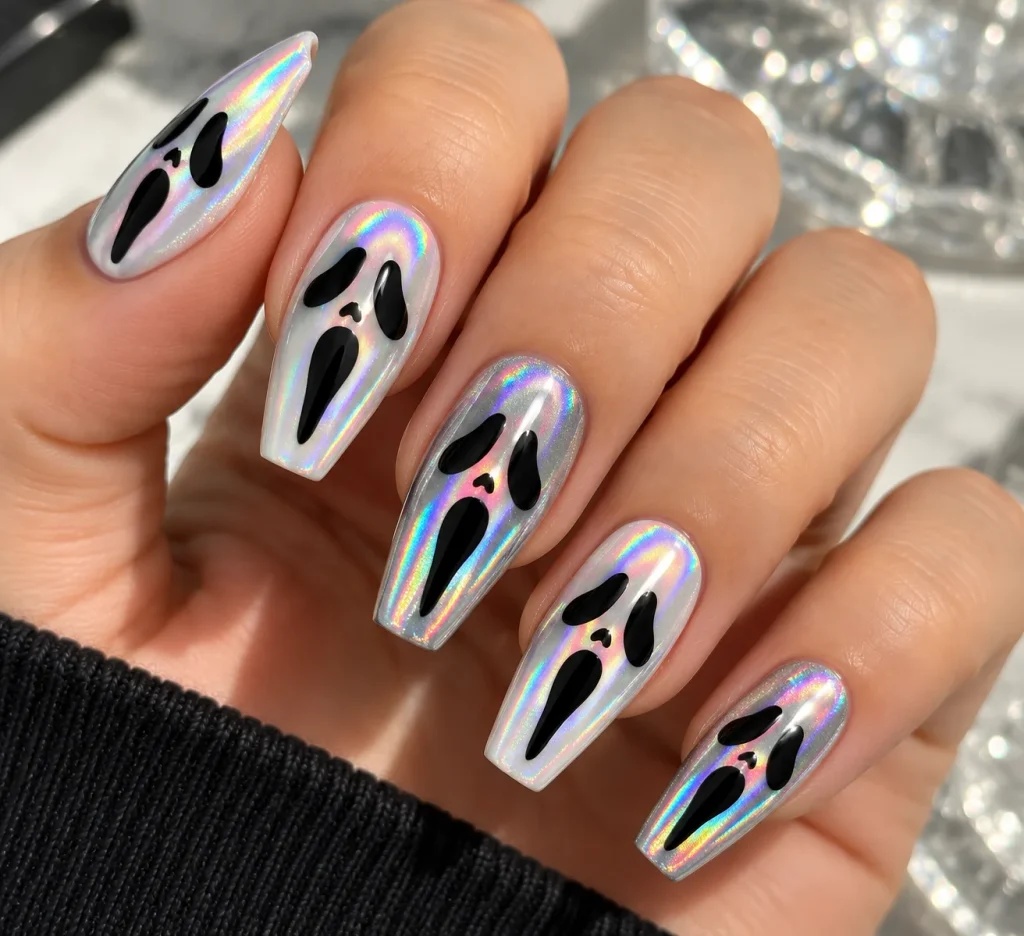
A holographic top coat adds a rainbow shimmer over white or silver. The face stays black and sharp against the shine.
Apply the holographic layer before you paint the face. That keeps your lines smooth and crisp.
This style catches attention in sunlight. It suits anyone who wants a bold, futuristic manicure.
27. Velvet Cat-Eye Ghost Nails
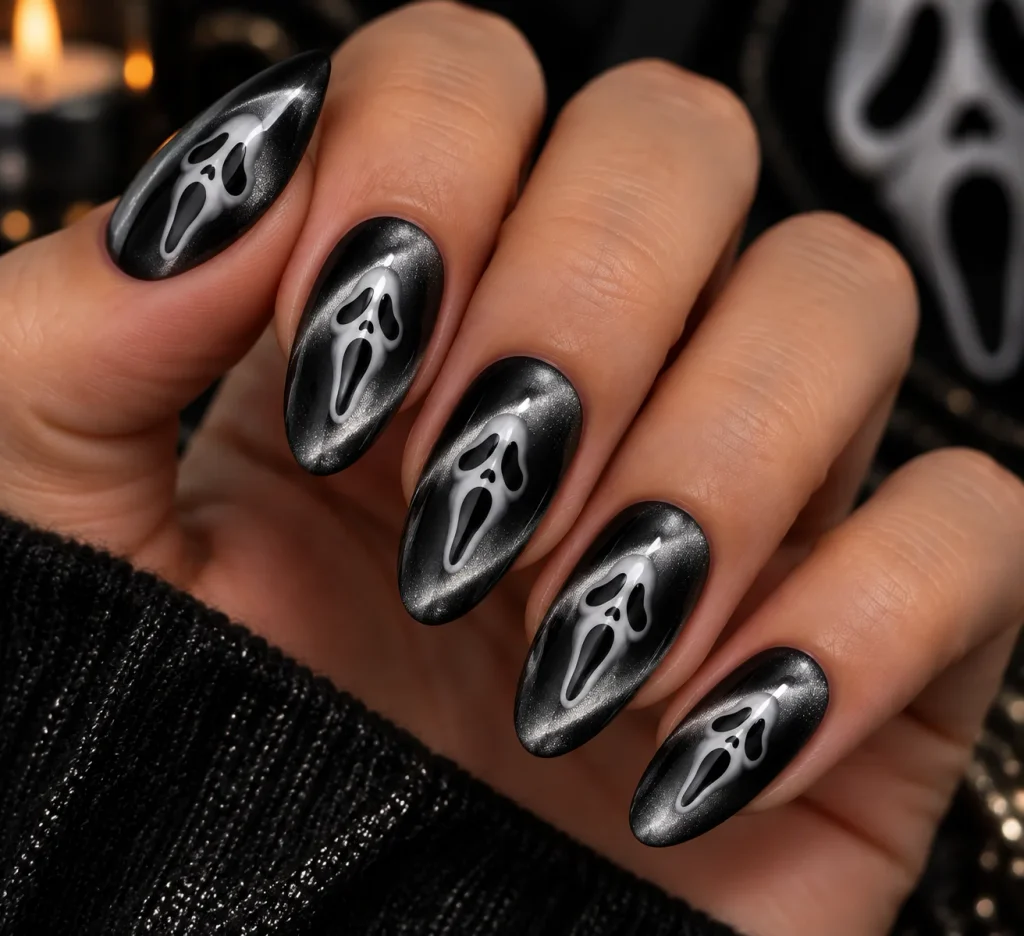
Use a magnetic cat-eye polish in dark grey or black. The magnet creates a shimmering line across the nail.
Paint a small white face at the center. The velvet base gives it a luxurious, moody depth.
This one takes a little practice with the magnet. The finished look is rich and unusual.
28. Tonal Grey Ghost Nails
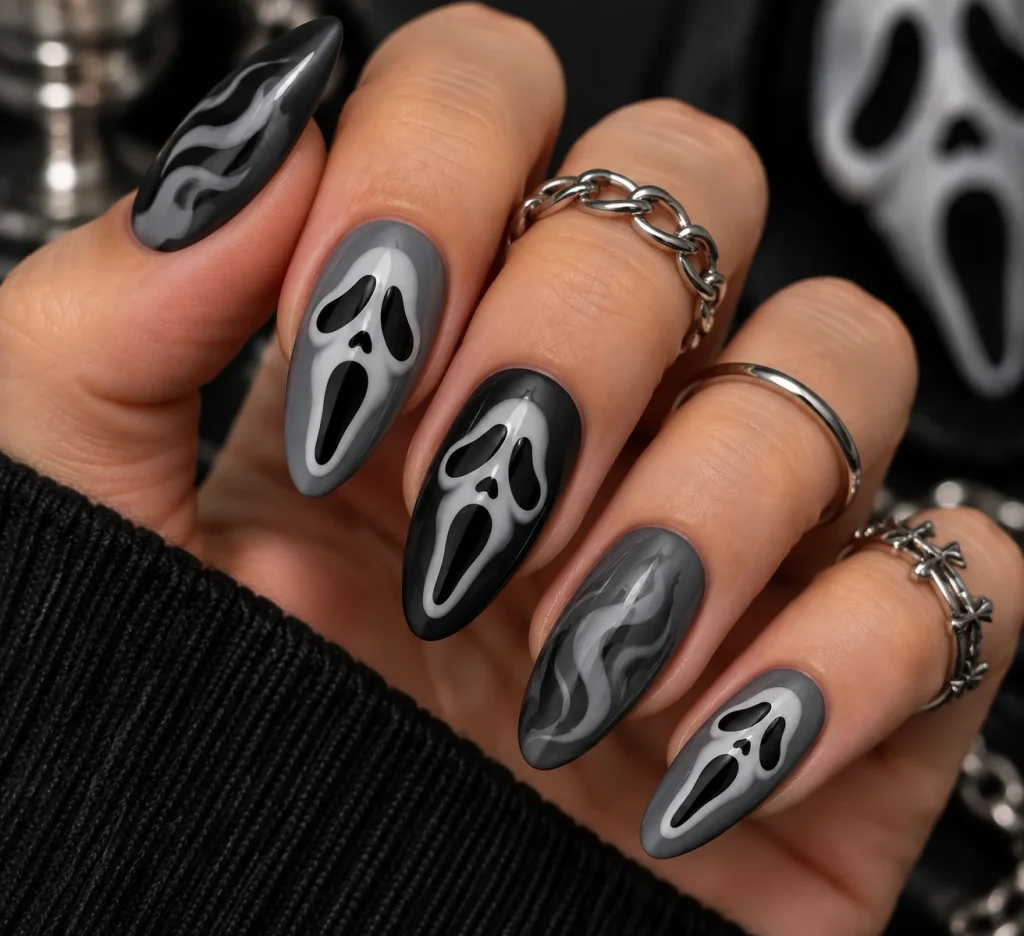
Skip the stark white and use several shades of grey. Paint a pale grey face on a charcoal base, and add black details.
The soft color range feels calm and refined. It is a more subtle take on the trend.
Tonal ghost face nails work well for people who like neutral style. They pair easily with black, denim, and silver jewelry.
29. Line Art Ghost Face Manicure
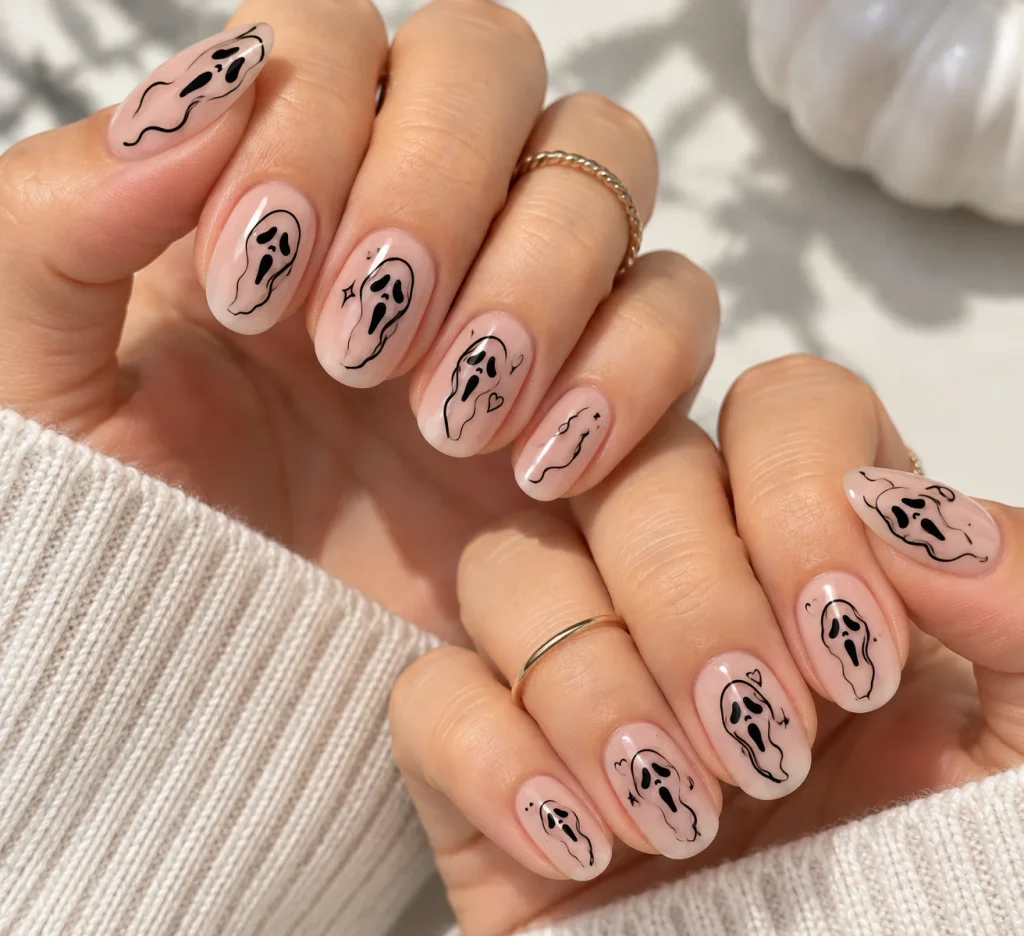
Line art uses thin black outlines with no fill. Draw a small, simple face using only a few strokes.
The design feels light and airy. It looks like a doodle on the nail.
Use a thin liner brush and let the base color show through. This is a great option for beginners who fear big shapes.
30. Hooded Silhouette Ghost Face Nails
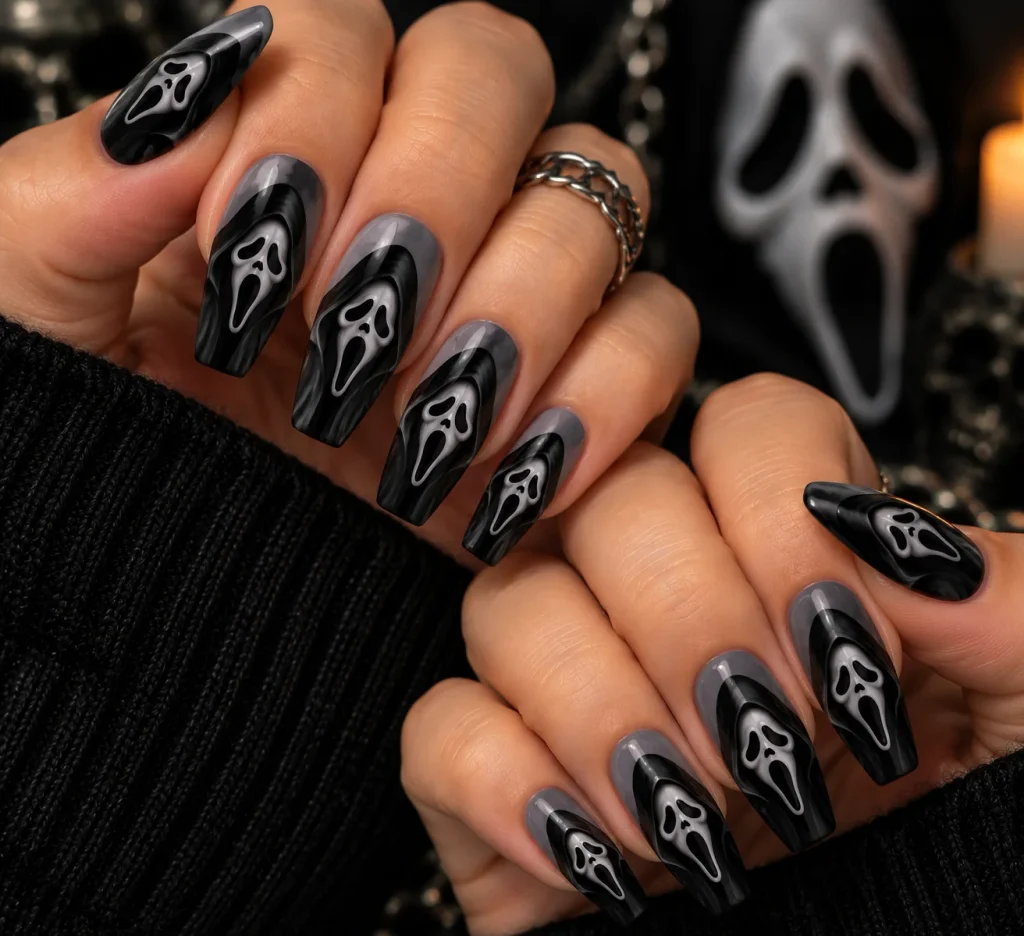
Paint the mask with a black hood shape around it. The pale face sits in the middle of a dark frame.
This design tells a small story on each nail. It also gives the face strong contrast and depth.
It takes patience, so work one nail at a time. The finished set looks dramatic and complete.
How to Paint Ghost Face Nails Step by Step
You can create most of these designs at home with a few simple steps.
Step 1: Prep your nails. Push back the cuticles, buff the surface lightly, and wipe with alcohol. Clean nails hold polish longer.
Step 2: Apply a base coat. A thin layer protects your natural nail and helps color stick. Cure it under your lamp.
Step 3: Paint the white base. Use two thin coats of white rather than one thick coat. Cure after each layer.
Step 4: Draw the eyes. Use a dotting tool or thin brush to make two teardrop shapes. Keep them the same size and angle.
Step 5: Add the mouth. Paint a long, curved oval below the eyes. Let it stretch toward the tip for the classic look.
Step 6: Clean up the edges. Use a small brush dipped in alcohol to fix any mistakes. Do this before curing.
Step 7: Seal the design. Apply a top coat, either glossy or matte. Cap the free edge to prevent chipping.
Go slowly and cure in thin layers. Rushing is the number one reason lines look messy.
What You Need Before You Start
A clean ghost face design depends on the right tools. You can build the look with only a few items.
Start with a good black gel nail polish. It should be highly pigmented so one thin coat covers well. A weak black looks grey and makes the eyes and mouth look faded.
Next, pick a strong white gel nail polish. White is the hardest shade to apply evenly, so choose one with an opaque, creamy formula.
For the face details, you need a nail art liner brush set. A long, thin brush gives you smooth curves for the mouth and steady lines for the eyes.
A dotting tool set helps you make round eyes and even dots in seconds. It also helps with tiny highlights and texture.
Gel polish needs curing, so a LED nail lamp is essential for home use. It sets each layer quickly and prevents smudging.
For a modern finish, a matte top coat turns shiny black into a soft, velvety shade. It makes the design look richer and more editorial.
If you would rather skip the painting, a ghost face press-on nail set gives you the look with no drawing skills at all. Press-ons are also great for testing a design before you commit to a full salon set.
Tips for Cleaner Ghost Face Nails
Small habits make a big difference in the final result.
Work with thin layers of polish. Thick layers lead to bubbles, wrinkles, and uneven curing.
Steady your hand by resting your wrist on a table. It helps you draw straighter lines.
Practice the face on a nail tip or a piece of paper first. Once your hand remembers the shape, painting it on a real nail gets much easier.
Keep the eyes and mouth in proportion to the nail size. A small nail needs a small face.
Clean your brush often. Old polish builds up and makes lines look thick and wobbly.
How Long Do Ghost Face Nails Last?
Gel nails usually last two to three weeks with proper prep and curing. Regular polish versions last about five to seven days.
Press-on nails can last one to two weeks, depending on the glue and how careful you are. Using a strong adhesive and prepping your nails well helps a lot.
Wear gloves when cleaning to protect your nail art. Avoid using your nails as tools, since that is the most common cause of chips and lifting.
How to Remove Ghost Face Nails Safely
Never peel or pick off gel polish. It pulls away layers of your natural nail and leaves them thin and weak.
File off the top coat gently, then soak cotton pads in acetone. Wrap each nail in foil and wait about 10 to 15 minutes.
Slide the softened polish off with a wooden stick. Finish with cuticle oil and a hydrating hand cream.
How to Care for Your Nails Between Sets
Healthy nails make better nail art. Give your nails a short break between sets if they feel thin or bendy.
Apply cuticle oil every day. It keeps the skin soft and helps nails stay flexible.
Use a gentle strengthening treatment and keep nails at a comfortable length. Strong, smooth nails hold polish much better than damaged ones.
Frequently Asked Questions
What are ghost face nails?
These nails are nail designs that copy the ghost mask, with a pale face, two teardrop eyes, and a long open mouth. They are usually done in white and black, with optional grey or metallic details.
Are these nails hard to do at home?
They are easy to do with the right tools. A thin liner brush and a dotting tool make the shapes simple. Beginners can start with one accent nail or a press-on set.
What nail shape is best for these nails?
Almond and coffin shapes give you the most space for a long face. Short square and oval shapes work well for smaller, simpler designs.
What colors work for these nails?
White and black are the classic choices. Grey, silver chrome, and deep red accents add depth and variety without losing the look.
Can I wear a ghost face on short nails?
Yes. Use a small face with tiny eyes and a short mouth. Negative space and line art designs are especially good on short nails.
How do I make the black lines look sharp?
Use a highly pigmented black gel polish and a fine liner brush. Work in thin layers, and clean up the edges before curing.
Do these nails go with everyday outfits?
They do. Black, white, and grey pair with almost any color. Minimalist and tonal versions look especially easy with casual and work outfits.
Final Thoughts
Ghost face nails prove that a strong graphic idea can work in many ways. You can keep it minimal with one accent nail, or go all out with chrome, charms, and texture.
Start with the design that fits your comfort level. Try the classic black and white set first, then experiment with finishes like matte, chrome, or holographic.
With a few good tools and some patience, you can create salon-quality ghost face nails at home. Save your favorite ideas from this list, and bring them along to your next nail appointment.